Chevrolet Cruze Repair Manual: Body Side Trim Panel Replacement - Left Side
Preliminary Procedure
- Remove the rear side door sill trim plate. Refer to Rear Side Door Sill Trim Plate Replacement.
- Remove the rear seat back. Refer to Rear Seat Replacement.
- Remove the quarter window garnish molding. Refer to Quarter Window Garnish Molding Replacement.
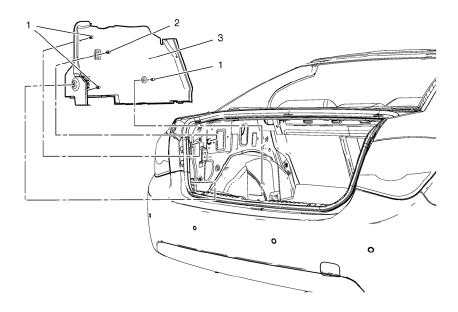
- Rear Window Panel Trim Retainer Clip
- Body Side Trim Panel Retainer (Qty: 3)
- Body Side Trim Panel Assembly
Body Side Trim Panel Replacement - Right Side

- Body Side Trim Panel Retainer (Qty: 4)
- Body Side Trim Panel Assembly
Radio Front Side Door Speaker Grille Bezel Replacement
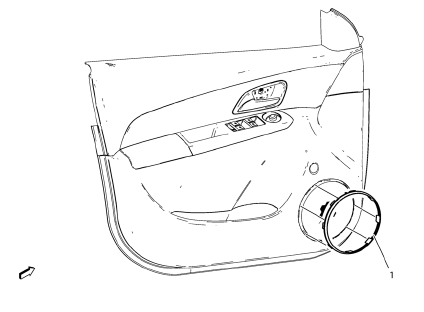
- Radio Front Side Door Speaker Grille Bezel Assembly
Radio Rear Side Door Speaker Grille Bezel Replacement
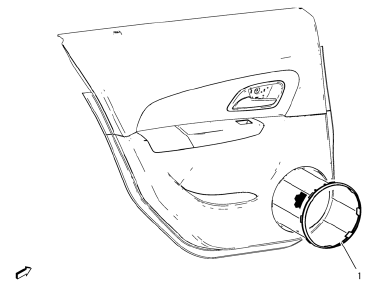
- Radio Rear Side Door Speaker Grille Bezel Assembly
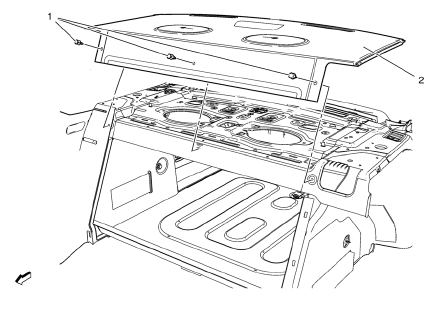
Rear Window Panel Trim Replacement
Preliminary Procedure
- Remove the rear seat back.
- Remove the high mount stop lamp. Refer to High Mount Stop Lamp Replacement.
- Rear Window Panel Trim Clip (Qty: 6)
- Rear Window Panel Trim Assembly
 Center Pillar Upper Garnish Molding Replacement
Preliminary Procedure
Remove the center pillar lower garnish molding. Refer to Center Pillar
Lower Ga rnish Molding Replacement
Remove the seat belt from the front seat. Refer ...
 Rear Side Door Trim Replacement
Rear Side Door Inside Handle Bolt Finish Cap
Procedure
Pull handle back to remove cap. Use suitable tool to unsnap.
Rear Side Door Inside Handle Screw
Caution: Refer to Fastener Caut ...
Other materials:
Windows
WARNING
Never leave a child, a helpless adult, or a pet alone in a vehicle, especially
with the windows closed in warm or hot weather.
They can be overcome by the extreme heat and suffer permanent injuries or even
death from heat stroke.
The vehicle aerodynamics are designed to improve fuel ...
Power Steering Gear Inlet Pipe/Hose Replacement
Removal Procedure
Remove front bumper fascia. Refer to Front Bumper Fascia Replacement
Remove as much power steering fluid from the remote power steering fluid
reservoir as possible.
Place drain pans under the vehicle as needed.
Remove power steering gear inlet hose bolt (1).
...
Overview
1.
• Turns the system on or off and adjusts the volume.
2. Buttons 1 to 6
• Radio: Saves and selects favorite stations.
3.
• Radio: Seeks the previous station.
• CD: Selects the previous track or rewinds within a track.
4.
• CD: Pauses playback, and stops playback.
5.
• Radio: ...
