Chevrolet Cruze Repair Manual: Installation Procedure
- Create 8 24 mm (5/16 x 15/16 in) slots for MIG-brazing along the edges of the underbody rear side rail reinforcement as noted from the original panel.
- Clean and prepare the attaching surfaces for brazing.
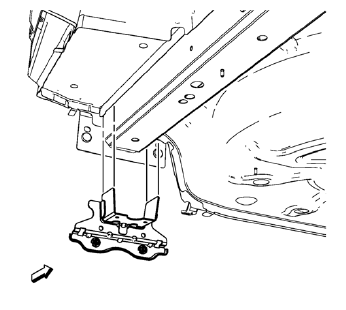
- Position the underbody rear side rail reinforcement on the vehicle.
- Verify the fit of the underbody rear side rail reinforcement.
- Clamp the underbody rear side rail reinforcement into position.
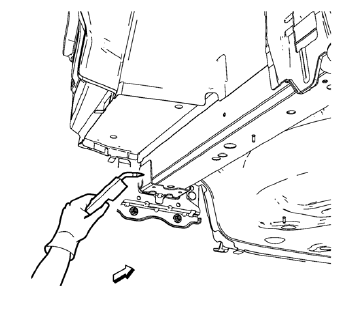
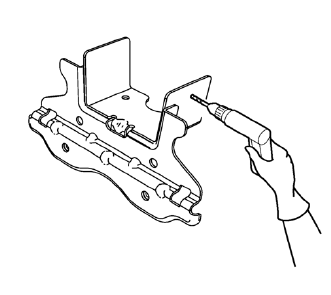
- Braze accordingly.
- Apply the sealers and anti-corrosion materials to the repair area, as necessary. Refer to Anti-Corrosion Treatment and Repair.
- Paint the repaired area. Refer to Basecoat/Clearcoat Paint Systems.
- Install all related panels and components.
- Connect the negative battery cable. Refer to Battery Negative Cable Disconnection and Connection.
- Enable the SIR system. Refer to SIR Disabling and Enabling.
 Removal Procedure
Warning: Refer to Approved Equipment for Collision Repair Warning in the
Preface section.
Warning: Refer to Glass and Sheet Metal Handling Warning in the Preface section.
Disable the SIR Syst ...
 Rear Floor Panel Filler Replacement (MAG-Welding)
Note: According to different corrosion warranties, only the
regional mandatory joining methods are allowed. ...
Other materials:
Fuel
Use of the recommended fuel is an important part of the proper maintenance of
this vehicle. To help keep the engine clean and maintain optimum vehicle performance,
we recommend the use of gasoline advertised as TOP TIER Detergent Gasoline.
Look for the TOP TIER label on the fuel pump to ensure ...
Vehicle Certification, Tire Placard, Anti-Theft, and Service Parts ID Label
Vehicle Certification Label
The vehicle certification label is located on the driver door and displays
the following assessments:
Gross Vehicle Weight Rating (GVWR)
Gross Axle Weight Rating (GAWR), front and rear
The gross vehicle weight (GVW) is the weight of the vehicle and everything it ...
Steering
Electric Power Steering
The vehicle has electric power steering. It does not have power steering fluid.
Regular maintenance is not required.
If power steering assist is lost due to a system malfunction, the vehicle can
be steered, but may require increased effort. See your dealer if there is a ...
