Chevrolet Cruze Repair Manual: Installation Procedure
Note: If the location of the original plug weld holes can not be determined, space the plug weld holes every 40 mm (1½ in).
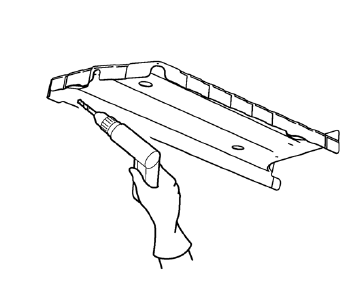
- Drill 8 mm (5/16 in) for plug welding along the edges of the rear floor panel filler as noted from the original panel.
- Clean and prepare the attaching surfaces for welding.
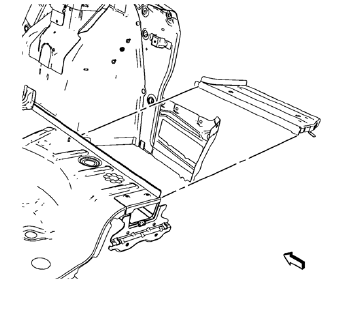
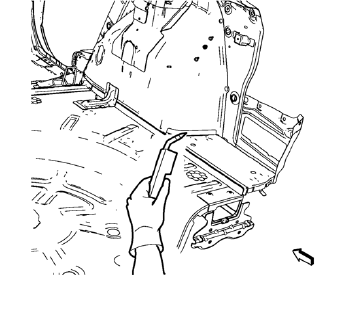
- Position the rear floor panel filler on the vehicle.
- Verify the fit of the rear floor panel filler.
- Clamp the rear floor panel filler into position.
- Plug weld accordingly.
- Apply the sealers and anti-corrosion materials to the repair area, as necessary. Refer to Anti-Corrosion Treatment and Repair.
- Paint the repaired area. Refer to Basecoat/Clearcoat Paint Systems.
- Install all related panels and components.
- Connect the negative battery cable. Refer to Battery Negative Cable Disconnection and Connection.
- Enable the SIR system. Refer to SIR Disabling and Enabling.
 Removal Procedure
Warning: Refer to Approved Equipment for Collision Repair Warning in the
Preface section.
Warning: Refer to Glass and Sheet Metal Handling Warning in the Preface section.
Disable the SIR Syst ...
 Rear Floor Panel Filler Replacement (MIG-Brazing)
Note: According to different corrosion warranties, only the
regional mandatory joining methods are allowed. ...
Other materials:
Interior Care
To prevent dirt particle abrasions, regularly clean the vehicle's interior.
Immediately remove any soils. Note that newspapers or dark garments that can
transfer color to home furnishings can also permanently transfer color to the vehicle's
interior.
Use a soft bristle brush to remove ...
Scrapping Procedure
During the course of a vehicle's useful life, certain situations may arise
which will necessitate the disposal of a live (undeployed)
pretensioner. The following information covers the proper procedures for the
disposing of a live (undeployed) pretensioner. Deploy the
pretensioner before dispo ...
Mirrors
Specifications
Inside Rearview Mirror Schematics
Outside Rearview Mirror Schematics
Outside Rearview Mirror Replacement
Preliminary Procedure
Remove the front side door trim. Refer to Front Side
Door Trim Replacement.
Remove the front side door upper trim cove ...
