
Chevrolet Cruze Repair Manual: Rear Compartment Lid Weatherstrip Replacement
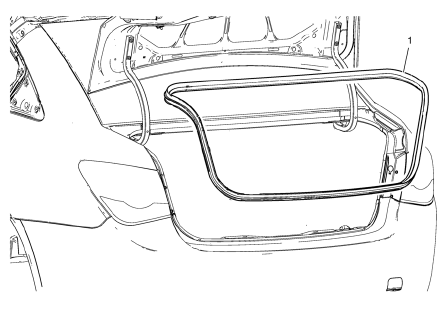
Rear Compartment Lid Weatherstrip
Procedure
- Start at the upper corner of the rear compartment opening and pull the weatherstrip away from the rear compartment opening flange.
- Position the weatherstrip in the upper corner of the r 2. ear compartment opening.
- Working downward along the edge, install the weatherstrip on the rear compartment opening flange ensuring that the carrier is fully seated in the corners.
- Using a rubber mallet, ensure that the weatherstrip is seated on the entire trunk opening flange.
 Front Side Door Weatherstrip Replacement - Body Side
Front Side Door Weatherstrip - Body Side
Procedure
Start at the rear upper corner of the door opening and pull the
weatherstrip away from the door opening flange.
Position th ...
 Rear Side Door Weatherstrip Replacement - Door Side
Rear Side Door Check Bolt
Caution: Refer to Fastener Caution in the Preface section.
Tighten
25 N·m (19 lb ft)
Rear Side Door Weatherstrip - Door Side
Procedure
Unclip weather ...
Other materials:
Service Publications Ordering Information
Service Manuals
Service Manuals have the diagnosis and repair information on the engines, transmission,
axle, suspension, brakes, electrical, steering, body, etc.
Service Bulletins
Service Bulletins give additional technical service information needed to knowledgeably
service General Motors c ...
Adding Equipment to the Airbag-Equipped Vehicle
Adding accessories that change the vehicle's frame, bumper system, height, front
end, or side sheet metal, may keep the airbag system from working properly. The
operation of the airbag system can also be affected by changing or moving any parts
of the front seats, safety belts, the airbag ...
Bluetooth (Voice Recognition)
Using Voice Recognition
To use voice recognition, press the
button located on the steering wheel.
Use the commands below for the various voice features. For additional information,
say “Help” while you are in a voice recognition menu.
Pairing
A Bluetooth-enabled cell phone must be paired to ...
