Chevrolet Cruze Repair Manual: Removal Procedure
- Turn the front wheels to the straight forward position and secure the steering wheel from moving.
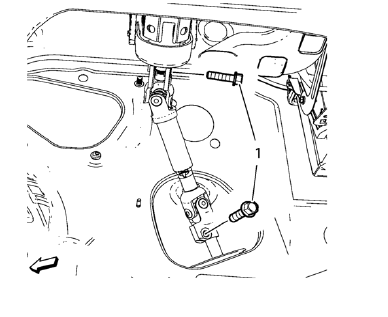
- Remove the 2 lower steering intermediate shaft bolts (1).
- Remove the steering intermediate shaft from the steering gear.
- Raise and support the vehicle. Refer to Lifting and Jacking the Vehicle
- Remove the tire and wheel assemblies. Refer to Tire and Wheel Removal and Installation
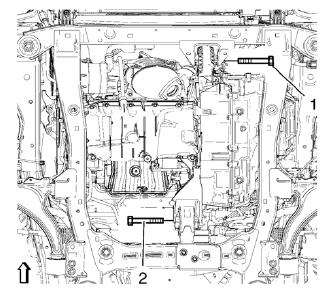
- Remove the front compartment insulator, if equipped.
- Remove the engine shield, if equipped
- Remove the exhaust flexible pipe. Refer to Exhaust Flexible Pipe Replacement.
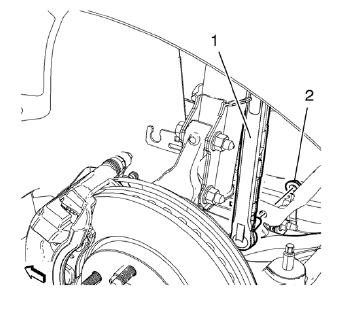
- Remove lower stabilizer link shaft nut (2) on both sides.
- Remove stabilizer link shaft (1) from stabilizer shaft.
- Remove stabilizer link shaft (1) from stabilizer.
- Remove 4 fasteners (1) for the engine side cover on both sides.
- Remove 4 fasteners (1) for the front engine compartment cover.
- Remove the front and rear transmission mount bracket bolts (1, 2).
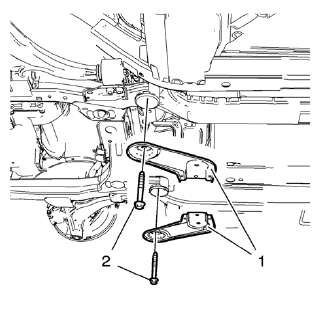
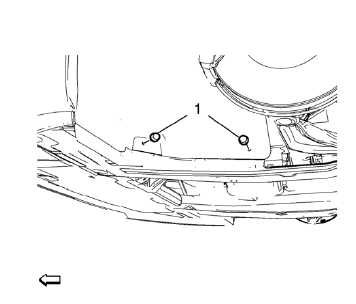
- Remove and DISCARD 2 rear suspension frame bolts (2).
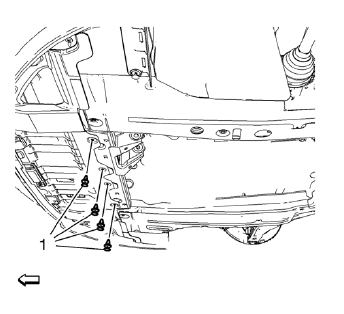
Remove rear frame reinforcements (1).

- Position and set hydraulic lifter in connection with CH 904 frame and CH 49289-50 adapter (2) onto suspension frame (1). Bent from cover beside.
- Lower suspension frame max. 55 mm.
Note: In order to assure a correct installation of the insulators ONLY remove and install the insulators side by side! Dismantled MUST BE discarded.
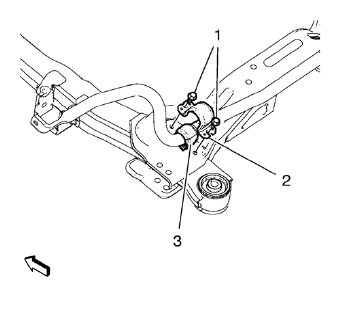
- Remove and discard the two front stabilizer shaft insulator clamp bolts (1).
- Remove the shaft insulator clamp (2).
Bend up clamp (2) slightly.
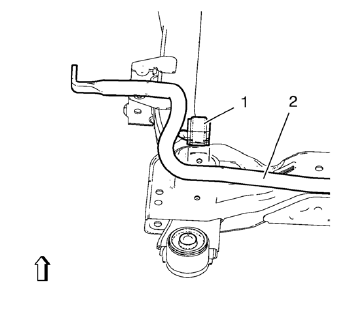
- Mark the location of the insulator (1) to the stabilizer shaft (2).
- Remove insulator (1) from stabilizer shaft (2).
 Stabilizer Shaft Insulator Replacement
Special Tools
CH 904 Underframe
EN 45059 Torque Angle Sensor Kit
CH 49289 Centering Adapter
For equivalent regional tools, refer to Special Tools. ...
 Installation Procedure
Install NEW stabilizer shaft insulators (1) to stabilizer shaft (2) so
that the slit in the insulator is facing the rear of the vehicle.
Install the insulator c 2. lamp to the insu ...
Other materials:
Installation Procedure
Cut the front end upper tie bar in corresponding locations to fit the
remaining original panel. The sectioning joint should be trimmed
to allow a gap of one-and-one-half-times the metal thickness at the
sectioning joint.
Create a 50 mm (2 in) backing plate from the unused portion of ...
Climate Control Systems
The heating, cooling, defrosting, and ventilation for the vehicle can be controlled with these systems.
Vehicles without Air Conditioning
1. Temperature Control.
2. Bi-level Air Mode.
3. Floor Air Mode.
4. Vent Air Mode.
5. Fan Control.
6. Driver and Passenger Heated Seats (If Equ ...
Windshield Washer Nozzle Hose Replacement
Preliminary Procedure
Remove the hood insulator. Refer to
Hood Insulator Replacement.
Place a clean container under the front driver side near where the
windshield washer nozzle and windshield washer pump
hose will be disconnected.
Recover all lost windshield washer solven ...
