Chevrolet Cruze Repair Manual: Vehicle Access
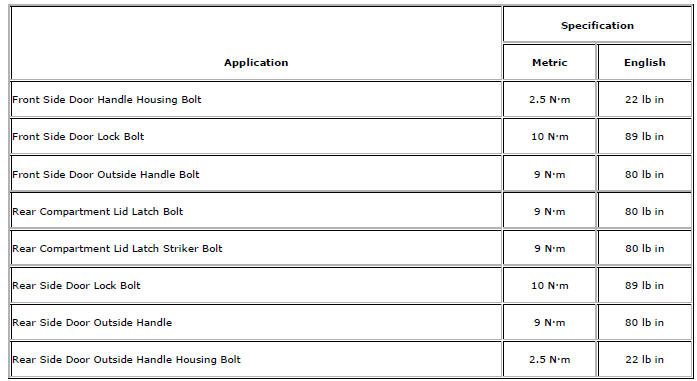
Specifications
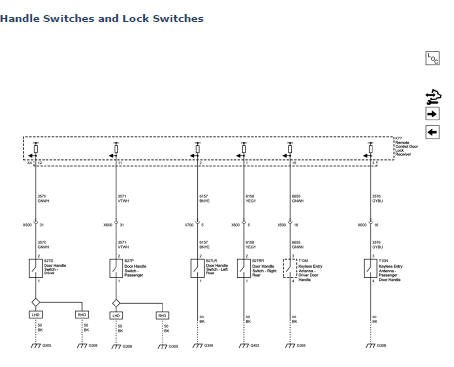
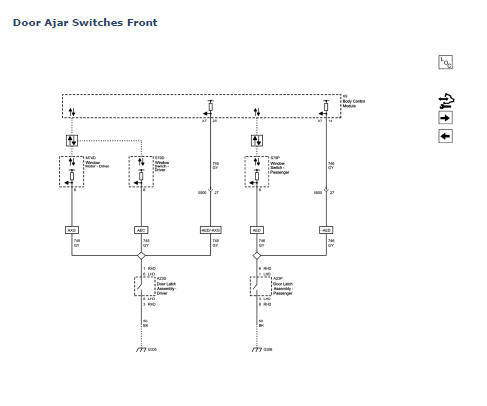
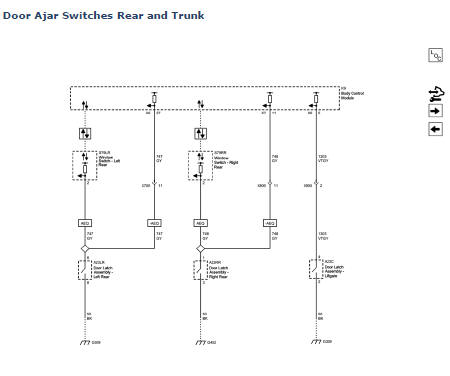
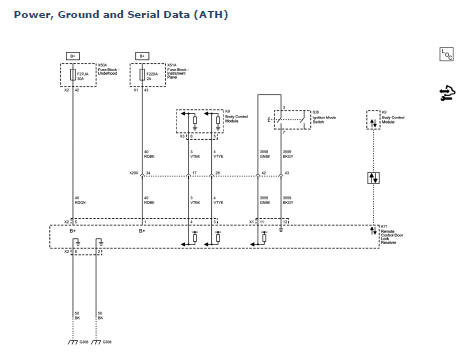
Door Lock/Indicator Schematics
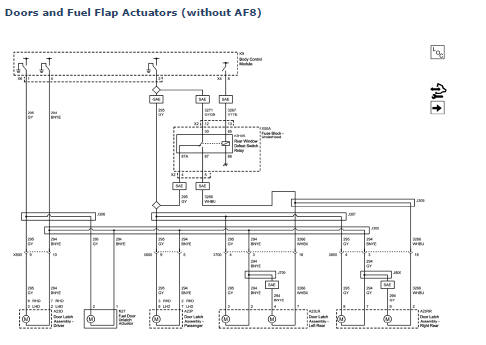
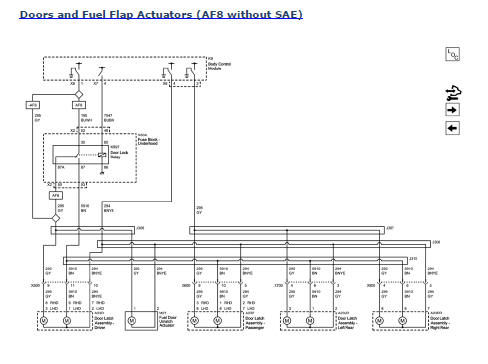
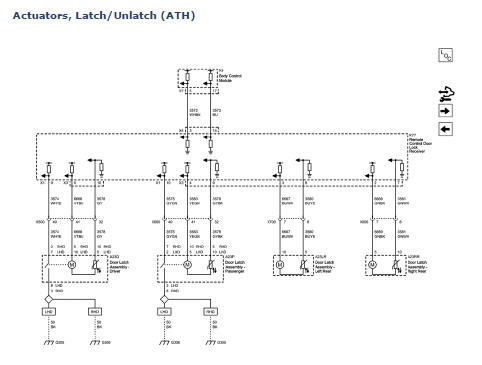

Door Control Module Schematics
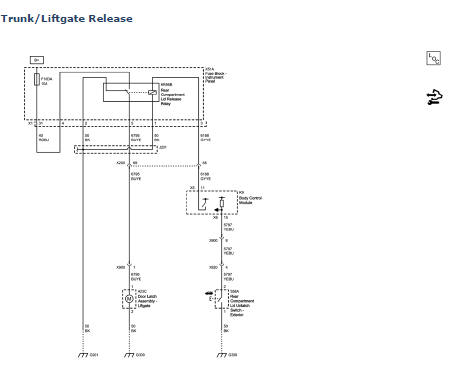
Release Systems Schematics
Fuel Tank Filler Door Lock Actuator Replacement
Preliminary Procedure
Remove the fuel tank filler housing. Refer to Fuel Tank Filler Pipe Housing Replacement.
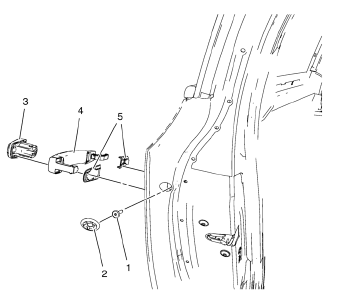
- Fuel Tank Filler Door Lock Actuator Rod
- Fuel Tank Filler Door Lock Actuator
Front Side Door Lock Cylinder Replacement
- Bolt Access Plug
Procedure
Use a plastic flat-bladed tool to remove.
- Front Side Door Outside Handle Bolt
Caution: Refer to Fastener Caution in the Preface section.
Tighten 9 N·m (80 lb in)
- Front Side Door Lock Cylinder
Procedure
- Pull the lock cylinder from the housing to remove.
- Inspect the lock, lock cylinder and handle adjustments. Refer to Front Side Door Outside Handle Rod Adjustment.
Tip
Pull the front side door outside handle to unlock the door lock cylinder.
Front Side Door Outside Handle Replacement
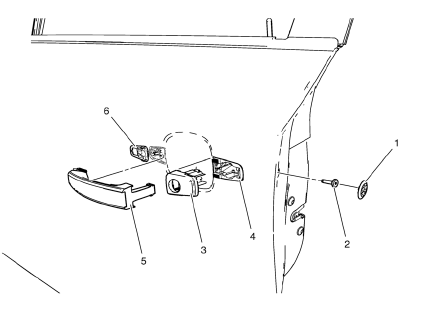
- Bolt Access Plug
Procedure
Use a plastic flat-bladed tool to remove.
- Front Side Door Outside Handle Bolt
Caution: Refer to Fastener Caution in the Preface section.
Tighten 9 N·m (80 lb in)
- Front Door Outside Handle Cap
- Front Door Outside Handle Cap Gasket
- Front Door Outside Handle
Procedure
Pull the outside handle rearward to release it from the inside handle housing.
- Front Door Outside Handle Gasket
Procedure
Inspect the lock, lock cylinder and handle adjustments. Refer to Front Side Door Outside Handle Rod Adjustment.
Rear Side Door Outside Handle Replacement
- Bolt Access Plug
Procedure
Use a plastic flat-bladed tool to remove.
- Rear Side Door Outside Handle Cap Bolt
Caution: Refer to Fastener Caution in the Preface section.
Tighten 9 N·m (80 lb in)
- Rear Door Outside Handle Cap
- Rear Door Outside Handle
Procedure
Pull the outside handle rearward to release it from the handle housing.
- Rear Door Outside Handle Gasket
Procedure
Inspect the lock and handle adjustments. Refer to Rear Side Door Outside Handle Rod Adjustment.
Rear Side Door Outside Handle Housing Replacement
Preliminary Procedure
- Remove the rear side door trim. Refer to Rear Side Door Trim Replacement.
- Remove the water deflector. Refer to Rear Side Door Water Deflector Replacement.
- Remove the outside door handle. Refer to Rear Side Door Outside Handle Replacement.
- Rear Side Door Handle Housing Bolt
Caution: Refer to Fastener Caution in the Preface section.
Tighten 2.5 N·m (22 lb in)
- Rear Side Door Outside Handle Housing
Procedure
- Transfer the handle and lock rods to the new outside door handle housing.
- Inspect the lock, lock cylinder and handle adjustments. Refer to Rear Side Door Outside Handle Rod Adjustment.
Rear Compartment Lid Latch Replacement
Preliminary Procedure
Remove the rear compartment lid inner panel trim. Refer to Rear Compartment Lid Inner Panel Trim Replacement.
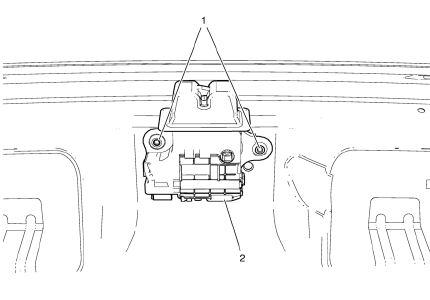
- Rear Compartment Lid Latch Bolt (Qty: 2)
Caution: Refer to Fastener Caution in the Preface section.
Tighten 9 N·m (80 lb ft)
- Rear Compartment Lid Latch
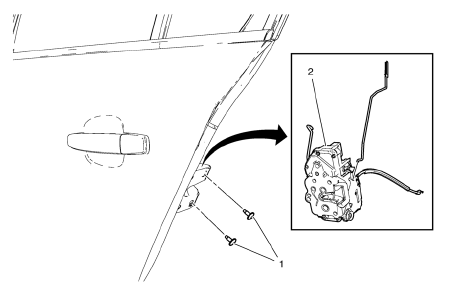
Front Side Door Lock Replacement
Preliminary Procedure
- Remove the front side door trim. Refer to Front Side Door Trim Replacement.
- Remove the water deflector. Refer to Rear Side Door Water Deflector Replacement.
Front Side Door Lock Screw (Qty: 2)
Caution: Refer to Fastener Caution in the Preface section.
Tighten 10 N·m (89 lb in)
Front Side Door Lock Assembly
Procedure
- Release the door lock cable retainers from the door.
- Disconnect the door lock electrical connector.
- Remove the door lock with the handle housing.
- Remove the handle and lock rods from the lock.
- Inspect the lock, lock cylinder and handle adjustments. Refer to Front Side Door Outside Handle Rod Adjustment.
Rear Door Lock Replacement
- Preliminary Procedure
- Remove the interior trim panel. Refer to Rear Side Door Trim Replacement.
- Remove the water deflector. Refer to Rear Side Door Water Deflector Replacement.
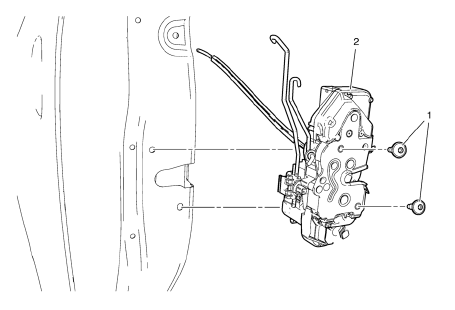
Rear Side Door Lock Bolt (Qty: 2)
Caution: Refer to Fastener Caution in the Preface section.
Tighten 10 N·m (89 lb in)
Rear Side Door Lock Assembly
Procedure
- Release the inside handle cable retainers before removing the door lock.
- Disconnect the door lock electrical connector.
- Remove the door lock with the handle housing.
- Transfer the handle and lock rods to the new door lock.
- Inspect the lock, lock cylinder and handle adjustments. Refer to Rear Side Door Outside Handle Rod Adjustment.
Front Side Door Outside Handle Housing Replacement

Preliminary Procedure
- Remove the front side door trim. Refer to Front Side Door Trim Replacement.
- Remove the water deflector. Refer to Front Side Door Water Deflector Replacement.
- Remove the outside door handle. Refer to Front Side Door Outside Handle Replacement.
Front Side Door Handle Housing Bolt
Caution: Refer to Fastener Caution in the Preface section.
Tighten 2.5 N·m (22 lb in)
Front Door Outside Handle Housing
Procedure
- Disconnect the lock and handle rods to remove the housing.
- Transfer the lock cylinder to the new housing. Refer to Front Side Door Lock Cylinder Replacement.
- Inspect the lock, lock cylinder and handle adjustments. Refer to Front Side Door Outside Handle Rod Adjustment.
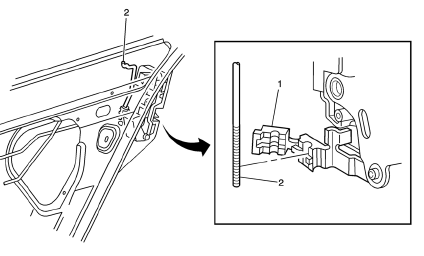
Front Side Door Locking Rod Replacement
Preliminary Procedure
- Remove the interior trim panel. Refer to Front Side Door Trim Replacement.
- Remove the water deflector. Refer to Front Side Door Water Deflector Replacement.
- Remove the front side door lock. Refer to Front Side Door Lock Replacement.
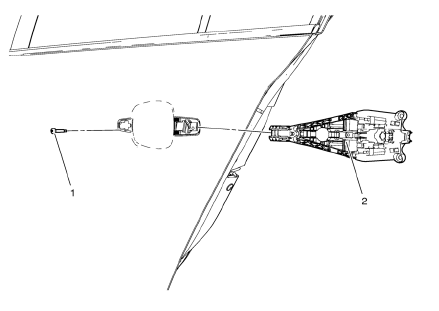
Front Side Door Lock Rod
Procedure
Inspect the lock, lock cylinder and handle adjustments. Refer to Front Side Door Outside Handle Rod Adjustment.
Front Side Door Locking Rod Clip
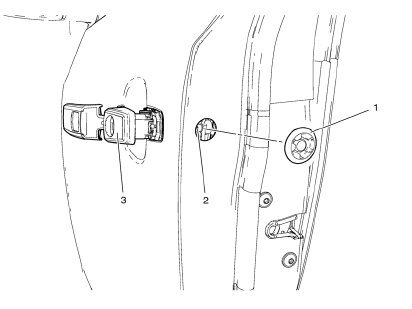
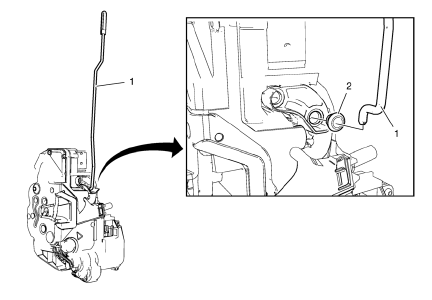
Front Side Door Outside Handle Rod Adjustment
Preliminary Procedure
Remove the water deflector. Refer to Front Side Door Water Deflector Replacement.
Outside Door Handle Rod Clip
Procedure
Use a flat-head tool to open the clip from the threaded rod connecting the lock to the outside handle.
Outside Door Handle Rod
Procedure
- Position the outside door handle rod (2) in the clip (1) in order to eliminate any free play in the outside door handle.
- Adjust the travel of the handle by removing the threaded rod in the clip.
- Install the clip cover closed over the threaded outside door handle rod.
- Inspect the door lock system for proper operation.
Rear Side Door Locking Rod Replacement
Preliminary Procedure
- Remove the rear side door trim. Refer to Rear Side Door Trim Replacement
- Remove the water deflector. Refer to Rear Side Door Water Deflector Replacement
- Remove the rear side door lock. Refer to Rear Door Lock Replacement
Rear Side Door Lock Rod
Procedure
Inspect the lock, lock cylinder and handle adjustments. Refer to Rear Side Door Outside Handle Rod Adjustment
Rear Side Door Locking Rod Clip
- Rear Side Door Outside Handle Rod Adjustment
- Door Ajar Indicator Description and Operation
- Luggage Compartment Description and Operation
- Power Door Latch Description and Operation
- Power Door Locks Description and Operation
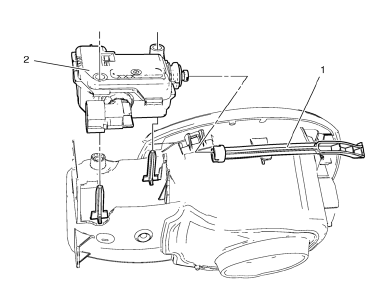
 Mirrors
Specifications
Inside Rearview Mirror Schematics
Outside Rearview Mirror Schematics
Outside Rearview Mirror Replacement
Preliminary Procedure
Remove the front side door tri ...
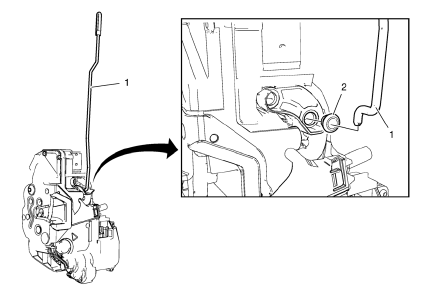
 Rear Side Door Outside Handle Rod Adjustment
Removal Procedure
Remove the rear door water deflector as needed. Refer to Rear Side Door
Water Deflector Replacement.
Use a flat-head tool to open the clip from the threaded rod connecti ...
Other materials:
Heated Oxygen and Oxygen Sensor Caution
Caution: Do not remove the pigtail from either the heated oxygen
sensor (HO2S) or the oxygen sensor (O2S). Removing the pigtail or the
connector will affect sensor operation.
Handle the oxygen sensor carefully. Do not drop the HO2S. Keep the in-line
electrical connector and the louvered end fr ...
CD Player
The CD player can play audio CDs and MP3 CDs.
The CD player will not play 8 cm (3 in) CDs.
Care of CDs
Sound quality can be reduced due to disc quality, recording method, quality of
the music recorded, and how the disc has been handled.
Handle discs carefully and store them in their original c ...
Power Steering
Specifications
Power Steering System Bleeding
Note:
Use clean, new power steering fluid type only. See the Maintenance
and Lubrication subsection for fluid specifications.
Hoses touching the frame, body or engine may cause system noise.
Verify that the hoses do not touch any ot ...
