Chevrolet Cruze Repair Manual: Thread Repair
General purpose thread repair kits are available commercially.
Warning: Refer to Safety Glasses Warning in the Preface section.
Note: Refer to the thread repair kit manufacturer's instructions regarding the size of the drill and which tap to use.
Always avoid any buildup of chips. Back out the tap every few turns and remove the chips.
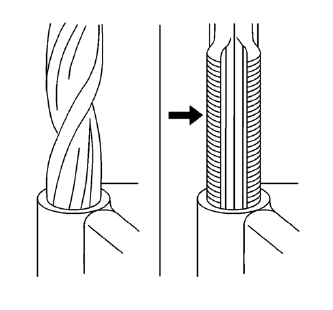
- Determine the size, the pitch, and the depth of the damaged thread.
- Adjust the stop collars on the cutting tool as needed. Tap the stop collars to the required depth.
- Drill out the damaged thread.
- Remove the chips.
- Apply clean engine oil to the top thread.
- Use the tap in order to cut new thread.
- Clean the thread.
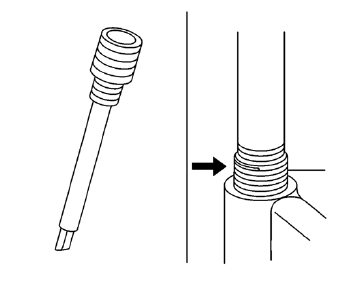
- Screw the thread insert onto the mandrel of the thread insert installer. Engage the tang of the thread insert onto the end of the mandrel.
Note: The thread insert should be flush to 1 turn below the surface.
- Lubricate the thread insert with clean engine oil - except when installing in aluminum - and install the thread insert.
- If the tang of the thread insert does not break off when backing out the thread insert installer, break off the tang using a drift punch.
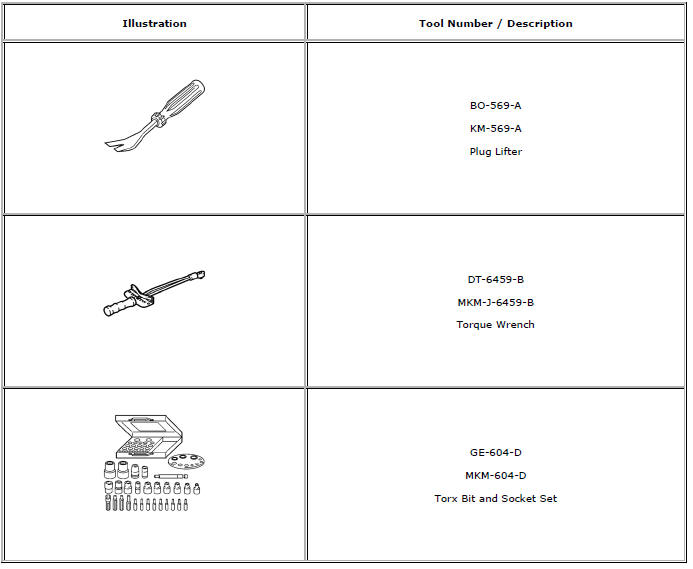
Special Tools and Equipment
 Rear Seat Back Cushion Cover and Pad Replacement - Left Side
Preliminary Procedure
Remove rear seat - left side. Refer to Rear Seat Replacement
Rear Seat Back Cushion Cover
Procedure
Remove the staples from the seat back cover.
Remove seat ba ...
 Seat Heating and Cooling
Specifications
Heated/Cooled Seat Schematics
Front Seat Heater Control Module Replacement
Preliminary Procedure
Driver or passenger seat replacement. Refer to Driver or Passenger S ...
Other materials:
Lighting
Specifications
Headlights/Daytime Running Lights (DRL) Schematics
Interior Lights Schematics
...
Rear Compartment Lid Emblem/Nameplate Replacement (Cruze - Left Side)
Rear Compartment Lid Emblem Assembly
Caution: Refer to Exterior Trim Emblem Removal Caution in the Preface
section.
Procedure
The part and surface should be 21°C (70°F) prior to installation. The
vehicle should remain 21°C (70°F) for
one hour after assembly to allow adhesive to deve ...
Installation Procedure
Cut the roof front header panel in corresponding locations to fit the
remaining original panel. The sectioning joint should be trimmed
to allow a gap of one-and-one-half-times the metal thickness at the
sectioning joint.
Create a 50 mm (2 in) backing plate from the unused portion of ...
