Chevrolet Cruze Repair Manual: Air Conditioning Condenser Replacement (1.6L LDE, LXT, LXV, and 1.8L 2H0)
Removal Procedure
- Recover the refrigerant. Refer to Refrigerant Recovery and Recharging.
- Disconnect battery negative cable. Refer to Battery Negative Cable Disconnection and Connection.
- Remove front bumper fascia. Refer to Front Bumper Fascia Replacement.
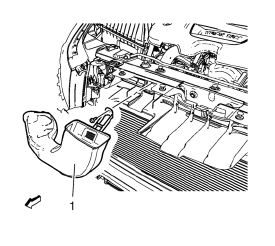
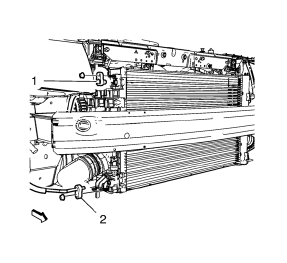
- Remove air intake duct (1).
- Remove radiator support replacement. Refer to Radiator Support Replacement.
- Remove A/C compressor and condenser hose from condenser. Refer to Air Conditioning Compressor and Condenser Hose Replacement.
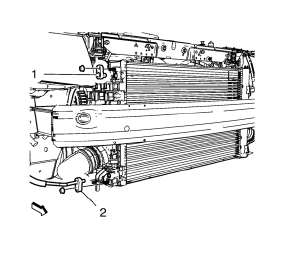
- Remove condenser hose bolt and condenser hose (1, 2).
- Remove A/C refrigerant pressure sensor. Refer to Air Conditioning (A/C) Refrigerant Pressure Sensor Replacement.
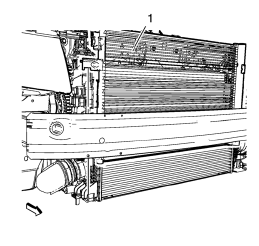
- Remove condenser.
Installation Procedure
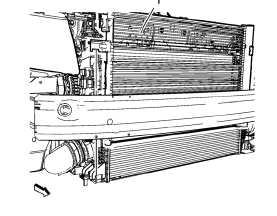
- Install condenser.
- Install A/C refrigerant pressure sensor. Refer to Air Conditioning (A/C) Refrigerant Pressure Sensor Replacement.
Caution: Refer to Fastener Caution in the Preface section.
- Install condenser hose (1, 2) and condenser hose bolt and tighten to 19 N·m (15 lb ft).
- Install A/C compressor and condenser hose to condenser. Refer to Air Conditioning Compressor and Condenser Hose Replacement
- Install radiator support. Refer to Radiator Support Replacement.
- Install air intake duct (1).
- Install front bumper fascia. Refer to Front Bumper Fascia Replacement.
- Connect battery negative cable. Refer to Battery Negative Cable Disconnection and Connection.
- Evacuate and charge the refrigerant system. Refer to Refrigerant Recovery and Recharging.
 Air Conditioning Evaporator Hose Assembly Replacement
Preliminary Procedures
Recover the refrigerant. Refer to Refrigerant Recovery and Recharging.
Remove the headlamp - right side. Refer to Headlamp Replacement.
Loosen power steering fluid r ...
 Instrument Panel Outer Air Outlet Replacement - Left Side
Preliminary Procedure
Remove instrument panel lower trim pad cover - left side. Refer to
Instrument Panel Lower Trim Pad Cover Replacement.
Remove instrument panel cluster trim plat ...
Other materials:
Front Floor Console Replacement
Preliminary Procedure
Remove the instrument panel lower trim panel - left side. Refer to
Instrument Panel Lower Trim Panel Replacement - Left
Side
Remove the instrument panel lower trim panel - right side. Refer to
Instrument Panel Lower Trim Panel Replacement - Right
Side
Remo ...
General Information
Your vehicle is an important investment. This section describes the required
maintenance for the vehicle. Follow this schedule to help protect against major
repair expenses resulting from neglect or inadequate maintenance. It may also help
to maintain the value of the vehicle if it is sold. It ...
Specifications
Front Door (Diesel)
65 mm
83 mm
Front Door (Diesel)
60 mm
87 mm
Rear Compartment Lid (Diesel)
122 mm
32 mm
Rear Compartment Lid (Ecoline)
162 mm
32 mm
...
