
Chevrolet Cruze Repair Manual: Instrument Panel Outer Air Outlet Replacement - Left Side
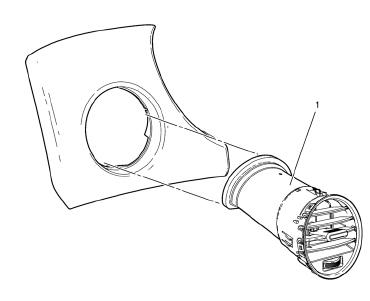
Preliminary Procedure
- Remove instrument panel lower trim pad cover - left side. Refer to Instrument Panel Lower Trim Pad Cover Replacement.
- Remove instrument panel cluster trim plate. Refer to Instrument Panel Cluster Trim Plate Replacement.
- Remove instrument panel cluster lower trim plate. Refer to Instrument Panel Cluster Lower Trim Plate Replacement.
- Remove instrument panel upper trim panel. Refer to Instrument Panel Upper Trim Panel Replacement - Left Side.
- Instrument Panel Outer Air Outlet Assembly
Procedure
- Remove instrument panel outer air oulet duct left side.
- Remove clip (Qty: 4).
Instrument Panel Center Air Outlet Replacement
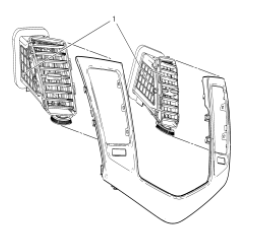
Preliminary Procedure
Remove instrument panel center upper molding (2). Refer to Instrument Panel Center Upper Molding Replacement.
- Instrument Panel Center Air Outlet
Instrument Panel Outer Air Outlet Replacement - Right Side
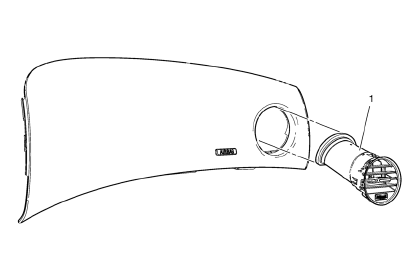
Preliminary Procedure
Remove instrument panel upper trim panel. Refer to Instrument Panel Upper Trim Panel Replacement - Right Side.
Instrument Panel Outer Air Outlet Assembly
Procedure
- Remove instrument panel outer air oulet duct right side.
- Remove clip (Qty: 4).
Radio Cooling Duct Replacement (Right Hand Drive)
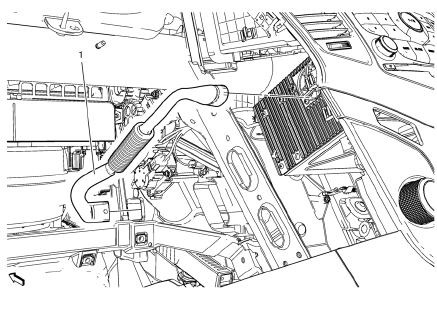
Preliminary Procedure
- Remove IP Compartment. Refer to Instrument Panel Compartment Replacement.
- Remove floor air outlet duct - left side. Refer to Floor Air Outlet Duct Replacement - Left Side.
Radio Cooling Duct
Procedure
Remove radio cooling duct.
 Air Conditioning Condenser Replacement (1.6L LDE, LXT, LXV, and 1.8L 2H0)
Removal Procedure
Recover the refrigerant. Refer to Refrigerant Recovery and Recharging.
Disconnect battery negative cable. Refer to Battery Negative Cable
Disconnection and Connection.
Rem ...
 Floor Air Outlet Replacement
Removal Procedure
Remove the instrument panel assembly. Refer to Instrument Panel
Assembly Replacement.
Remove the instrument panel wiring harness (2) from the instrument panel ...
Other materials:
Wiper/Washer System Description and Operation
Wiper/Washer System Components
The wiper/washer system consists of the following electrical components:
Windshield Wiper Relay
Windshield Wiper Speed Control Relay
Windshield Washer Pump Relay
Rain Sensor (optional)
Windshield Washer Fluid Pump
Windshield Wiper Motor
Window Wiper/Wa ...
OnStar Additional Information
Transferring Service
Press to request account transfer
eligibility information. The Advisor can assist in canceling or removing account
information. If OnStar receives information that vehicle ownership has changed,
OnStar may send a voice message to the vehicle, requesting updated account i ...
Thread Repair
General purpose thread repair kits are available commercially.
Warning: Refer to Safety Glasses Warning in the Preface section.
Note: Refer to the thread repair kit manufacturer's instructions
regarding the size of the drill and which tap to use.
Always avoid any buildup of chips. Back ou ...
