Chevrolet Cruze Repair Manual: Front Side Door Trim Replacement
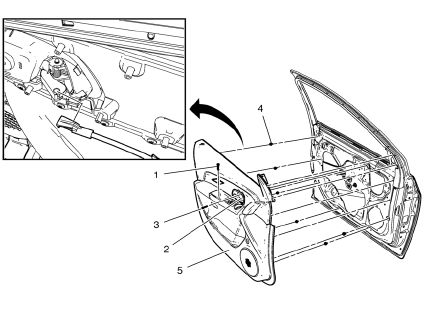
- Front Side Door Pull Handle Bolt
Caution: Refer to Fastener Caution in the Preface section.
Tighten 2 N·m (18 lb in)
- Front Side Door Inside Handle Bolt Finish Cap
Tip Pull handle back to remove cap. Use suitable tool to unsnap.
- Front Side Door Inside Handle Bolt
Tighten 2.5 N·m (22 lb in)
- Front Side Door Trim Clip (Qty: 10)
- Front Side Door Trim Assembly
Procedure
- Pull upwards on the door lock retainer cable to disengage.
- Disconnect the electrical connectors.
Front Side Door Water Deflector Replacement

Preliminary Procedure
Remove the front side door trim. Refer to Front Side Door Trim Replacement.
- Front Side Door Water Deflector
Procedure
Pull the water deflector from the door. Guide electrical connectors through the water deflector while removing it from the door.
Rear Side Door Water Deflector Replacement
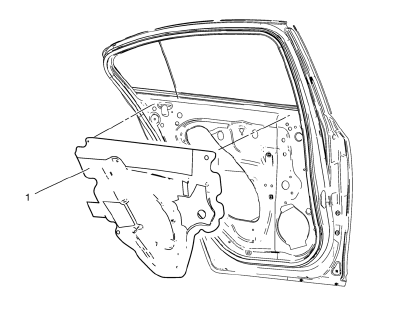
Preliminary Procedure
Remove the rear side door trim. Refer to Rear Side Door Trim Replacement.
Rear Side Door Water Deflector
Procedure
- Pull the water deflector from the door. Guide electrical connectors through the water deflector while removing it from the door.
Rear Side Door Window Garnish Molding Replacement
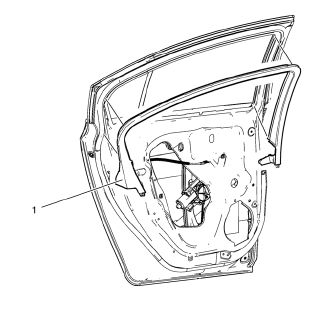
Preliminary Procedure
Remove the rear side door trim. Refer to Rear Side Door Trim Replacement.
- Rear Side Door Window Garnish Molding Assembly.
Front Side Door Window Garnish Molding Replacement
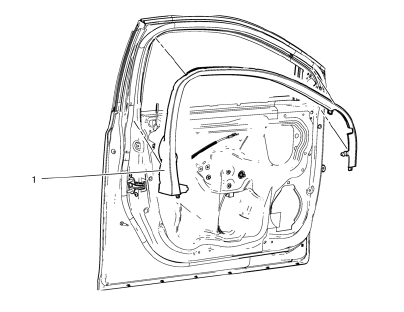
Preliminary Procedure
Remove the front side door trim. Refer to Front Side Door Trim Replacement.
- Front Side Door Window Garnish Molding Assembly.
Front Side Door Sill Trim Plate Replacement
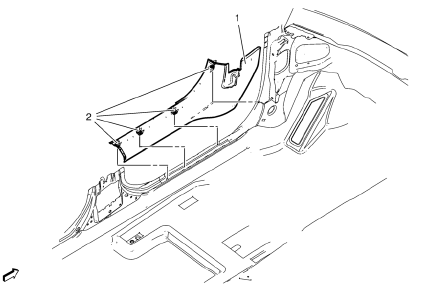
- Front Side Door Sill Trim Plate Assembly.
- Front Side Door Sill Trim Plate Assembly Clip (Qty: 5).
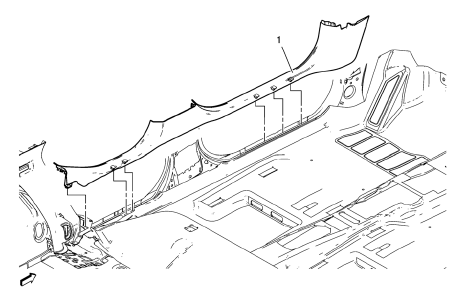
Rear Side Door Sill Trim Plate Replacement
- Rear Side Door Sill Trim Plate Replacement Assembly.
- Rear Side Door Sill Trim Plate Replacement Assembly Clip (Qty: 2).
Front and Rear Side Door Sill Trim Plate Replacement
- Front and Rear Side Door Sill Trim Plate
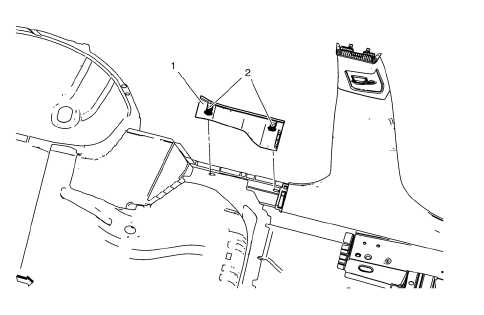
Assist Handle Replacement
- Assist Handle Screw (Qty: 2)
Caution: Refer to Fastener Caution in the Preface section.
Procedure
- Fold the assist handle downward and hold.
- Use a small flat-bladed tool to open the assist handle covers to access the screws.
Tighten 6 N·m (53 lb in)
- Assist Handle Assembly
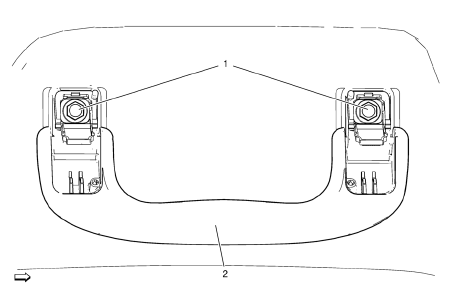
Sunshade Replacement
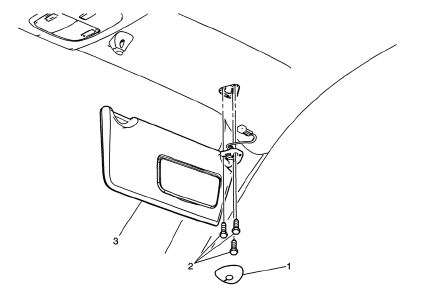
Preliminary Procedure
Lower the front of the headliner to access the sunshade electrical connector, if necessary. Refer to Headlining Trim Panel Replacement.
- Sunshade Support Bolt Cover
- Sunshade Screws (Qty: 3)
Caution: Refer to Fastener Caution in the Preface section.
Tighten 3 N·m (27 lb in)
- Sunshade Assembly
Sunshade Support Replacement
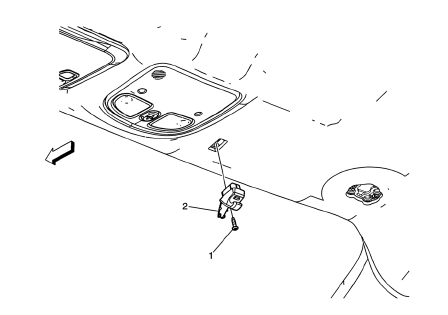
Preliminary Procedure
Remove sunshade assembly. Refer to Sunshade Replacement.
- Sunshade Support Screw.
Caution: Refer to Fastener Caution in the Preface section.
Tighten 3 N·m (27 lb in).
- Sunshade Support Assembly.
 Interior Trim and Paneling
Specifications
Front Side Door Window Switch Bezel Replacement
Preliminary Procedure
Remove the front side door trim. Refer to Front Side Door Trim Replacement.
Front Side Door Window S ...
 Windshield Garnish Molding Replacement
Preliminary Procedure
Disable the SIR system. Refer to SIR Disabling and Enabling.
Windshield Garnish Molding Assembly
Procedure
Loosen tether clip and steel clips.
Disconnect ...
Other materials:
Overview
Read the following pages to become familiar with the infotainment system features.
WARNING
Taking your eyes off the road for extended periods could cause a crash resulting
in injury or death to you or others. Do not give extended attention to infotainment
tasks while driving.
The infotainment ...
Turn and Lane-Change Signals
Move the lever all the way up or down to signal a turn.
An arrow on the instrument cluster will flash in the direction of the turn or
lane change.
Raise or lower the lever until the arrow starts to flash to signal a lane change.
The turn signal flashes three times.
The lever returns to its ...
Instrument Panel Accessory Bezel Replacement
Preliminary Procedure
Remove transmission control cover. Refer to Automatic or Manual Transmission
Control Lever Trim Cover Replacement.
Instrument Panel Accessory Bezel Screw (Qty: 4)
Caution: Refer to Fastener Caution in the Preface section.
Tighten
2.5 N·m (23 lb in).
Instrume ...
