Chevrolet Cruze Repair Manual: Installation Procedure
- Clean and prepare the attaching surfaces for welding.
- Apply one-part windshield urethane adhesive as noted from the original panel.
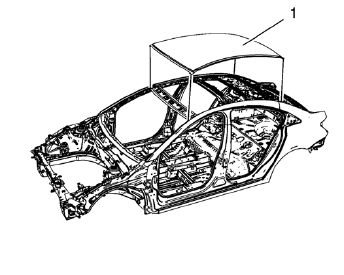
- Position the roof panel (1) on the vehicle.
- Verify the fit of the panel.
- Clamp the panel into position.
- Spot weld accordingly as noted from the original panel.
- Apply the sealers and anti-corrosion materials to the repair area, as necessary. Refer to Anti-Corrosion Treatment and Repair.
- Paint the repaired area. Refer to Basecoat/Clearcoat Paint Systems.
- Install all related panels and components.
- Connect the negative battery cable. Refer to Battery Negative Cable Disconnection and Connection.
- Enable the SIR system. Refer to SIR Disabling and Enabling.
 Removal Procedure
Warning: Refer to Approved Equipment for Collision Repair Warning in
the Preface section.
Disable the SIR System. Refer to SIR Disabling
and Enabling.
Disconnect the negative battery cable. ...
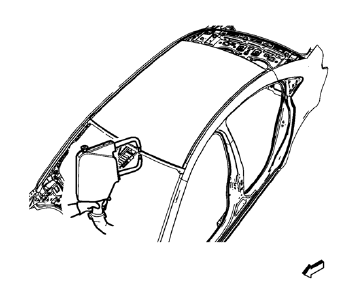
 Roof Front Header Panel Replacement (MAG-Welding)
Note: According to different corrosion warranties, only the
regional mandatory joining methods are allowed. ...
Other materials:
Heating and Air Conditioning System Description and Operation
Engine Coolant
Engine coolant is the key element of the heating system. The thermostat
controls engine operating coolant temperature. The thermostat
also creates a restriction for the cooling system that promotes a positive
coolant flow and helps prevent cavitation. Coolant enters the
heater ...
Rear Vision Camera (RVC)
This vehicle may have the RVC system. Read this entire section before using it.
The RVC system can assist the driver when backing up by displaying a view of
the area behind the vehicle.
WARNING
The RVC system does not display children, pedestrians, bicyclists, animals,
or any other object loc ...
Hood Adjustment
Hood
Caution: Refer to Fastener Caution in the Preface section.
Procedure
Loosen the hood hinge reinforcement nuts (Qty: 4).
Adjust the hood in order to obtain an even gap on both sides between the
hood and the fenders, the headlamps and
the front bumper fascia and so that the hood ...
