Chevrolet Cruze Repair Manual: Passenger Seat Frame Replacement
Removal Procedure
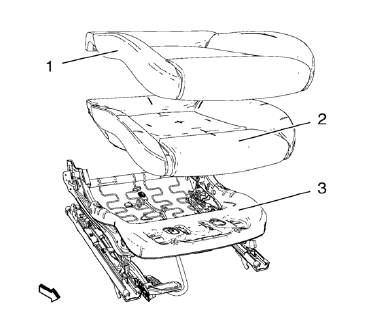
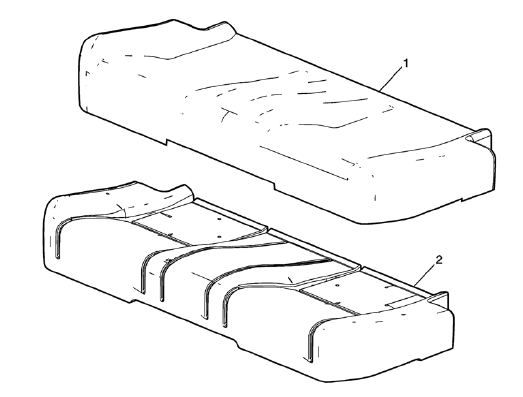
- Remove front seat cushion cover (1) and pad (2) from frame (3). Refer to Front Seat Cushion Cover and Pad Replacement
- Remove the wire harness (1), if equipped.
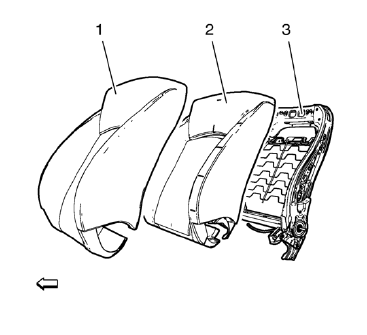
- Remove front seat back cushion cover (1) and pad (2) from frame (3). Refer to Driver or Passenger Seat Back Cushion Cover and Pad Replacement
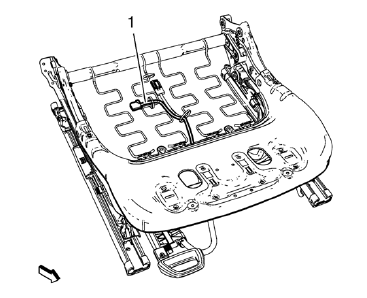
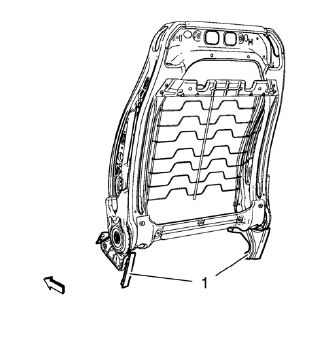
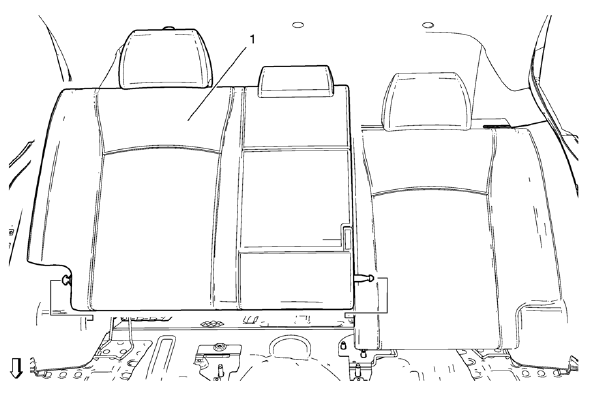
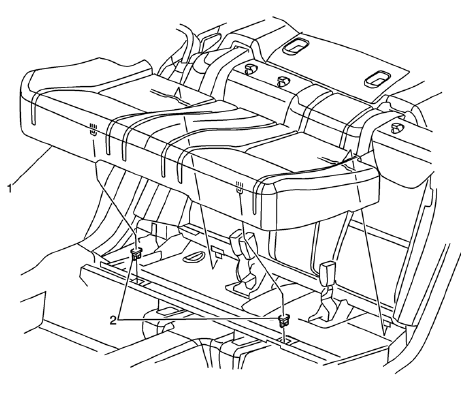
- Remove inner seat frame cover (1).
- Remove the wire harness, if equipped.
Installation Procedure
- Install the wire harness, if equipped.
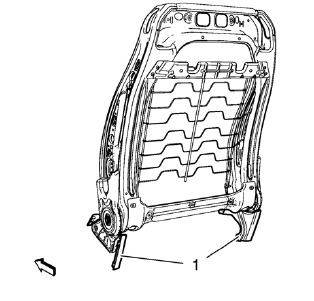
- Install inner seat frame cover (1).
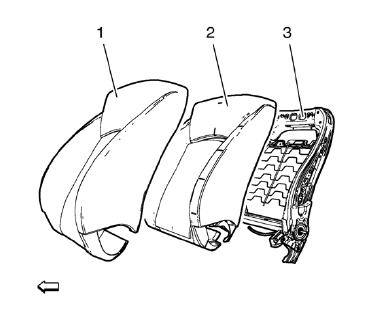
- Install front seat back cushion cover (1) and pad (2) to frame (3). Refer to Driver or Passenger Seat Back Cushion Cover and Pad Replacement
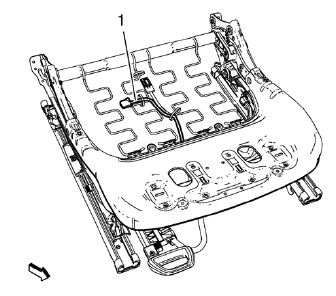
- Install the wire harness (1), if equipped.
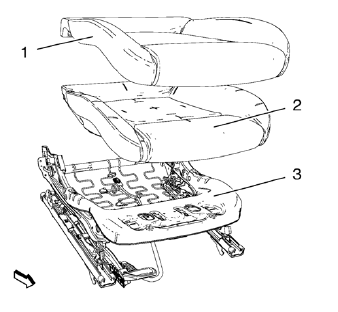
- Install front seat cushion cover (1) and pad (2) to frame (3). Refer to Front Seat Cushion Cover and Pad Replacement
Rear Seat Replacement (40 Percent Seat)

Preliminary Procedure
Rear seat cushion. Refer to Rear Seat Cushion Replacement
- Rear Seat Back - Left Side
Procedure
- Fold down rear seat backrest.
- Remove rear seat backrest from booth side guide.
Rear Seat Replacement (60 Percent Seat)
Preliminary Procedure
Remove rear seat belt buckle. Refer to Rear Seat Belt Buckle Replacement
Rear Seat Back - Right Side
Procedure
- Fold down rear seat backrest.
- Remove rear seat backrest from booth side guide.
Rear Seat Armrest Replacement
Preliminary Procedure
Remove rear seat back - right side. Refer to Rear Seat Replacement
- Armrest Hinge Cover
- Armrest Hinge Nut
Caution: Refer to Fastener Caution in the Preface section.
Tighten 4.5 N·m (40 lb in)
- Armrest Hinge Bolt
Tighten 9 N·m (80 lb in)
- Armrest
Rear Seat Head Restraint Replacement
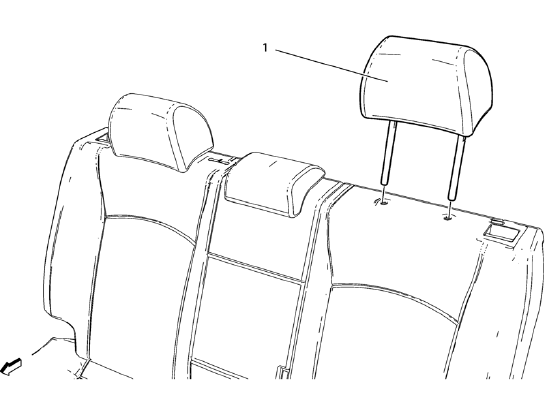
- Rear Seat Head Restraint
Procedure
Push the head restraint guide button and remove the head restraint.
Rear Seat Head Restraint Guide Replacement
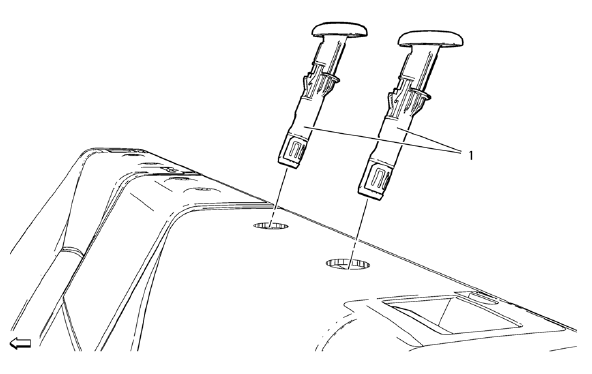
Preliminary Procedure
Remove rear seat head restraint. Refer to Rear Seat Head Restraint Replacement.
- Rear Seat Head Restraint Guide Replacement
Procedure
Unclip the rear seat head restraint guide with a suitable device (Qty: 2)
Rear Seat Cushion Cover and Pad Replacement
Preliminary Procedure
Remove the rear seat cushion. Refer to Rear Seat Cushion Replacement
Rear Seat Cushion Cover
Procedure
- Remove the hog rings that secure the rear seat cushion cover to the pad.
- Remove seat cushion cover from Velcro.
Rear Seat Cushion Pad
Rear Seat Cushion Replacement
Rear Seat Cushion
Procedure
Pull up on the front of the seat cushion to disengage the retainers, and lift out of the vehicle.
Seat Cushion Retainer (Qty: 2)
Rear Seat Back Latch Replacement (40 Percent Seat)
Preliminary Procedure
- Remove rear seat - left side. Refer to Rear Seat Replacement.
- Remove rear seat back cushion cover and pad - left side. Refer to Rear Seat Back Cushion Cover and Pad Replacement - Left Side
Rear Seat Back Latch Bolt (Qty: 2)
Caution: Refer to Fastener Caution in the Preface section.
Tighten 45 N·m (33 lb ft)
Rear Seat Back Latch
Rear Seat Back Latch Replacement (60 Percent Seat)
Preliminary Procedure
- Remove rear seat - right side. Refer to Rear Seat Replacement.
- Remove rear seat armrest. Refer to Rear Seat Armrest Replacement
- Remove rear seat back cushion cover and pad - right side. Refer to Rear Seat Back Cushion Cover and Pad Replacement - Right Side
Rear Seat Back Latch Bolt (Qty: 2)
Caution: Refer to Fastener Caution in the Preface section.
Tighten 45 N·m (33 lb ft)
Rear Seat Back Latch
 Driver Seat Frame Replacement
Removal Procedure
Remove front seat cushion cover (1) and pad (2) from frame (3). Refer to
Front Seat Cushion Cover and Pad Replacement
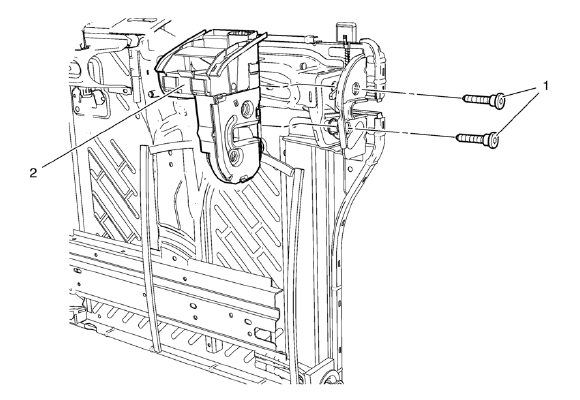
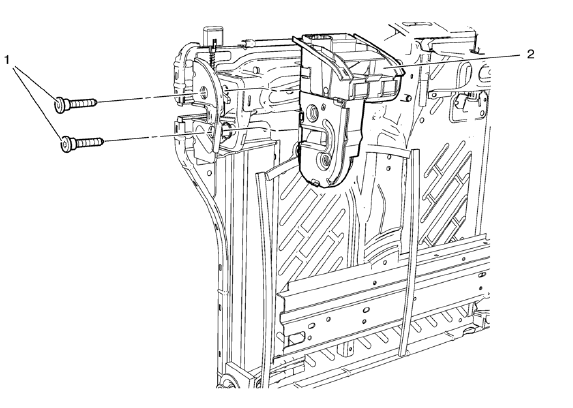
Remove the wire harness (1), if equipped.
...
 Rear Seat Back Cushion Cover and Pad Replacement - Left Side
Preliminary Procedure
Remove rear seat - left side. Refer to Rear Seat Replacement
Rear Seat Back Cushion Cover
Procedure
Remove the staples from the seat back cover.
Remove seat ba ...
Other materials:
Installation Procedure
Cut the front end upper tie bar in corresponding locations to fit the
remaining original panel. The sectioning joint should be trimmed
to allow a gap of one-and-one-half-times the metal thickness at the
sectioning joint.
Create a 50 mm (2 in) backing plate from the unused portion of ...
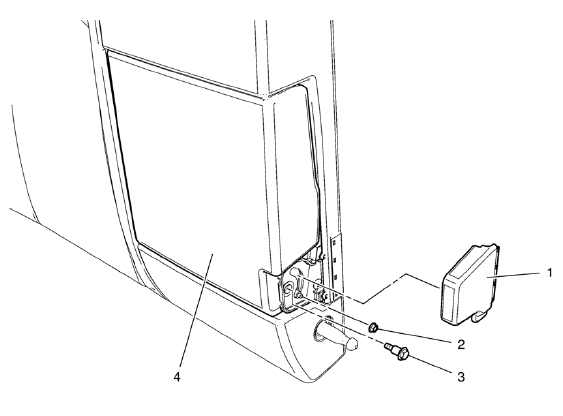
Front Fender Emblem/Nameplate Replacement (1.8L 2H0 or 2.0L Diesel)
Front Fender Emblem Assembly
Caution: Refer to Exterior Trim Emblem Removal Caution in the
Preface section.
Procedure
The part and surface should be 21°C (70°F) prior to installation. The
vehicle should remain 21°C (70°F) for
one hour after assembly to allow adhesive to develop suff ...
Driver Information Center (DIC)
The DIC display is in the center of the instrument cluster. It shows the status
of many vehicle systems. The controls for the DIC are on the turn signal lever.
1. SET/CLR: Press to set, or press and hold to clear, the menu item displayed.
2. /
: Use the thumbwheel to scroll through
the it ...
