Chevrolet Cruze Infotainment System: Pictures
Pictures can only be viewed using USB devices. If pictures are on an SD card, transfer to a USB device or use a USB-SD adapter. File sizes above approximately four mega pixels may not show. Only jpeg, bmp, gif, and png files are supported.
1. Press the Pictures screen button on the Home Page.
2. The system does a search to find the picture folders.
A “Please wait” message displays until the search is finished.
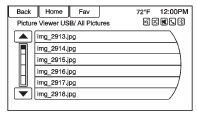
3. A list displays. Select a picture to view.
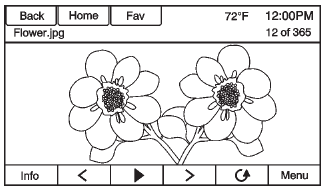
4. Once a picture displays, the following options are available: Info
: Press to turn file name information on or off.
 : Press to display a previous picture
if not in slide show mode.
: Press to display a previous picture
if not in slide show mode.
 : Press to toggle between slide show
mode and manual mode.
: Press to toggle between slide show
mode and manual mode.
 : Press to display a next picture
if not in slide show mode.
: Press to display a next picture
if not in slide show mode.
 : Press to manually rotate a picture
90 degrees counterclockwise.
: Press to manually rotate a picture
90 degrees counterclockwise.
Menu
: Press to open the Picture Viewer Settings screen. Slide Picture Viewer Main, Slideshow Timer, and Shuffle Images display as options for configuring the view of images stored in the system.
If the displayed picture screen is not used within six seconds, the upper and lower bar options will disappear.
Touch-tap the screen to re-display the upper and lower bar.
 Stitcher Internet Radio
Stitcher SmartRadio™ is an Internet radio service that streams news, sports,
and entertainment shows through the audio system. Create personalized, on-demand
stations or discover new shows through ...
 Audio Players
...
Other materials:
Installation Procedure
Cut the front compartment front rail in corresponding locations to fit
the remaining original panel. The sectioning joint should be
trimmed to allow a gap of one-and-one-half-times the metal thickness at the
sectioning joint.
Create a 50 mm (2 in) backing plate from the unused porti ...
Instrument Panel Outer Air Outlet Replacement - Left Side
Preliminary Procedure
Remove instrument panel lower trim pad cover - left side. Refer to
Instrument Panel Lower Trim Pad Cover Replacement.
Remove instrument panel cluster trim plate. Refer to Instrument Panel
Cluster Trim Plate Replacement.
Remove instrument panel cluster lo ...
Rear Compartment Lid Emblem/Nameplate Replacement (Cruze - Right Side)
Rear Compartment Lid Emblem Assembly
Caution: Refer to Exterior Trim Emblem Removal Caution in the Preface
section.
Procedure
The part and surface should be 21°C (70°F) prior to installation. The
vehicle should remain 21°C (70°F) for
one hour after assembly to allow adhesive to deve ...
