Chevrolet Cruze Repair Manual: Removal Procedure
Warning: Refer to Approved Equipment for Collision Repair Warning in the Preface section.
Warning: Refer to Glass and Sheet Metal Handling Warning in the Preface section.
- Disable the SIR System. Refer to SIR Disabling and Enabling.
- Disconnect the negative battery cable. Refer to Battery Negative Cable Disconnection and Connection.
- Remove all related panels and components.
- Visually inspect the damage. Repair as much of the damage as possible.
- Remove the sealers and anti-corrosion materials from the repair area, as necessary. Refer to Anti-Corrosion Treatment and Repair.

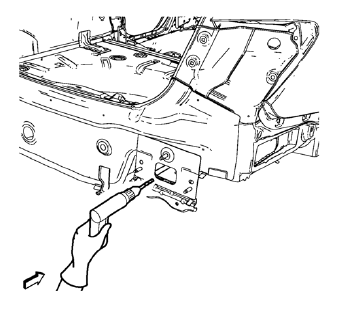
- Locate and mark all the necessary factory welds of the rear bumper impact bar stud plate.
Note: Note the number and location of welds for installation of the service assembly.
- Drill all factory welds.

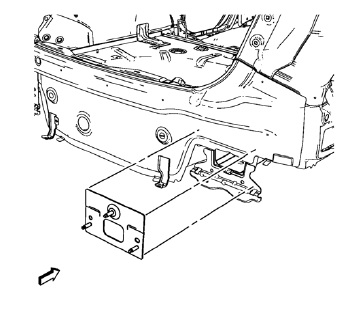
- Remove the rear bumper impact bar stud plate.
 Rear Bumper Impact Bar Stud Plate Replacement (MIG-Brazing)
Note: According to different corrosion warranties, only the
regional mandatory joining methods are allowed. ...
 Installation Procedure
Clean and prepare the attaching surfaces for brazing.
Apply structural adhesive to the attaching surfaces.
Position the rear bumper impact bar stud plate on the vehicle.
Verify ...
Other materials:
How To Indentify Plastic Parts
Plastic parts can be identified by the SAE code, which is usually found on
the rear of the part, and/or by the characteristics of the plastic.
Knowing the type of plastic aids in selecting the proper repair materials and in
selecting the proper repair procedure.
Look for the SAE code s ...
Rear Compartment Lid Emblem/Nameplate Replacement (Bowtie)
Rear Compartment Lid Emblem Assembly
Caution: Refer to Exterior Trim Emblem Removal Caution in the
Preface section.
Procedure
The part and surface should be 21°C (70°F) prior to installation. The
vehicle should remain 21°C (70°F) for
one hour after assembly to allow adhesive to deve ...
Accident With Side Air Bag Module Deployment - Component Replacement and
Inspections
After a collision involving left/right side air bag module deployment,
replace the following components.
Left/right inflatable restraint side impact sensors on the side of the
impact.
Left/right inflatable restraint roof rail module on the side of the
impact.
Inflatable restraint sen ...
