
Chevrolet Cruze Repair Manual: Removal Procedure
Warning: Refer to Approved Equipment for Collision Repair Warning in the Preface section.
Warning: Refer to Collision Sectioning Warning in the Preface section.
Warning: Refer to Glass and Sheet Metal Handling Warning in the Preface section.
- Disable the SIR System. Refer to SIR Disabling and Enabling.
- Disconnect the negative battery cable. Refer to Battery Negative Cable Disconnection and Connection.
- Remove all related panels and components.
- Visually inspect the damage. Repair as much of the damage as possible.
- Remove the sealers and anti-corrosion materials from the repair area, as necessary. Refer to Anti-Corrosion Treatment and Repair.
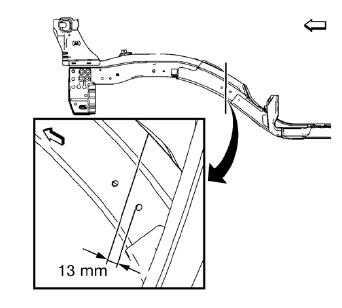
- Create cut lines on the front compartment front rail.
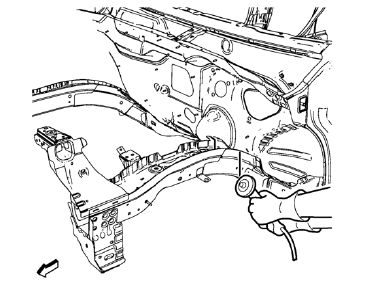
Note: Do not damage any other panels or reinforcements.
- Cut the panel where sectioning is to be performed.
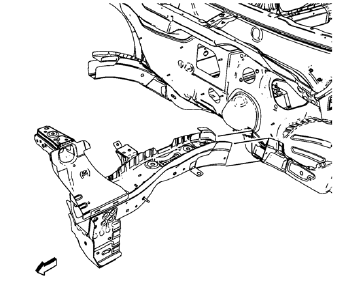
- Remove the damaged front compartment front rail.
 Front Compartment Side Rail Sectioning (Long, MIG-Brazing)
Note: According to different corrosion warranties, only the
regional mandatory joining methods are allowed. ...
 Installation Procedure
Cut the front compartment front rail in corresponding locations to fit
the remaining original panel. The sectioning joint should be
trimmed to allow a gap of one-and-one-half-times the met ...
Other materials:
CD Player
The CD player is capable of playing:
• Most audio CDs
• CD-R
• CD-RW
• MP3, unprotected WMA, and AAC formats
When playing any compatible recordable disc, the sound quality may be reduced
due to the disc, the method of recording, the quality of the music recorded, or
how the disc has b ...
Storing the Tire Sealant and Compressor Kit
The tire sealant and compressor kit is located in the trunk, under the load floor,
behind an access panel.
To remove the kit:
1. Open the trunk.
2. Turn the left knob counterclockwise and the right knob clockwise, 90 degrees,
at the same time. Then pull the access panel rearward and up to r ...
Steering Linkage Inner Tie Rod Replacement (Electronic Power Steering)
Special Tools
CH-6247 Removal and Installation Tool for the Steering Linkage Inner Tie Rod
For equivalent regional tools, refer to Special Tools.
Removal Procedure
Raise and support the vehicle. Refer to Lifting and Jacking the
Vehicle.
Remove the tire and wheel assembly. Refer to ...
