
Chevrolet Cruze Repair Manual: Removal Procedure
Warning: Refer to Approved Equipment for Collision Repair Warning in the Preface section.
Warning: Refer to Glass and Sheet Metal Handling Warning in the Preface section.
- Disable the SIR System. Refer to SIR Disabling and Enabling.
- Disconnect the negative battery cable. Refer to Battery Negative Cable Disconnection and Connection.
- Remove all related panels and components.
- Visually inspect the damage. Repair as much of the damage as possible.
- Remove the sealers and anti-corrosion materials from the repair area, as necessary. Refer to Anti-Corrosion Treatment and Repair.
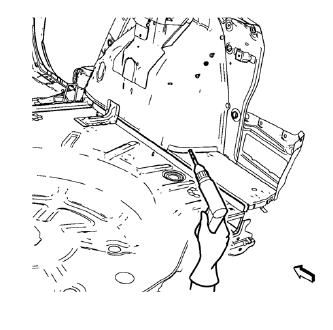
- Locate and mark all the necessary factory welds of the rear floor panel filler.
Note: Note the number and location of welds for installation of the service assembly.
- Drill all factory welds.
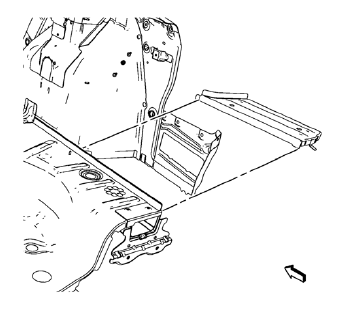
- Remove the rear floor panel filler.
 Rear Floor Panel Filler Replacement (MAG-Welding)
Note: According to different corrosion warranties, only the
regional mandatory joining methods are allowed. ...
 Installation Procedure
Note: If the location of the original plug weld holes can not be
determined, space the plug weld holes every 40 mm (1½ in).
Drill 8 mm (5/16 in) for plug welding along the edges of th ...
Other materials:
Information Displays
Driver Information Center (DIC)
The DIC displays information about your vehicle. It also displays warning messages
if a system problem is detected.
DIC Operation and Displays
The DIC has different displays which can be accessed by using the DIC buttons
on the turn signal lever.
The DIC displ ...
Rear Bumper Impact Bar Replacement
Preliminary Procedure
Remove the rear bumper fascia. Refer to Rear Bumper Fascia Replacement.
Rear Bumper Energy Absorber Nut (Qty: 6)
Caution: Refer to Fastener Caution in the Preface section.
Tighten
40 N·m (30 lb ft)
Rear Bumper Impact Bar
Special Tools and Equipment
...
Power Outlets
The accessory power outlets can be used to plug in electrical equipment, such
as a cell phone or MP3 player.
There is one accessory power outlet located on the center floor console and one
on the rear of the center floor console. These outlets are powered when the key
is in ON/ RUN or ACC/ACC ...
