Chevrolet Cruze Repair Manual: Installation Procedure
Note: If the location of the original plug weld holes can not be determined, space the plug weld holes every 40 mm (1½ in).
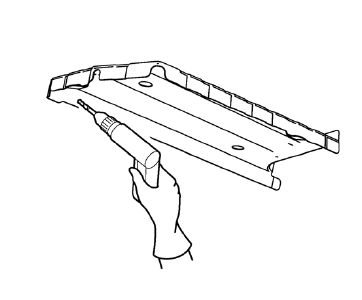
- Drill 8 mm (5/16 in) for plug welding along the edges of the rear floor panel filler as noted from the original panel.
- Clean and prepare the attaching surfaces for welding.
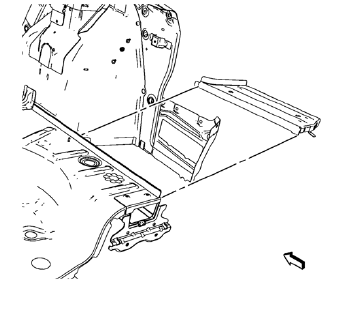
- Position the rear floor panel filler on the vehicle.
- Verify the fit of the rear floor panel filler.
- Clamp the rear floor panel filler into position.
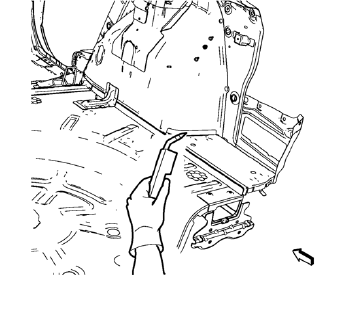
- Plug weld accordingly.
- Apply the sealers and anti-corrosion materials to the repair area, as necessary. Refer to Anti-Corrosion Treatment and Repair.
- Paint the repaired area. Refer to Basecoat/Clearcoat Paint Systems.
- Install all related panels and components.
- Connect the negative battery cable. Refer to Battery Negative Cable Disconnection and Connection.
- Enable the SIR system. Refer to SIR Disabling and Enabling.
 Removal Procedure
Warning: Refer to Approved Equipment for Collision Repair Warning in the
Preface section.
Warning: Refer to Glass and Sheet Metal Handling Warning in the Preface section.
Disable the SIR Syst ...
 Rear Floor Panel Filler Replacement (MIG-Brazing)
Note: According to different corrosion warranties, only the
regional mandatory joining methods are allowed. ...
Other materials:
Installation Procedure
Clean and prepare the attaching surfaces for welding.
Position the roof rear header panel (1) on the vehicle.
Verify the fit of the panel.
Clamp the roof rear header panel into position.
Spot weld accordingly as noted from the original panel.
Apply the sealer ...
Front Fender Emblem/Nameplate Replacement (1.8L 2H0 or 2.0L Diesel)
Front Fender Emblem Assembly
Caution: Refer to Exterior Trim Emblem Removal Caution in the
Preface section.
Procedure
The part and surface should be 21°C (70°F) prior to installation. The
vehicle should remain 21°C (70°F) for
one hour after assembly to allow adhesive to develop suff ...
Safety System Check
Now and then, check that the safety belt reminder light, safety belts, buckles,
latch plates, retractors, and anchorages are all working properly.
Look for any other loose or damaged safety belt system parts that might keep
a safety belt system from doing its job. See your dealer to have it rep ...
