Chevrolet Cruze Owners Manual: Taillamps, Turn Signal, Sidemarker, Stoplamps, and Back-Up Lamps
Trunk Deck Inboard Taillamps
1. Open the trunk.
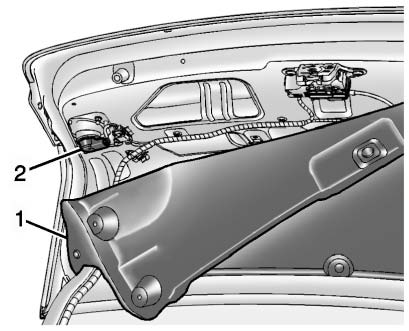
2. Remove the trunk deck trim cover (1).
3. Remove the bulb socket (2) by turning counterclockwise and pulling straight out.
4. Remove the bulb from the socket.
5. Install the new bulb in the bulb socket.
6. Install the bulb socket by turning clockwise.
7. Install the trunk deck trim cover.
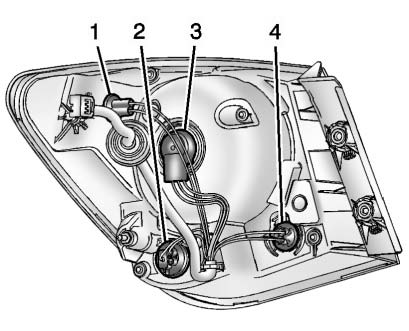
1. Sidemarker Lamp
2. Turn Signal Lamp
3. Stoplamp/Taillamp
4. Back-up Lamp
To replace any one of these bulbs:
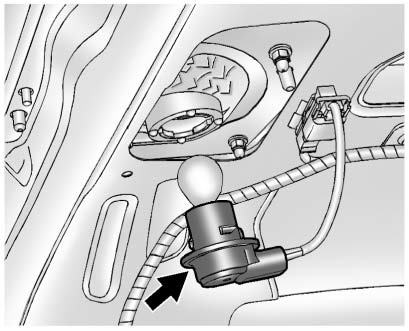
Stoplamp/Taillamp, Turn Signal, Back-up, and Rear Sidemarker Lamp
1. Open the trunk.
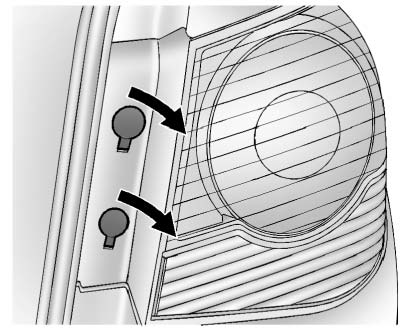
2. Open the two screw covers.
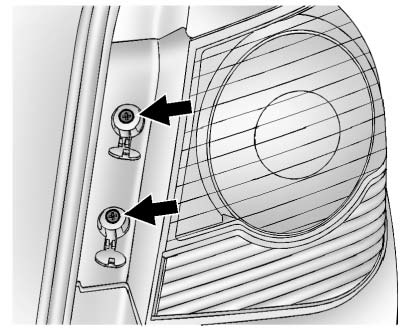
3. Remove the two screws that secure the taillamp assembly.
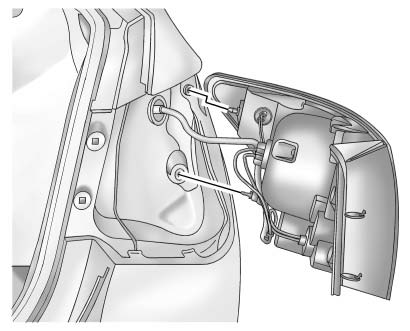
4. Remove the taillamp assembly by pulling it straight back.
5. Remove the bulb socket from the taillamp assembly by turning it counterclockwise.
6. Install a new bulb into the bulb socket.
7. Install the bulb socket into the taillamp assembly by turning it clockwise.
8. Install the taillamp assembly and tighten the two screws.
9. Close the two screw covers.
 Headlamps, Front Turn Signal and Parking Lamps
1. Parking/Turn Signal Lamp
2. High-Beam Headlamp/ Low-Beam Headlamp and DRL
High-Beam Headlamp/ Low-Beam Headlamp and DRL
1. Open the hood
2. For the driver side bulb, remove the windshield was ...
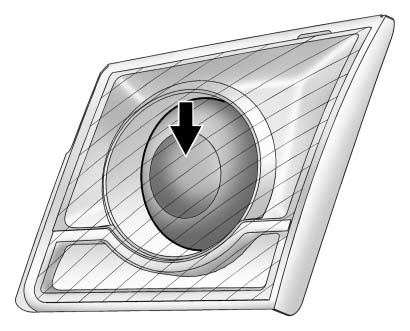
 License Plate Lamp
To replace the license plate lamp bulb:
1. Remove the two screws from the license plate lamp assembly.
2. Turn and pull the license plate lamp assembly down.
3. Turn the bulb socket countercloc ...
Other materials:
Hood Primary Latch Release Cable Replacement
Preliminary Procedure
Remove hood primary latch release cable handle. Refer to Hood Primary
Latch Release Cable Handle Replacement.
Remove the front bumper fascia. Refer to Front Bumper Fascia Replacement
Remove the radiator grille support. Refer to Radiator Grille
Reinforcem ...
Bluetooth
Overview
For vehicles equipped with Bluetooth capability, the system can interact with
many cell phones and devices, allowing:
• Placing and receiving hands-free calls.
• Sharing of the cell phone’s address book or contact list with the vehicle. The
phone book will only display when that phon ...
Front Side Door Trim Replacement
Front Side Door Pull Handle Bolt
Caution: Refer to Fastener Caution in the Preface section.
Tighten
2 N·m (18 lb in)
Front Side Door Inside Handle Bolt Finish Cap
Tip
Pull handle back to remove cap. Use suitable tool to unsnap.
Front Side Door Inside Handle Bolt
Tighten
...
