Chevrolet Cruze Owners Manual: Headlamps, Front Turn Signal and Parking Lamps
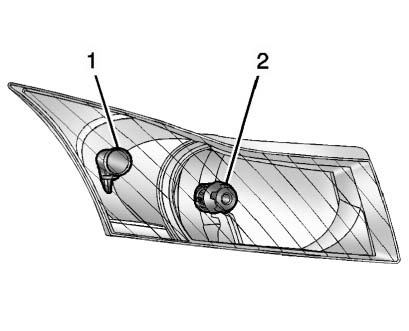
1. Parking/Turn Signal Lamp 2. High-Beam Headlamp/ Low-Beam Headlamp and DRL
High-Beam Headlamp/ Low-Beam Headlamp and DRL
1. Open the hood
2. For the driver side bulb, remove the windshield washer bottle filler neck by
firmly pulling it straight up and out of the bottle.
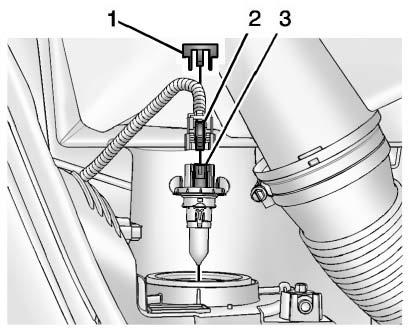
3. Remove the connector retaining tab (1).
4. Disconnect the wiring harness connector from the bulb (3) by pressing the connector release (2) and pulling straight back.
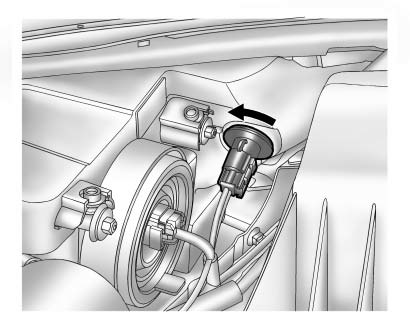
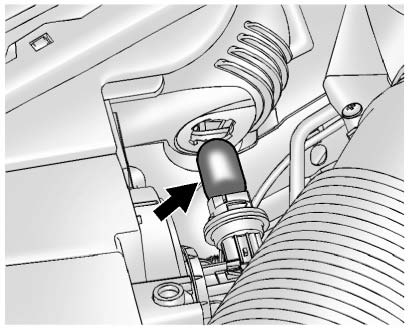
5. Remove the bulb (3) from the headlamp assembly by turning counterclockwise and pulling straight back.
6. Install the new bulb in the headlamp assembly by turning clockwise.
7. Install the wiring harness connector to the bulb. Be sure the connector release (2) locks into place.
8. Install the connector retaining tab (1).
9. For the driver side, reinstall the windshield washer bottle filler neck by firmly pushing it straight into the bottle. Ensure that the filler neck clip engages into the underhood electrical center retainer.
Parking/Turn Signal Lamp
1. Open the hood.
2. For the driver side bulb, remove the windshield washer bottle filler neck by firmly pulling it straight up and out of the bottle.
3. Remove the parking/turn signal lamp bulb socket from the headlamp assembly by turning counterclockwise.
4. Remove the bulb from the bulb socket.
5. Install the new bulb in the bulb socket.
6. Install the bulb socket into the headlamp assembly by turning clockwise.
7. For the driver side, reinstall the windshield washer bottle filler neck by firmly pushing it straight into the bottle. Ensure that the filler neck clip engages into the underhood electrical center retainer.
 Halogen Headlamps
WARNING
Halogen bulbs have pressurized gas inside and can burst if you drop or scratch
the bulb. You or others could be injured. Be sure to read and follow the instructions
on the bulb package. ...
 Taillamps, Turn Signal, Sidemarker, Stoplamps, and Back-Up Lamps
Trunk Deck Inboard Taillamps
1. Open the trunk.
2. Remove the trunk deck trim cover (1).
3. Remove the bulb socket (2) by turning counterclockwise and pulling straight out.
4. Remove the bul ...
Other materials:
Forward Lamp Wiring Harness Replacement
Preliminary Procedures
Remove the front bumper. Refer to Front Bumper Fascia Replacement.
Remove the headlamp. Refer to Headlamp Replacement.
Using a scan tool, check for DTCs.
Forward Lamp Wiring Harness
Tip
Create a work area large enough to lay out the new and old wiring
ha ...
Removal Procedure
Warning: Refer to Approved Equipment for Collision Repair Warning in the
Preface section.
Warning: Refer to Glass and Sheet Metal Handling Warning in the Preface section.
Disable the SIR System. Refer to SIR
Disabling and Enabling.
Disconnect the negative battery cable. Refer to ...
Reclining Seatbacks
WARNING
If either seatback is not locked, it could move forward in a sudden stop or
crash. That could cause injury to the person sitting there.
Always push and pull on the seatbacks to be sure they are locked.
To recline the seatback:
1. Lift the lever.
If necessary, move the safety belt ou ...
