Chevrolet Cruze Owners Manual: Headlamps, Front Turn Signal and Parking Lamps
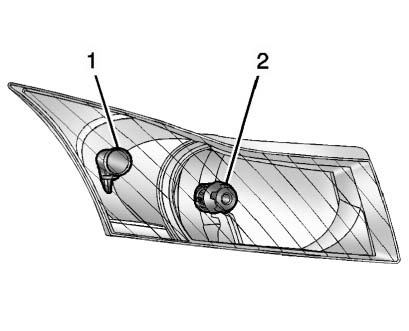
1. Parking/Turn Signal Lamp 2. High-Beam Headlamp/ Low-Beam Headlamp and DRL
High-Beam Headlamp/ Low-Beam Headlamp and DRL
1. Open the hood
2. For the driver side bulb, remove the windshield washer bottle filler neck by
firmly pulling it straight up and out of the bottle.
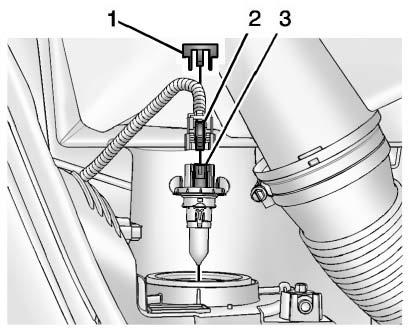
3. Remove the connector retaining tab (1).
4. Disconnect the wiring harness connector from the bulb (3) by pressing the connector release (2) and pulling straight back.
5. Remove the bulb (3) from the headlamp assembly by turning counterclockwise and pulling straight back.
6. Install the new bulb in the headlamp assembly by turning clockwise.
7. Install the wiring harness connector to the bulb. Be sure the connector release (2) locks into place.
8. Install the connector retaining tab (1).
9. For the driver side, reinstall the windshield washer bottle filler neck by firmly pushing it straight into the bottle. Ensure that the filler neck clip engages into the underhood electrical center retainer.
Parking/Turn Signal Lamp
1. Open the hood.
2. For the driver side bulb, remove the windshield washer bottle filler neck by firmly pulling it straight up and out of the bottle.
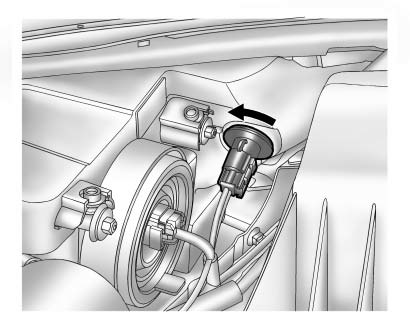
3. Remove the parking/turn signal lamp bulb socket from the headlamp assembly by turning counterclockwise.
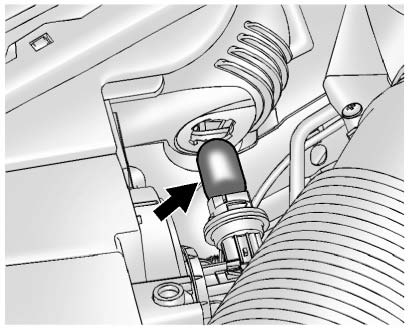
4. Remove the bulb from the bulb socket.
5. Install the new bulb in the bulb socket.
6. Install the bulb socket into the headlamp assembly by turning clockwise.
7. For the driver side, reinstall the windshield washer bottle filler neck by firmly pushing it straight into the bottle. Ensure that the filler neck clip engages into the underhood electrical center retainer.
 Halogen Headlamps
WARNING
Halogen bulbs have pressurized gas inside and can burst if you drop or scratch
the bulb. You or others could be injured. Be sure to read and follow the instructions
on the bulb package. ...
 Taillamps, Turn Signal, Sidemarker, Stoplamps, and Back-Up Lamps
Trunk Deck Inboard Taillamps
1. Open the trunk.
2. Remove the trunk deck trim cover (1).
3. Remove the bulb socket (2) by turning counterclockwise and pulling straight out.
4. Remove the bul ...
Other materials:
Turn Signal Switch Replacement
Preliminary Procedure
Remove the steering column upper trim cover. Refer to Steering Column
Upper Trim Cover Replacement.
Remove the steering column lower trim cover. Refer to Steering Column
Lower Trim Cover Replacement.
Turn Signal Switch
Procedure
Disconnect any elec ...
Tire Inspection
We recommend that the tires, including the spare tire, if the vehicle has one,
be inspected for signs of wear or damage at least once a month.
Replace the tire if:
• The indicators at three or more places around the tire can be seen.
• There is cord or fabric showing through the tire's rubb ...
Configure Menu
The Configuration Menu is used to adjust features and preferences, such as Sound,
Radio, Nav (Navigation), Display, or Time Settings.
1. Press the Config screen button on the Home Page.
2. Touch-tap the scroll bar until the desired option displays. Select the desired
settings to change.
S ...
