Chevrolet Cruze Infotainment System: Pictures
Pictures can only be viewed using USB devices. If pictures are on an SD card, transfer to a USB device or use a USB-SD adapter. File sizes above approximately four mega pixels may not show. Only jpeg, bmp, gif, and png files are supported.
1. Press the Pictures screen button on the Home Page.
2. The system does a search to find the picture folders.
A “Please wait” message displays until the search is finished.
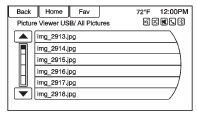
3. A list displays. Select a picture to view.
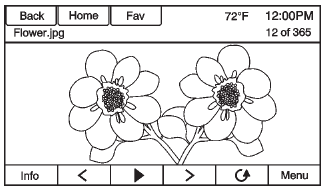
4. Once a picture displays, the following options are available: Info
: Press to turn file name information on or off.
 : Press to display a previous picture
if not in slide show mode.
: Press to display a previous picture
if not in slide show mode.
 : Press to toggle between slide show
mode and manual mode.
: Press to toggle between slide show
mode and manual mode.
 : Press to display a next picture
if not in slide show mode.
: Press to display a next picture
if not in slide show mode.
 : Press to manually rotate a picture
90 degrees counterclockwise.
: Press to manually rotate a picture
90 degrees counterclockwise.
Menu
: Press to open the Picture Viewer Settings screen. Slide Picture Viewer Main, Slideshow Timer, and Shuffle Images display as options for configuring the view of images stored in the system.
If the displayed picture screen is not used within six seconds, the upper and lower bar options will disappear.
Touch-tap the screen to re-display the upper and lower bar.
 Stitcher Internet Radio
Stitcher SmartRadio™ is an Internet radio service that streams news, sports,
and entertainment shows through the audio system. Create personalized, on-demand
stations or discover new shows through ...
 Audio Players
...
Other materials:
Ultrasonic Parking Assist
The Ultrasonic Rear Parking Assist (URPA) system assists the driver with parking
and avoiding objects while in R (Reverse). URPA operates at speeds less than 8 km/h
(5 mph). The sensors on the rear bumper detect objects up to 2.5m (8 ft) behind
the vehicle, and at least 20 cm (8 in) off the gr ...
Instrument Panel Illumination Control
This feature controls the brightness of the instrument panel controls and infotainment
display screen. The thumbwheel is to the left of the steering column on the instrument
panel.
(Instrument Panel Brightness):
Move the thumbwheel up or down and hold, to brighten or dim the instrument pan ...
Battery Disconnect Warning
Warning: Unless directed otherwise, the ignition and start switch
must be in the OFF or LOCK position, and all electrical loads must be
OFF before servicing any electrical component. Disconnect the negative battery
cable to prevent an electrical spark should a tool or
equipment come in contact ...
