Chevrolet Cruze Repair Manual: Rear Compartment Lid Emblem/Nameplate Replacement (Bowtie)
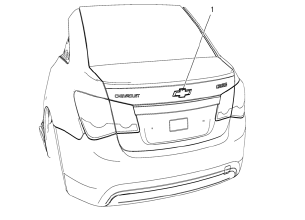
Rear Compartment Lid Emblem Assembly
Caution: Refer to Exterior Trim Emblem Removal Caution in the Preface section.
Procedure
- The part and surface should be 21°C (70°F) prior to installation. The vehicle should remain 21°C (70°F) for one hour after assembly to allow adhesive to develop sufficient bond strength
- Use a Heat Gun or equivalent to remove the old nameplate. Clean all adhesive from the rear compartment panel and wipe the surface dry with a clean lint-free towel prior to installing the new nameplate.
- When removing protective liners from the adhesive tape, be careful not to touch tape with hands and do not allow tape to come in contact with dirt or any foreign matter prior to adhesion.
- Close the rear compartment lid prior to adhesion.
- Using the palm of the hand, wet out the emblem to the rear compartment lid to ensure full adhesion of the emblem is made.
 Front Fog Lamp Bezel Replacement
Preliminary Procedure
Remove front bumper fascia. Refer to Front B 1. umper Fascia
Replacement.
Remove front fog lamp. Refer to Front Fog Lamp Replacement.
Front Fog Lamp Bezel Scre ...
 Rear Compartment Lid Emblem/Nameplate Replacement (Chevrolet)
Rear Compartment Lid Emblem Assembly
Caution: Refer to Exterior Trim Emblem Removal Caution in the Preface
section.
Procedure
The part and surface should be 21°C (70°F) prior to installati ...
Other materials:
StabiliTrak® OFF Light
This light comes on briefly while starting the engine. If it does not, have the
vehicle serviced by your dealer.
This light comes on when the StabiliTrak system is turned off.
If StabiliTrak is off, the Traction Control System (TCS) is also off.
If the TCS is off, the system does not assist i ...
Air Conditioning Compressor Replacement (1.6L LDE, LXV, and 1.8L 2H0)
Preliminary Procedures
Recover the refrigerant. Refer to Refrigerant Rec . overy and
Recharging.
Remove drive belt. Refer to Drive Belt Replacement.
Raise and support the vehicle. Refer to Lifting and Jacking the Vehicle.
Disconnect the A/C compressor electrical connector
Re ...
Front Side Door Wiring Harness Replacement
Preliminary Procedure
Remove the front side door inner panel trim. Refer to Front Side Door Trim
Replacement.
Front Side Door Wiring Harness
Warning: Unless directed otherwise, the ignition and start switch must be
in the OFF or LOCK position, and all electrical
loads must be OFF before ...
