Chevrolet Cruze Repair Manual: Removal Procedure
Warning: Refer to Approved Equipment for Collision Repair Warning in the Preface section.
Warning: Refer to Collision Sectioning Warning in the Preface section.
Warning: Refer to Glass and Sheet Metal Handling Warning in the Preface section
- Disable the SIR System. Refer to SIR Disabling and Enabling.
- Disconnect the negative battery cable. Refer to Battery Negative Cable Disconnection and Connection.
- Remove all related panels and components.
- Visually inspect the damage. Repair as much of the damage as possible.
- Remove the sealers and anti-corrosion materials from the repair area, as necessary. Refer to Anti-Corrosion Treatment and Repair.
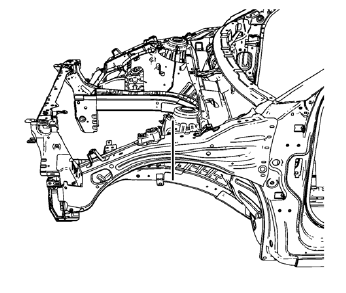
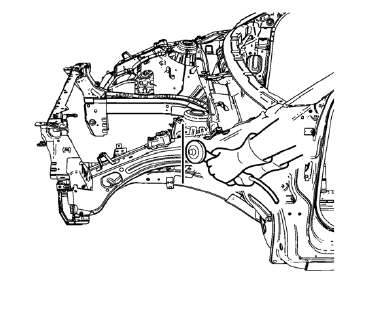
- Create cut lines on the front compartment upper side rail.
Note: Do not damage any inner panels or reinforcements.
- Cut the panel where sectioning is to be performed.
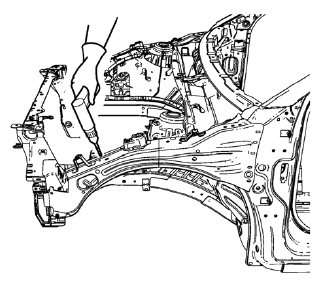
- Locate and mark all the necessary factory welds of the front compartment upper side rail.
- Drill all factory welds. Note the number and location of welds for installation of the service assembly.
- Remove the damaged front 10. compartment upper side rail.
 Front Compartment Upper Side Rail Sectioning (MAG-Welding)
Note: According to different corrosion warranties, only the
regional mandatory joining methods are allowed. ...
 Installation Procedure
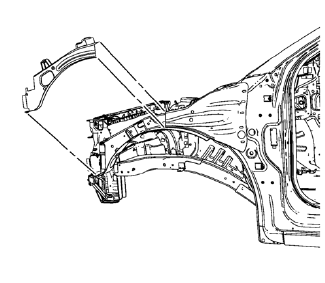
Cut the front compartment upper side rail in corresponding locations to
fit the remaining original panel. The sectioning joint should
be trimmed to allow a gap of one-and-one-half-times th ...
Other materials:
Auxiliary Devices
This vehicle has an auxiliary input jack in the center console. Possible auxiliary
audio sources include:
• Laptop computer
• MP3 player
• Tape player
This jack is not an audio output.
Do not plug headphones into the auxiliary input jack. Set up any auxiliary device
while the vehicle is in ...
Navigation
OnStar navigation requires the Directions and Connections service plan.
Press to receive directions or have
them sent to the vehicle navigation screen, if equipped.
Destinations can also be forwarded to the vehicle from MapQuest.com.
The OnStar mapping database is continuously updated. For cov ...
Reporting Safety Defects to General Motors
In addition to notifying NHTSA (or Transport Canada) in a situation like this,
notify General Motors.
Call 1-800-222-1020, or write:
Chevrolet Motor Division
Chevrolet Customer Assistance
Center
P.O. Box 33170
Detroit, MI 48232-5170
In Canada, call 1-800-263-3777
(English) or 1-800-263-785 ...
