Chevrolet Cruze Repair Manual: Removal Procedure
Warning: Refer to Approved Equipment for Collision Repair Warning in the Preface section.
Warning: Refer to Collision Sectioning Warning in the Preface section.
Warning: Refer to Glass and Sheet Metal Handling Warning in the Preface section.
- Disable the SIR System. Refer to SIR Disabling and Enabling.
- Disconnect the negative battery cable. Refer to Battery Negative Cable Disconnection and Connection.
- Remove all related panels and components.
- Visually inspect the damage. Repair as much of the damage as possible.
- Remove the sealers and anti-corrosion materials from the repair area, as necessary. Refer to Anti-Corrosion Treatment and Repair.
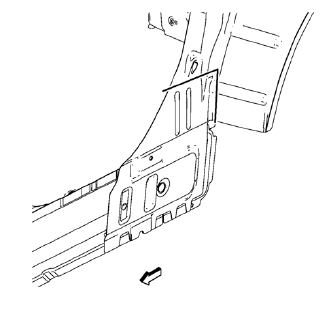
- Create cut lines on the body side inner panel.
Note: Do not damage any inner panels or reinforcements.
- Cut the panel where sectioning is to be performed.

- Locate and mark all the necessary factory welds of the body side inner panel.
- Drill all factory welds. Note the number and location of welds for installation of the service assembly.
- Remove the body side inner panel.
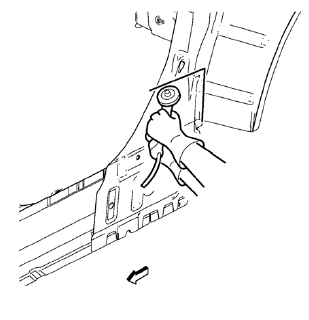
- Locate and mark all the necessary factory welds of the rocker inner panel.
- Drill all factory welds. Note the number and location of welds for installation of the service assembly.
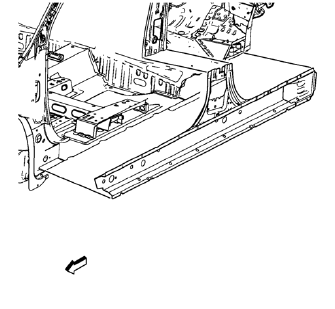
- Remove the damaged rocker inner panel.
 Rocker Inner Panel Replacement (MAG-Welding)
Note: According to different corrosion warranties, only the
regional mandatory joining methods are allowed. ...
 Installation Procedure
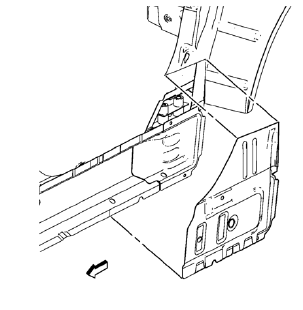
Align the rocker inner panel.
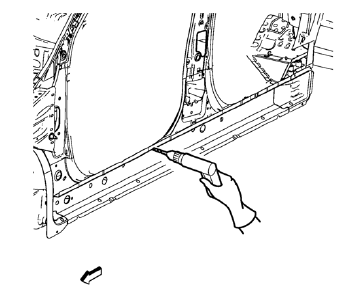
Drill 8 mm (5/16 in) for plug welding along the edges of the quarter
outer panel as noted from the original panel.
Clean and prepare the attaching ...
Other materials:
Lamp Messages
AUTOMATIC LIGHT CONTROL ON
This message is displayed when the automatic light control has been turned on.
AUTOMATIC LIGHT CONTROL OFF
This message is displayed when the automatic light control has been turned off.
XXX TURN INDICATOR FAILURE
When one of the turn signals is out, this message disp ...
Infotainment
Read the following pages to become familiar with the audio system's features.
WARNING
Taking your eyes off the road for extended periods could cause a crash resulting
in injury or death to you or others. Do not give extended attention to infotainment
tasks while driving.
This system provi ...
Safety Belt Use During Pregnancy
Safety belts work for everyone, including pregnant women. Like all occupants,
they are more likely to be seriously injured if they do not wear safety belts.
A pregnant woman should wear a lap-shoulder belt, and the lap portion should
be worn as low as possible, below the rounding, throughout ...
