Chevrolet Cruze Repair Manual: Removal Procedure
Warning: Refer to Approved Equipment for Collision Repair Warning in the Preface section.
Warning: Refer to Collision Sectioning Warning in the Preface section.
Warning: Refer to Glass and Sheet Metal Handling Warning in the Preface section.
- Disable the SIR System. Refer to SIR Disabling and Enabling.
- Disconnect the negative battery cable. Refer to Battery Negative Cable Disconnection and Connection.
- Remove all related panels and components.
- Visually inspect the damage. Repair as much of the damage as possible.
- Remove the sealers and anti-corrosion materials from the repair area, as necessary. Refer to Anti-Corrosion Treatment and Repair.
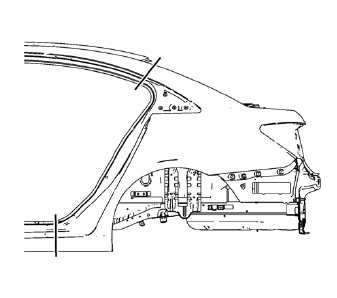
- Create cut lines on the quarter outer panel.
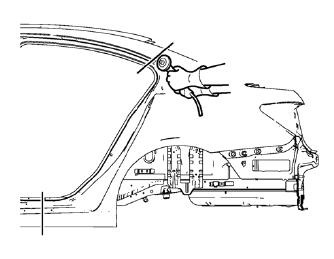
Note: Do not damage any inner panels or reinforcements.
- Cut the panel where sectioning is to be performed.
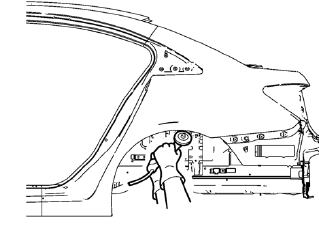
- Open the wheelhouse flanging.
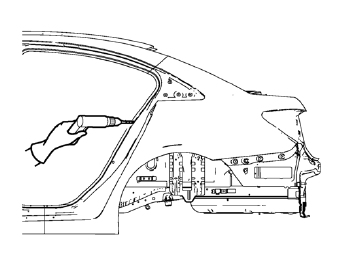
- Locate and mark all the necessary factory welds of the quarter outer panel.
- Drill all factory welds. Note the number and location of welds for installation of the service assembly.
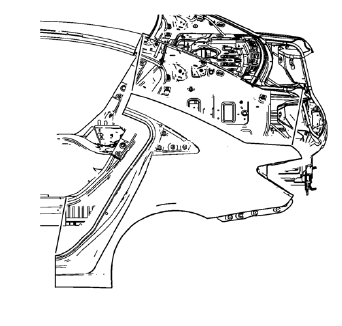
- Remove the damaged quarter outer panel.
 Quarter Outer Panel Sectioning (MIG-Brazing)
Special Tools
BO-6396 Bonding Pliers
BO-6392 Flanging Tool Kit
For equivalent regional tools, refer to Special Tools.
Note: According to different corrosion warranties, only the
regional m ...
 Installation Procedure
Cut the quarter outer panel in corresponding locations to fit the
remaining original panel. The sectioning joint should be trimmed to
allow a gap of one-and-one-half-times the metal thickn ...
Other materials:
Head Restraints
The vehicle's front and rear seats have adjustable head restraints in the outboard
seating positions.
WARNING
With head restraints that are not installed and adjusted properly, there is
a greater chance that occupants will suffer a neck/ spinal injury in a crash. Do
not drive until the h ...
Removal Procedure
Warning: Refer to Approved Equipment for Collision Repair Warning in the
Preface section.
Warning: Refer to Glass and Sheet Metal Handling Warning in the Preface section.
Disable the SIR System. Refer to SIR Disabling and Enabling
Disconnect the negative battery cable. Refer to Batte ...
Air Conditioning Evaporator Hose Assembly Replacement
Preliminary Procedures
Recover the refrigerant. Refer to Refrigerant Recovery and Recharging.
Remove the headlamp - right side. Refer to Headlamp Replacement.
Loosen power steering fluid reservoir screw.
Remove brake pipes from the dash lower extension panel.
Remove engine mount. Ref ...
