Chevrolet Cruze Repair Manual: Thread Inserts
General Purpose Thread Repair Kits.
These kits are available commercially.
Repair Procedure
Warning: Refer to Safety Glasses Warning in the Preface section.
Note: Refer to the thread repair kit manufacturer's instructions regarding the size of the drill and tap to use. Avoid any buildup of chips. Back out the tap every few turns and remove the chips.
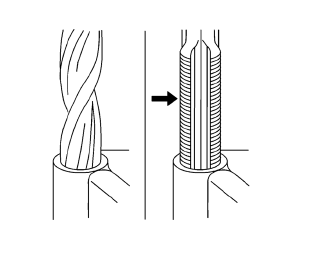
- Determine the size, the pitch, and the depth of the damaged thread. If necessary, adjust the stop collars on the cutting tool and tap to the required depth.
- Drill out the damaged threads. Clean out any chips.
- Lubricate the tap with light engine oil. Tap the hole. Clean the threads.
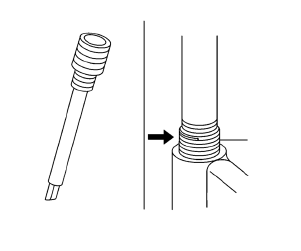
- Thread the thread insert onto the mandrel of the installer. Engage the tang of the insert onto the end of the mandrel.
Note: The insert should be flush to one turn below the surface.
- Lubricate the insert with light engine oil, except when installing in aluminum and install the insert.
- If the tang of the insert does not break off when backing out the installer, break the tang off with a drift.
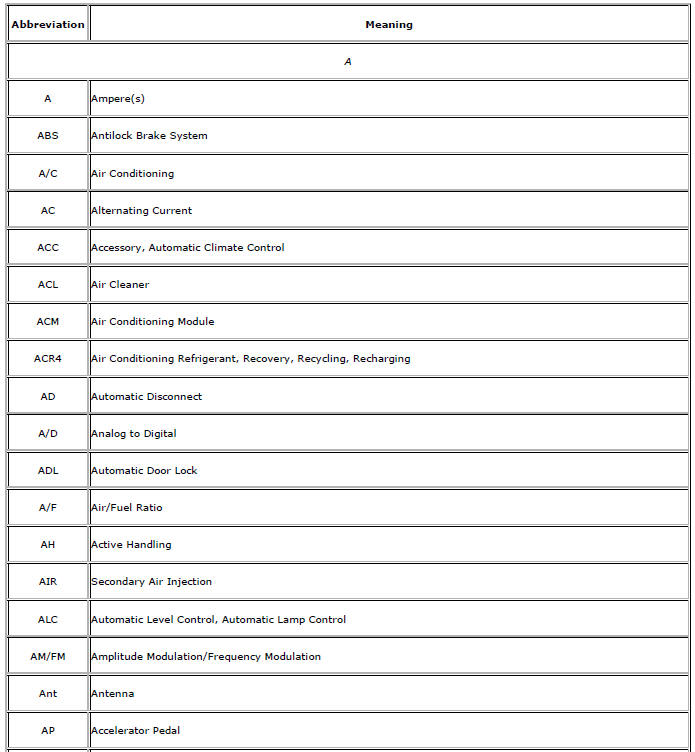
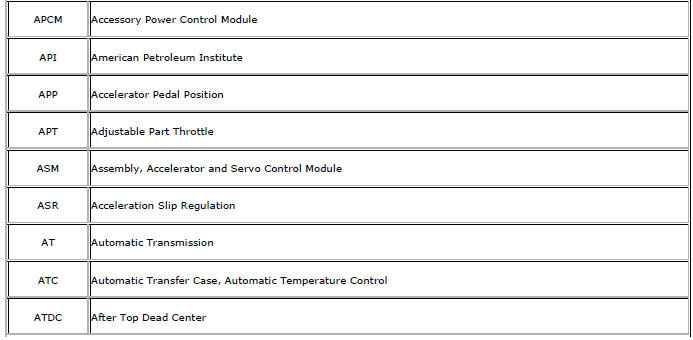
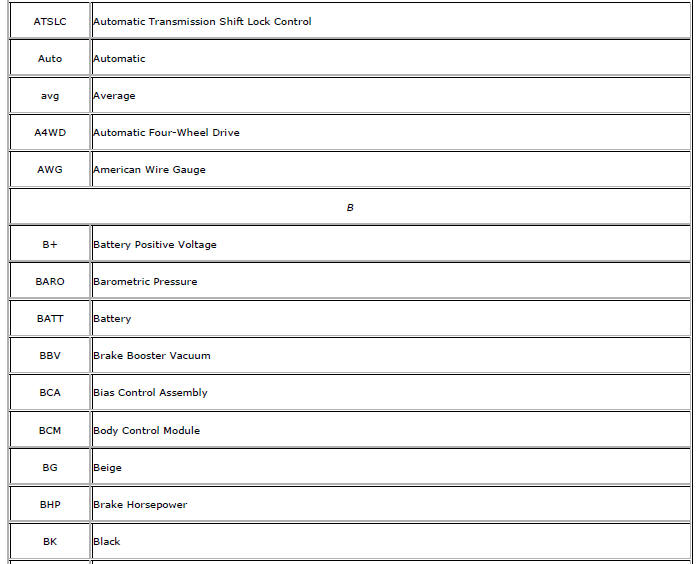
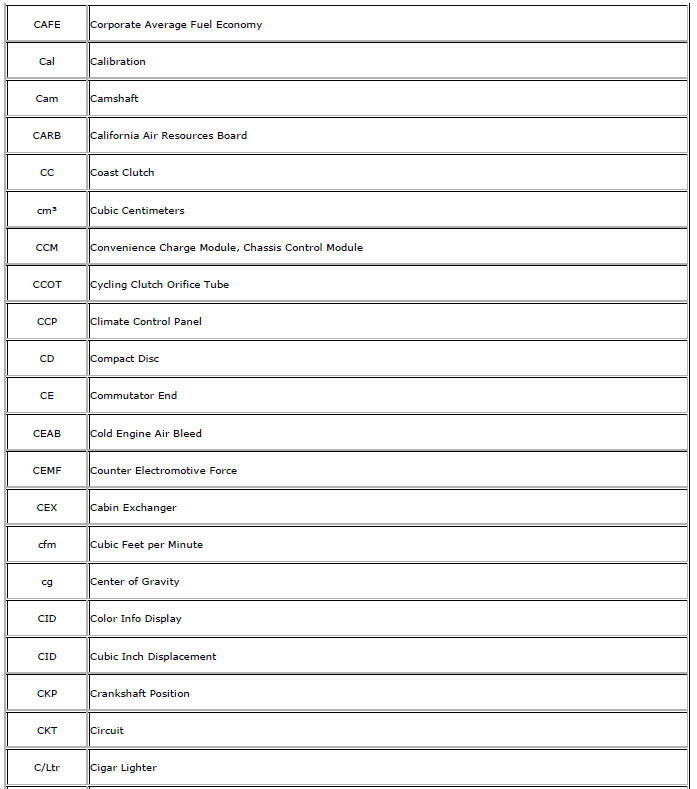
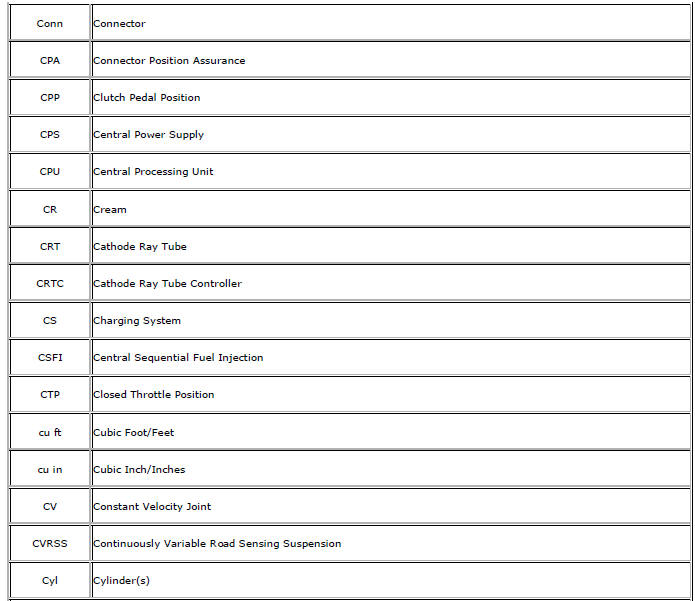
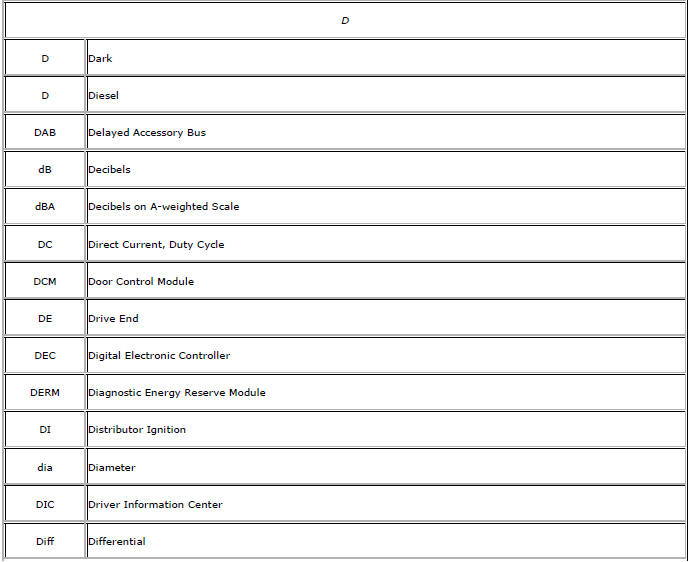
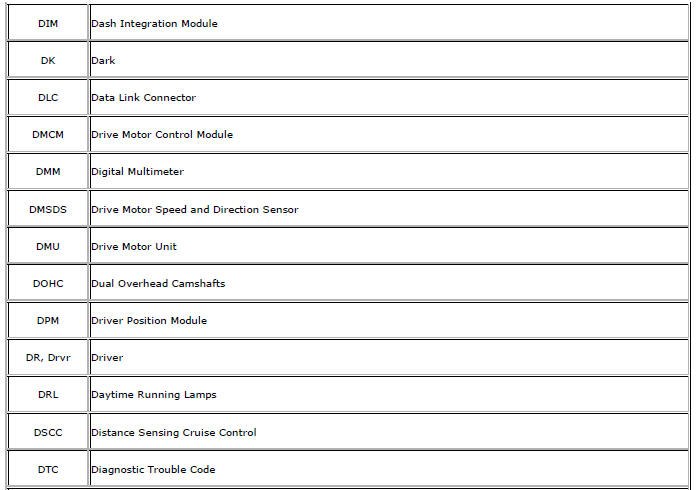
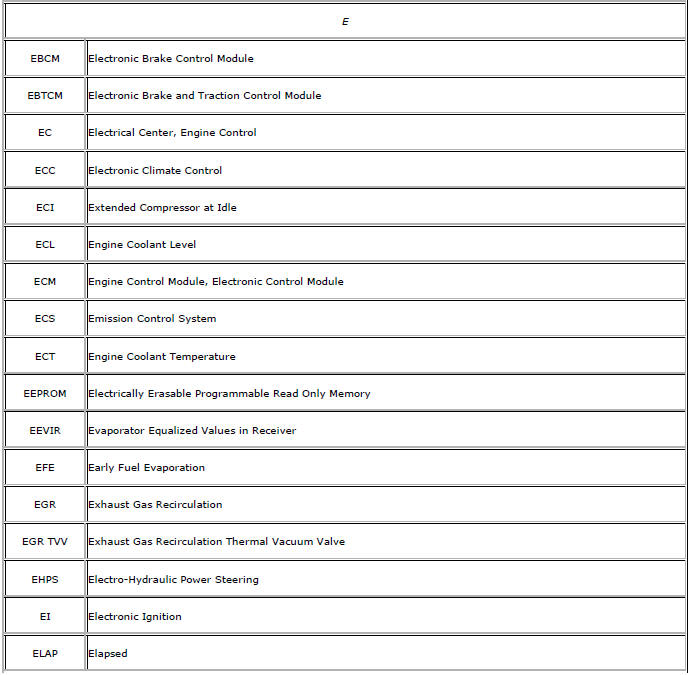
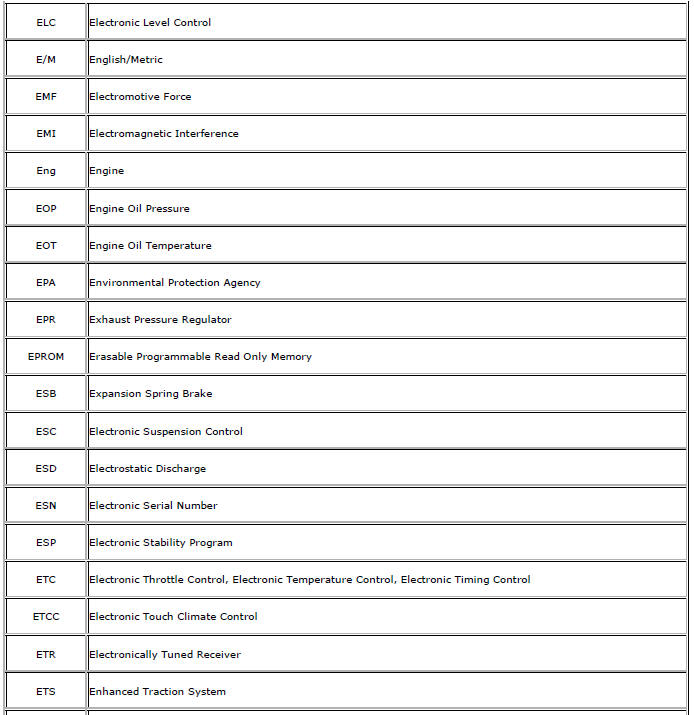
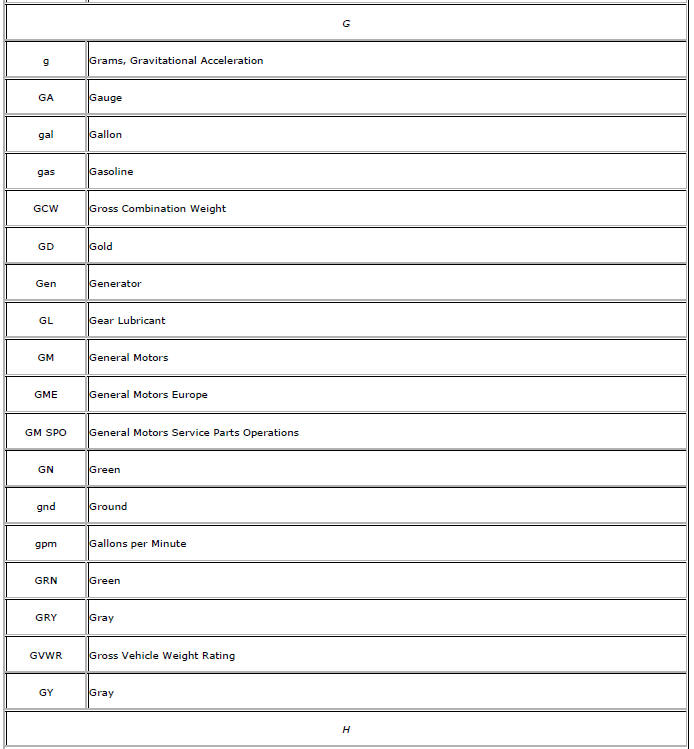
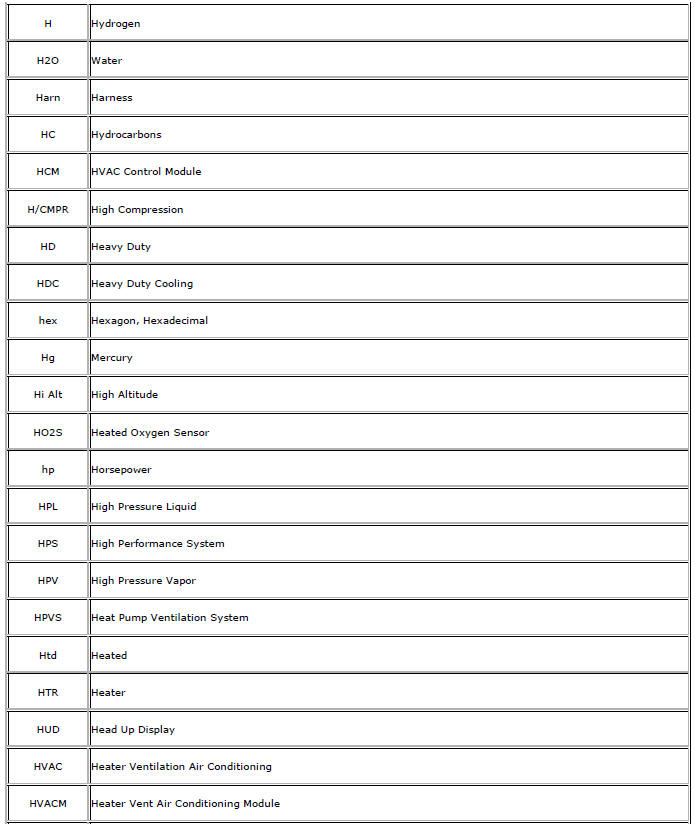
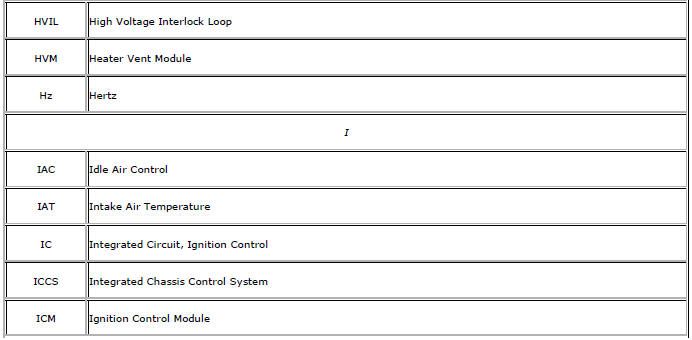
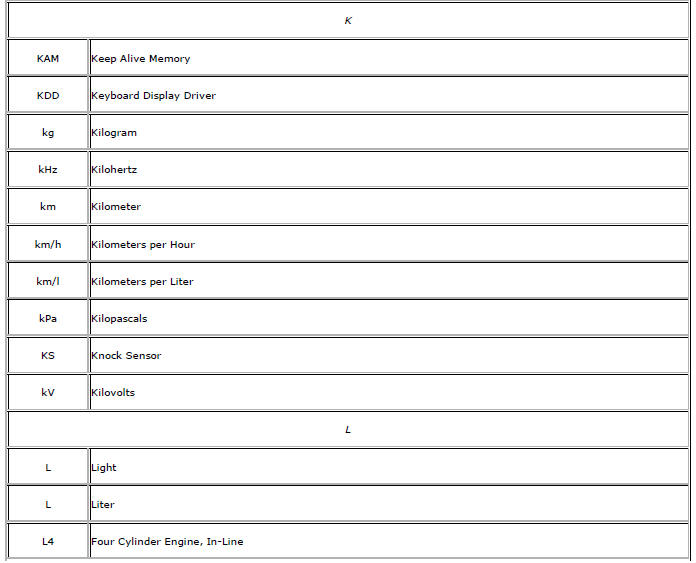
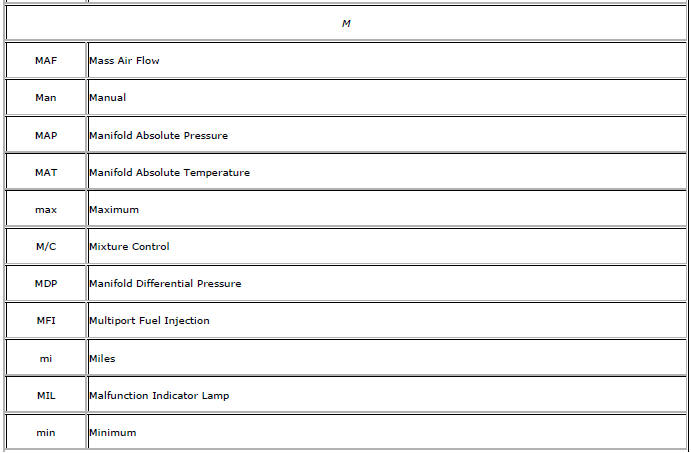
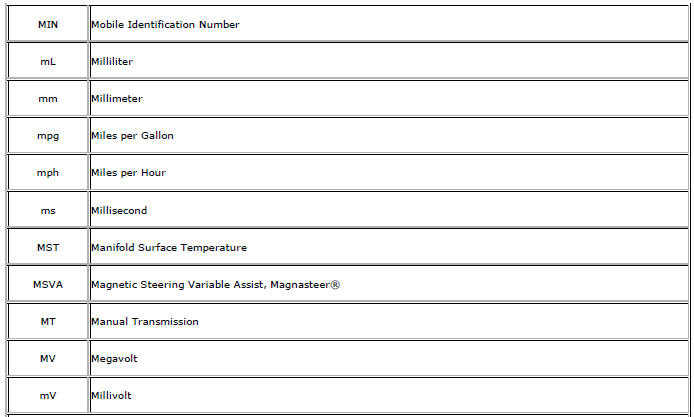
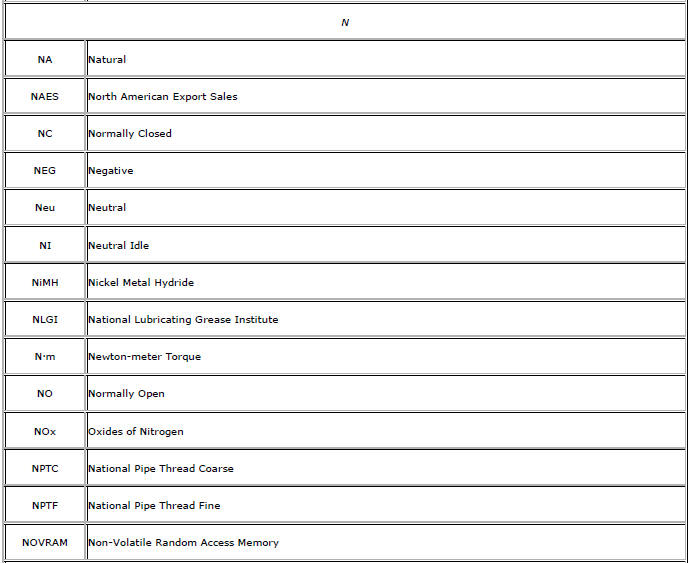
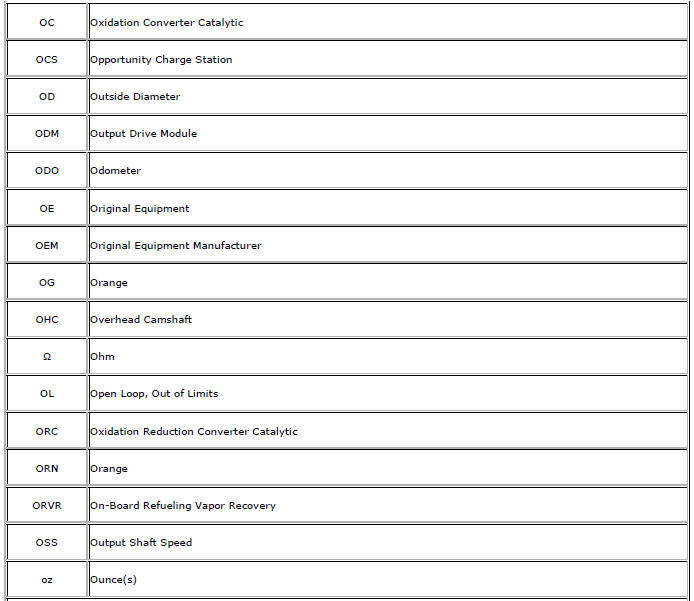
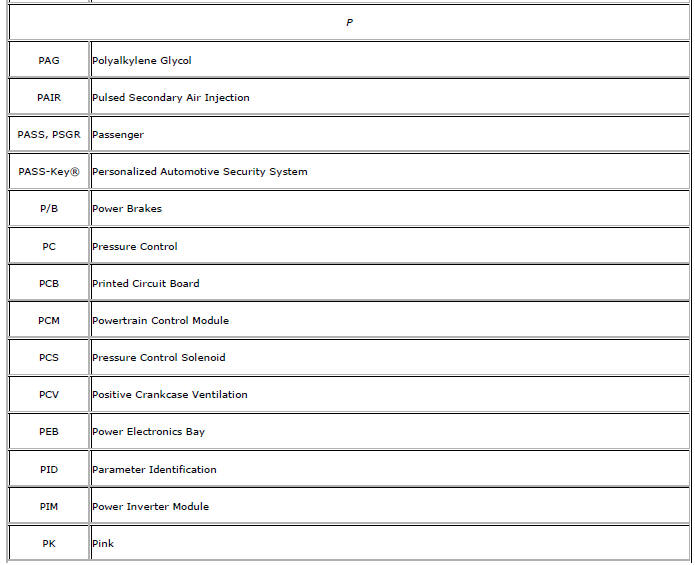
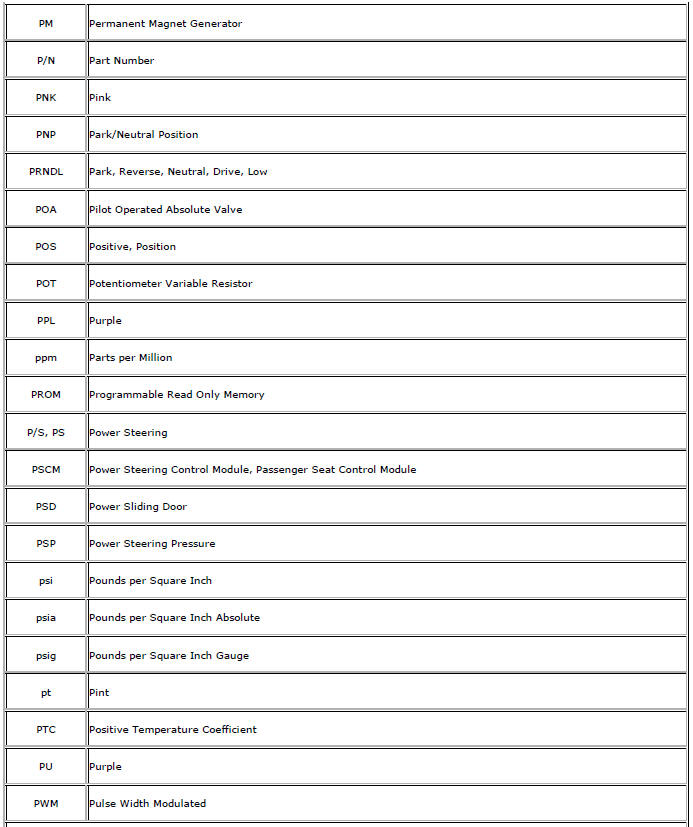
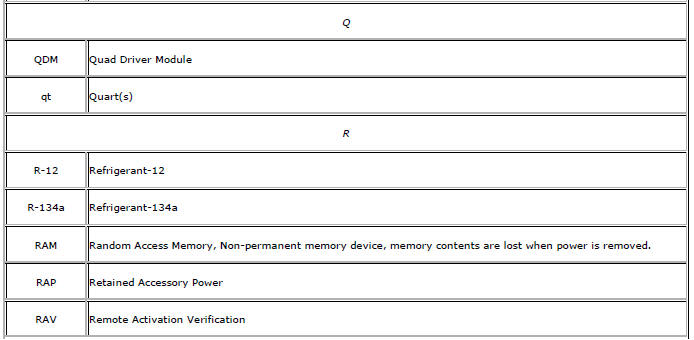
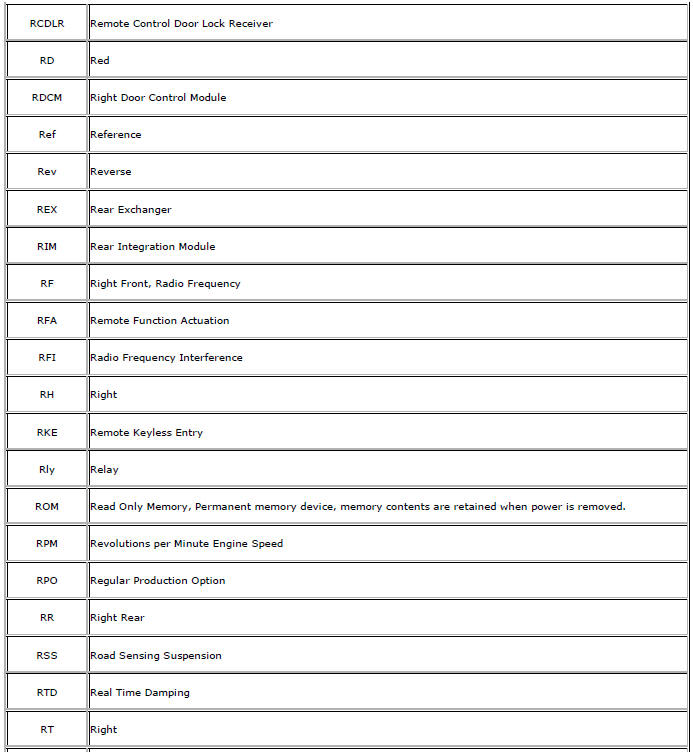
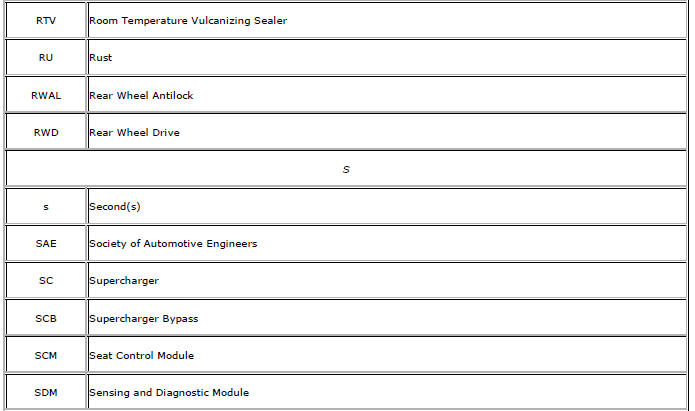
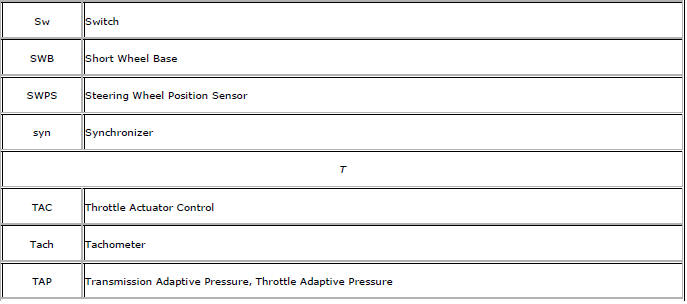
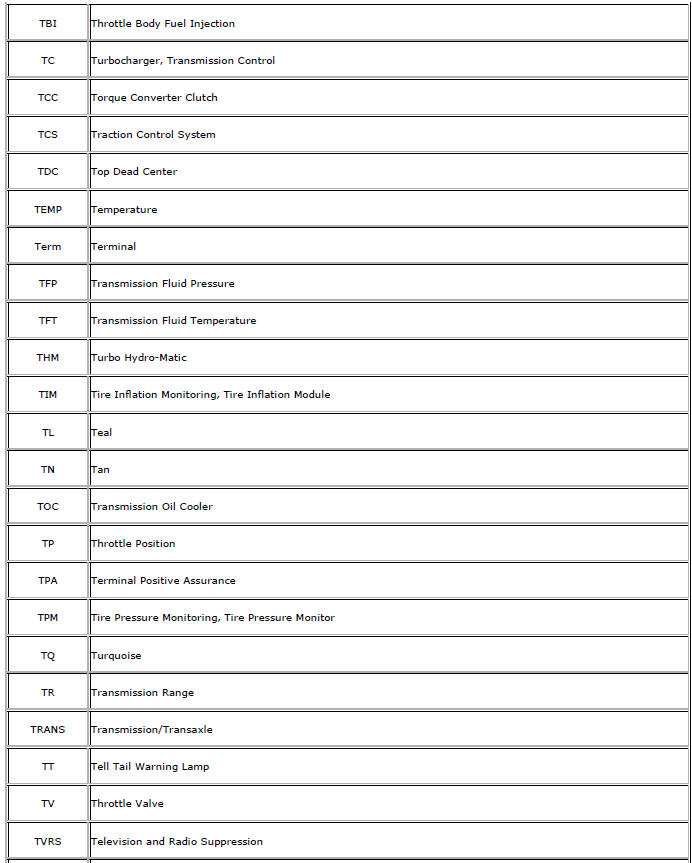
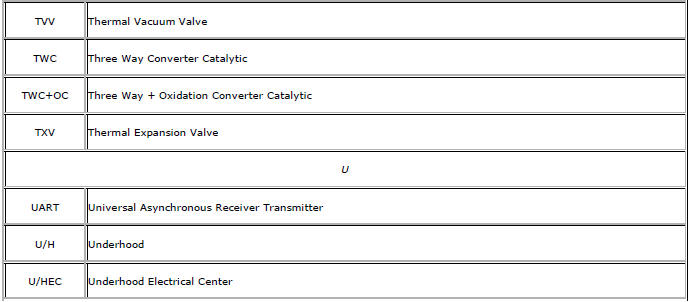
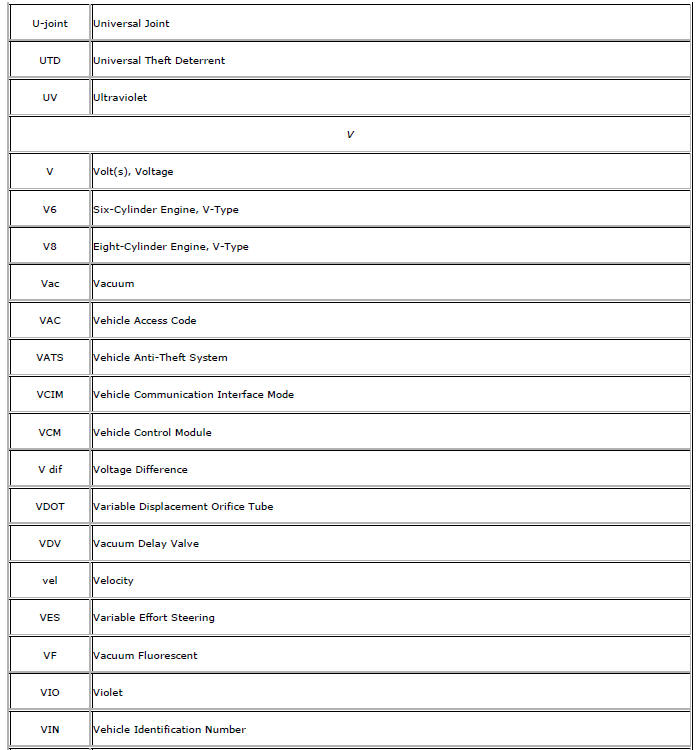
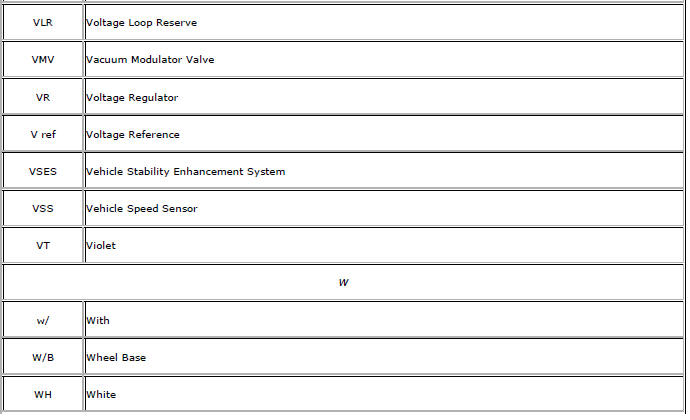
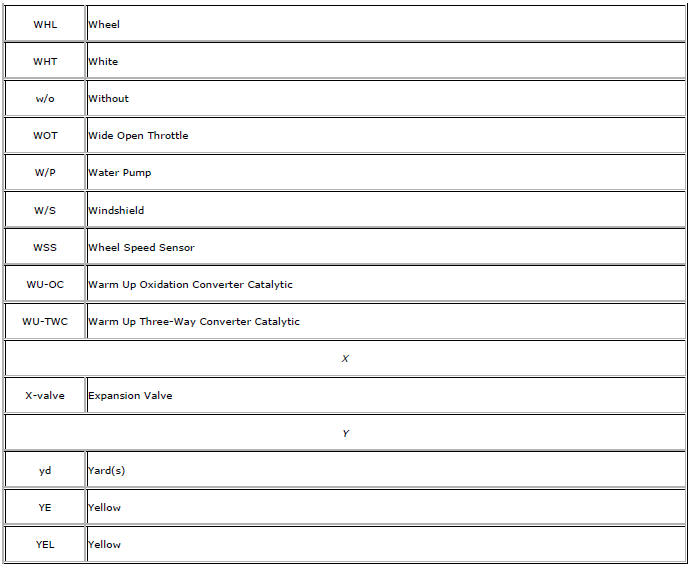
Abbreviations and Meanings


Registered and Non-Registered Trademarks
Listed below are Registered Trademarks (®) or Non-Registered Trademarks (™) which may appear in this service manual.


 Prevailing Torque Fasteners
Prevailing torque fasteners create a thread interface between the fastener
and the fastener counterpart in order to prevent the fastener
from loosening.
All Metal Prevailing Torque Fasteners
Thes ...
 Lifting and Jacking the Vehicle
Note: The use of a LOW PROFILE LIFT ARMS SYSTEM may be required to
avoid unwanted contact with the vehicle's body and structure
depending on lifting equipment used. Refer to the manufacture's recom ...
Other materials:
Rear Spring Replacement
Removal Procedure
Raise and suitably support the vehicle. Refer to Lifting and Jacking the
Vehicle.
Support the rear axle with a tall jack stand near the shock absorber.
Remove the lower shock bolt. Refer to Shock Absorber Replacement.
Using the tall jack stands, slowly lower the rear a ...
Removal Procedure
Warning: Refer to Approved Equipment for Collision Repair Warning in the
Preface section.
Warning: Refer to Collision Sectioning Warning in the Preface section.
Warning: Refer to Glass and Sheet Metal Handling Warning in the Preface section.
Disable the SIR System. Refer to SIR Dis ...
Park Brake and P (Park) Mechanism Check
WARNING
When you are doing this check, the vehicle could begin to move.
You or others could be injured and property could be damaged.
Make sure there is room in front of the vehicle in case it begins to roll. Be
ready to apply the regular brake at once should the vehicle begin to move.
Park on ...
