Chevrolet Cruze Repair Manual: Front Bumper Impact Bar Replacement
Removal Procedure
Warning: Refer to Approved Equipment for Collision Repair Warning in the Preface section.
Warning: Refer to Glass and Sheet Metal Handling Warning in the Preface section.
- Disable the SIR System. Refer to SIR Disabling and Enabling.
- Disconnect the negative battery cable. Refer to Battery Negative Cable Disconnection and Connection.
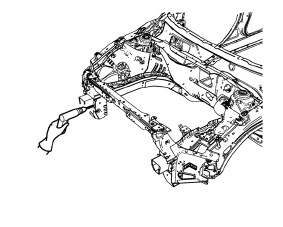
- Remove all related panels and components.
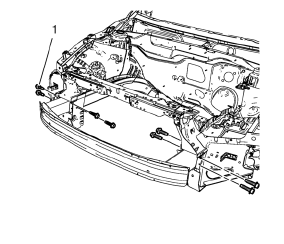
- Remove the 8 front bumper impact bar bolts (1).
- Cut the front bumper impact bar left and right.
- Locate and mark all factory welds.
- Drill all factory welds.
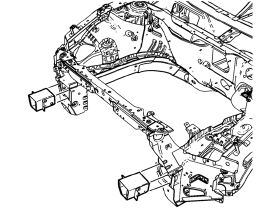
- Remove the remaining parts of 8. the front bumper impact bar.
Installation Procedure

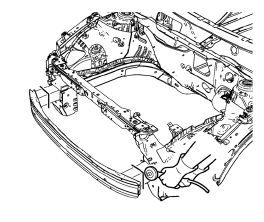
- Position the front bumper impact bar on the vehicle.
Caution: Refer to Fastener Caution in the Preface section.
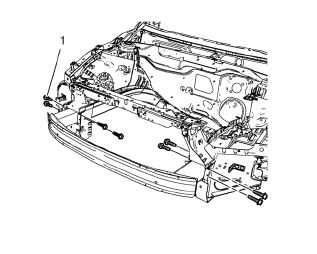
- Install the 8 front bumper impact bar bolts (1) and tighten to 110 N·m (81 lb ft).
Note: Use only the original front bumper impact bar bolts. Replace bolts if damaged.
- Paint the repaired area. Refer to Basecoat/Clearcoat Paint Systems.
- Install all related panels and components.
- Connect the negative battery cable. Refer to Battery Negative Cable Disconnection and Connection.
- Enable the SIR system. Refer to SIR Disabling and Enabling.
 Overlap/Backing Plate Sectioning (Welding)
Warning: Refer to Approved Equipment for Collision Repair Warning in
the Preface section.
Fit the service panel to the vehicle to ensure a proper fit.
Measure and mark a line at th ...
 Headlamp Mount Panel Replacement (MAG-Welding)
Note: According to different corrosion warranties, only the
regional mandatory joining methods are allowed.
Removal Procedure
Warning: Refer to Approved Equipment for Collision Repair Warning in t ...
Other materials:
Floor Carpet Drying
If the carpet or the pad or insulator is wet, use the following criteria for
drying or for replacing the components:
For a 1-piece carpet assembly bonded to a cotton or a fiber padding,
replace the entire assembly
For a 2-piece carpet assembly with a cotton or a fiber padding, replace
...
Safety Belt Extender
If the vehicle's safety belt will fasten around you, you should use it.
But if a safety belt is not long enough, your dealer will order you an extender.
When you go in to order it, take the heaviest coat you will wear, so the extender
will be long enough for you. To help avoid personal inju ...
Installation Procedure
Create 6 x 20 mm (4/16 x 11/16 in) slots for MIG-brazing along the upper
edges of the service panel as noted from the original
panel.
Clean and prepare the attaching surfaces for brazing and spot welding.
Position the body lock pillar inner panel on the vehicle.
Verify the ...
