Chevrolet Cruze Repair Manual: Headlamp Mount Panel Replacement (MAG-Welding)
Note: According to different corrosion warranties, only the regional mandatory joining methods are allowed.
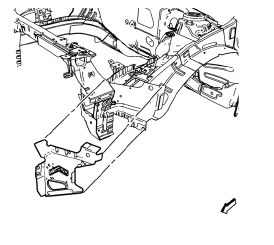
Removal Procedure
Warning: Refer to Approved Equipment for Collision Repair Warning in the Preface section.
Warning: Refer to Glass and Sheet Metal Handling Warning in the Preface section.
- Disable the SIR System. Refer to SIR Disabling and Enabling.
- Disconnect the negative battery cable. Refer to Battery Negative Cable Disconnection and Connection.
- Remove all related panels and components.
- Visually inspect the damage. Repair as much of the damage as possible.
- Remove the sealers and anti-corrosion materials from the repair area, as necessary. Refer to Anti-Corrosion Treatment and Repair.
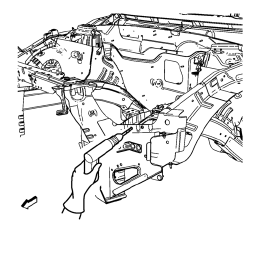
- Locate and mark all the necessary factory welds of the headlamp mount panel.
- Drill all factory welds. Note the number and location of welds for installation of the service assembly.
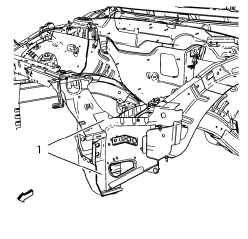
- Cut the adhesive (1) with an appropriate tool.
- Remove the headlamp mount panel.
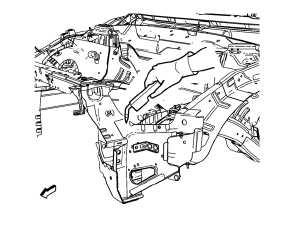
Installation Procedure
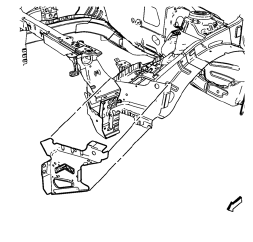
- Drill 8 mm (5/16 in) for plug welding instead of the adhesive noted from the original panel.
- Drill 8 mm (5/16 in) for plug welding along the edges of the headlamp mount panel as noted from the original panel.
- Clean and prepare the attaching surfaces for welding.
- Position the headlamp mount panel on the vehicle.
- Verify the fit of the headlamp mount panel.
- Clamp the headlamp mount panel into position.
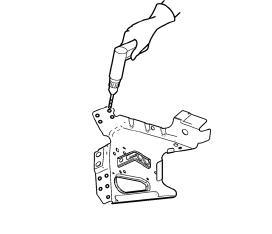
- Plug weld accordingly.
- Apply the sealers and anti-corrosion materials to the repair area, as necessary. Refer to Anti-Corrosion Treatment and Repair.
- Paint the repaired area. Refer to Basecoat/Clearcoat Paint Systems.
- Install all related panels and components.
- Connect the negative battery cable. Refer to Battery Negative Cable Disconnection and Connection.
- Enable the SIR system. Refer to SIR Disabling and Enabling.
 Front Bumper Impact Bar Replacement
Removal Procedure
Warning: Refer to Approved Equipment for Collision Repair Warning in the
Preface section.
Warning: Refer to Glass and Sheet Metal Handling Warning in the Preface section.
D ...
 Headlamp Mount Panel Replacement (MIG-Brazing)
Note: According to different corrosion warranties, only the
regional mandatory joining methods are allowed.
Removal Procedure
Warning: Refer to Approved Equipment for Collision Repair Warning in t ...
Other materials:
Vehicle, Engine and Transmission ID and VIN Location, Derivative and Usage
Note:: Graphic shows exemplary VIN.
The VIN plate is the legal identifier of the vehicle. The VIN plate is
located on the upper left corner of the instrument panel (I/P) and can
be seen through the windshield from the outside of the vehicle:
...
Rear Compartment Lid Hinge Torque Rod Replacement
Preliminary Procedure
Remove rear compartment lid. Refer to Rear Compartment Lid Replacement.
Special Tools
BO-125 Torque Rod Lifter
For equivalent regional tools, refer to Special Tools.
Rear Compartment Lid Hinge Torque Rod - Right Side
Tip
Only use the special tool to remove and i ...
Rear Compartment Lid Emblem/Nameplate Replacement (Rear Emblem)
Rear Compartment Lid Emblem Assembly
Caution: Refer to Exterior Trim Emblem Removal Caution in the
Preface section.
Procedure
The part and surface should be 21°C (70°F) prior to installation. The
vehicle should remain 21°C (70°F) for
one hour after assembly to allow adhesive to deve ...
