Chevrolet Cruze Repair Manual: Front Floor Console Storage Tray Replacement
Preliminary Procedure
Remove the automatic or manual transmission control lever trim cover. Refer to Automatic or Manual Transmission Control Lever Trim Cover Replacement
- Front Floor Console Storage Tray Screw (Qty: 2)
Caution: Refer to Fastener Caution in the Preface section.
Tighten 2.5 N·m (23 lb in)
- Front Floor Console Storage Tray Assembly
Automatic or Manual Transmission Control Lever Trim Cover Replacement
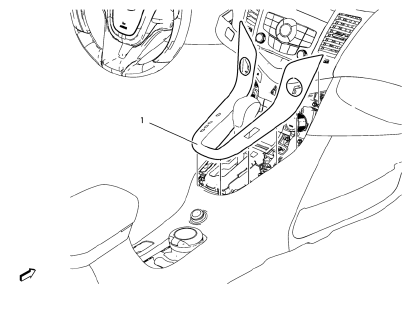
- Transmission Control Lever Trim Cover Assembly
Parking Brake Lever Boot Replacement
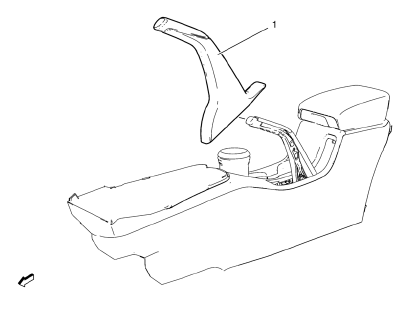
Parking Brake Lever Boot
Procedure
- Pull down boot.
- Apply bead of adhesive to upper surface of parking brake lever (arrow).
- Install parking brake lever boot carefully.
 Instrument Panel Wiring Harness Replacement
Removal Procedure
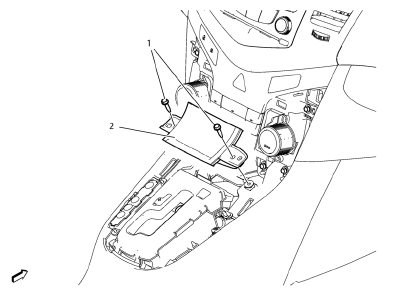
Remove instrument panel compartment assembly. Refer to Instrument
Panel Compartment Replacement.
Remove instrument panel wiring harness (2) from instrume ...
 Front Floor Console Replacement
Preliminary Procedure
Remove the instrument panel lower trim panel - left side. Refer to
Instrument Panel Lower Trim Panel Replacement - Left
Side
Remove the instrument panel lower trim ...
Other materials:
OnStar Additional Information
Transferring Service
Press to request account transfer
eligibility information. The Advisor can assist in canceling or removing account
information. If OnStar receives information that vehicle ownership has changed,
OnStar may send a voice message to the vehicle, requesting updated account i ...
Roof Console Replacement
Dome Lamp Bezel
Roof Console Screw (Qty: 2)
Caution: Refer to Fastener Caution in the Preface section.
Tighten
2.5 N·m (22 lb in)
Roof Console Assembly
Procedure
Disconnect the electrical connectors.
When replacing the driver information display bezel, remove the dri ...
Removal Procedure
Raise and support the vehicle. Refer to Lifting and Jacking the Vehicle.
Remove the brake rotor. Refer to Front Brake Rotor Replacement.
Remove the wheel speed sensor screw (2).
Remove the wheel speed sensor (1) from the steering knuckle.
Remove the wheel drive shaft from the fron ...
