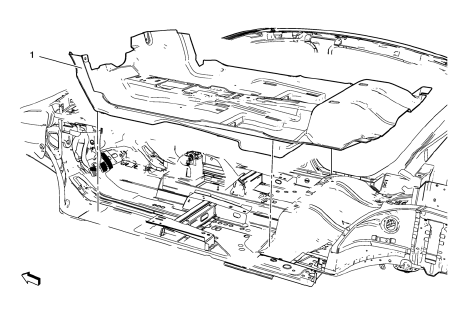
Chevrolet Cruze Repair Manual: Front Floor Panel Carpet Replacement
Preliminary Procedures
- Remove front seats. Refer to Driver or Passenger Seat Replacement.
- Remove rear seat. Refer to Rear Seat Replacement.
- Remove the front floor console. Refer to Front Floor Console Replacement.
- Remove front sill panels. Refer to Front Side Door Sill Trim Plate Replacement.
- Remove rear sill panels. Refer to Rear Side Door Sill Trim Plate Replacement.
- Remove center pillar lower garnish moldings. Refer to Center Pillar Lower Garnish Molding Replacement.
Front Floor Panel Carpet Assembly
Procedure
Loosen Transmission Control.
 Floor Carpet Drying
If the carpet or the pad or insulator is wet, use the following criteria for
drying or for replacing the components:
For a 1-piece carpet assembly bonded to a cotton or a fiber padding,
repla ...
 Headlining Trim Panel Replacement (With Sunroof)
Warning: Do not attempt to repair or alter the head impact
energy-absorbing material glued to the headliner or to the garnish
trims. If the material is damaged, replace the headliner and/or the ...
Other materials:
Passenger Sensing System
The vehicle has a passenger sensing system for the front outboard passenger position.
The passenger airbag status indicator will light on the instrument panel when the
vehicle is started.
United States
Canada
The words ON and OFF, or the symbol for on and off, will be visible during the
...
US English/Metric Conversion
Decimal and Metric Equivalents
Arrows and Symbols
This service manual uses various symbols in order to describe different
service operations.
Front of Vehicle
View Detail
View Detail
Ambient Air Mixed with Another Gas or Indicate Temperature Chan ...
Mirrors
Specifications
Inside Rearview Mirror Schematics
Outside Rearview Mirror Schematics
Outside Rearview Mirror Replacement
Preliminary Procedure
Remove the front side door trim. Refer to Front Side
Door Trim Replacement.
Remove the front side door upper trim cove ...
