
Chevrolet Cruze Repair Manual: Rear Side Door Weatherstrip Replacement - Door Side
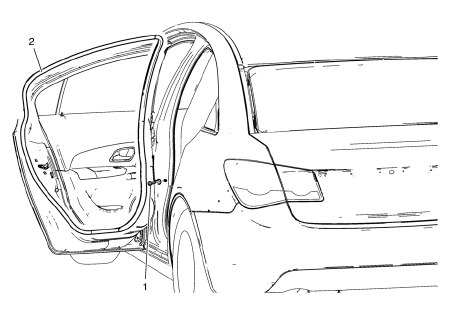
- Rear Side Door Check Bolt
Caution: Refer to Fastener Caution in the Preface section.
Tighten 25 N·m (19 lb ft)
- Rear Side Door Weatherstrip - Door Side
Procedure
- Unclip weatherstrip from rear side door.
- When removing protective liners from adhesive tape, be careful not to touch tape with hands and do not allow tape to come in contact with dirt or any foreign matter prior to adhesion.
 Rear Compartment Lid Weatherstrip Replacement
Rear Compartment Lid Weatherstrip
Procedure
Start at the upper corner of the rear compartment opening and pull the
weatherstrip away from the rear
compartment opening flange.
Position ...
 Rear Side Door Weatherstrip Replacement - Body Side
Rear Side Door Weatherstrip - Body Side
Procedure
Start at the front upper corner of the door opening and pull the
weatherstrip away from the door opening flange.
Position th ...
Other materials:
Safety Locks
The rear door safety locks prevent passengers from opening the rear doors from
inside the vehicle.
Press to activate the safety locks.
The indicator light comes on when activated.
The rear door power windows are also disabled.
Press again to deactivate the safety
locks and power windows ...
Shock Absorber Disposal
Warning: Use the proper eye protection when drilling to prevent
metal chips from causing physical injury.
Clamp the strut in a vise horizontally with the rod ( 1) completely
extended.
Drill a hole in the strut at the center of the end cap (3) using a 5 mm
(3/16 in) drill bit. Gas o ...
Emergency
With Automatic Crash Response, the built-in system can automatically connect
to help in most crashes, even if help cannot be requested.
Press to connect to an Emergency
Advisor. GPS technology is used to identify the vehicle location and can provide
critical information to emergency personne ...
