Chevrolet Cruze Repair Manual: Removal Procedure
Warning: Refer to Approved Equipment for Collision Repair Warning in the Preface section.
Warning: Refer to Collision Sectioning Warning in the Preface section.
Warning: Refer to Glass and Sheet Metal Handling Warning in the Preface section.
- Disable the SIR System. Refer to SIR Disabling and Enabling.
- Disconnect the negative battery cable. Refer to Battery Negative Cable Disconnection and Connection.
- Remove all related panels and components.
- Visually inspect the damage. Repair as much of the damage as possible.
- Remove the sealers and anti-corrosion materials from the repair area, as necessary. Refer to Anti-Corrosion Treatment and Repair.
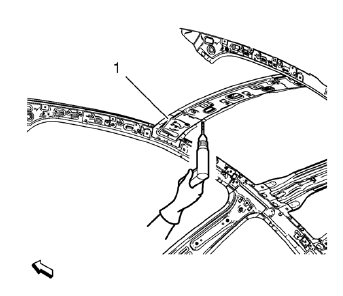
- Locate and mark all the necessary factory welds of the roof panel front bracket right (1).
- Drill all factory welds. Note the number and location of welds for installation of the service assembly.
- Remove the roof panel front bracket right (1).
- Proceed the same way with the roof panel front bracket left.
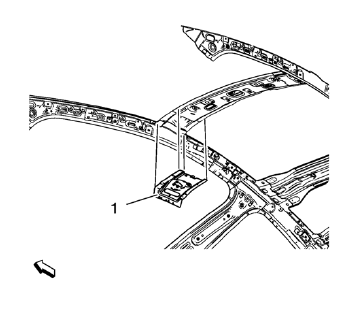
- Create cut lines on the roof front header panel.
- Cut the panel where sectioning is to be performed.
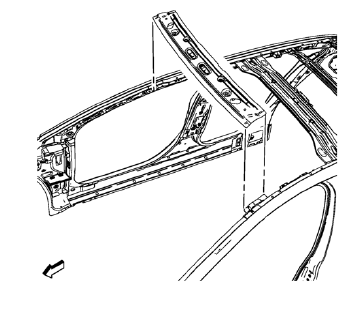
- Remove the damaged roof front header panel.
 Roof Front Header Panel Replacement (MIG-Brazing)
Note: According to different corrosion warranties, only the
regional mandatory joining methods are allowed. ...
 Installation Procedure
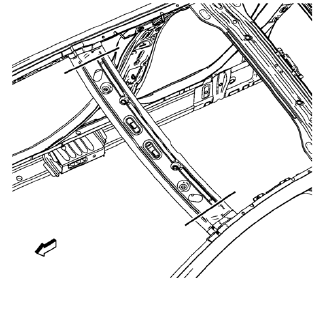
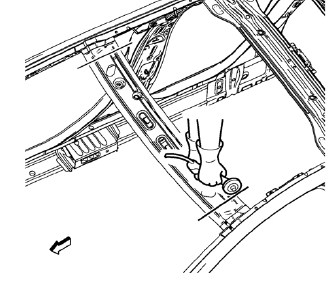
Cut the roof front header panel in corresponding locations to fit the
remaining original panel. The sectioning joint should be trimmed
to allow a gap of one-and-one-half-times the metal th ...
Other materials:
Removal Procedure
Warning: Refer to Approved Equipment for Collision Repair Warning in the
Preface section.
Warning: Refer to Collision Sectioning Warning in the Preface section.
Warning: Refer to Glass and Sheet Metal Handling Warning in the Preface section
Disable the SIR System. Refer to SIR ...
Vehicle Alarm System
This vehicle has a theft alarm system.
Arming the System
To arm the system, use the power door lock switch or the RKE transmitter to lock
the vehicle while exiting with the vehicle turned off.
The alarm arms after about 30 seconds after all the doors have been closed.
Press again and the syst ...
Heating and Air Conditioning System Description and Operation
Engine Coolant
Engine coolant is the key element of the heating system. The thermostat
controls engine operating coolant temperature. The thermostat
also creates a restriction for the cooling system that promotes a positive
coolant flow and helps prevent cavitation. Coolant enters the
heater ...
