Chevrolet Cruze Repair Manual: Removal Procedure
Warning: Refer to Glass and Sheet Metal Handling Warning in the Preface section.
- Disable the SIR System. Refer to SIR Disabling and Enabling.
- Disconnect the negative battery cable. Refer to Battery Negative Cable Disconnection and Connection.
- Remove the rear side door. Refer to Rear Side Door Replacement.
- Remove the rear side door outside handle. Refer to Rear Side Door Outside Handle Replacement.
- Remove the sealers and anti-corrosion materials from the repair area, as necessary. Refer to Anti-Corrosion Treatment and Repair.
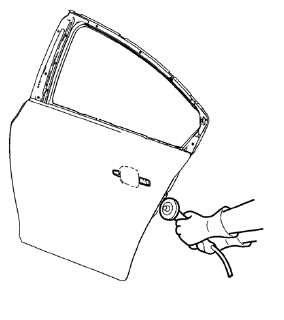
- Grind the edges of the rear side door outer panel to separate the outer door panel from the door shell.
- Remove the rear side door outer door panel.
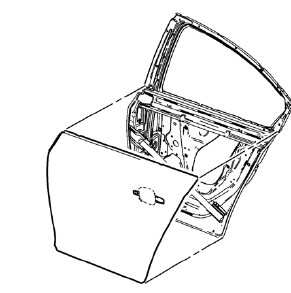
- Remove the sealers and anti-corrosion materials from the repair area, as necessary. Refer to Anti-Corrosion Treatment and Repair.
- Straighten the edges of the door shell.
 Rear Side Door Outer Panel Replacement (MAG-Welding)
Special Tools
BO-6396 Bonding Pliers
BO-6392 Flanging Tool Kit
For equivalent regional tools, refer to Special Tools.
Note: According to different corrosion warranties, only the
regional m ...
 Installation Procedure
Align the rear side door outer panel.
Verify the fit of the rear side door outer panel.
Clamp the rear side door outer panel
into position.
Pre-flanging the flange with BO-63 ...
Other materials:
Headlamp Replacement
Preliminary Procedure
Remove the front bumper fascia upper bracket. Refer to Front Bumper Fascia
Replacement.
Headlamp Screw (Qty: 4)
Caution: Refer to Fastener Caution in the Preface section.
Tip
Secure the headlamp fasteners in sequence, as indicated.
Tighten
2.5 N·m (22 lb in)
...
Front Fender Emblem/Nameplate Replacement (1.8L 2H0 or 2.0L Diesel)
Front Fender Emblem Assembly
Caution: Refer to Exterior Trim Emblem Removal Caution in the
Preface section.
Procedure
The part and surface should be 21°C (70°F) prior to installation. The
vehicle should remain 21°C (70°F) for
one hour after assembly to allow adhesive to develop suff ...
Removal Procedure
Warning: Refer to Approved Equipment for Collision Repair Warning in the
Preface section.
Warning: Refer to Glass and Sheet Metal Handling Warning in the Preface section.
Disable the SIR System. Refer to SIR
Disabling and Enabling.
Disconnect the negative battery cable. Refer to ...
