Chevrolet Cruze Repair Manual: Body Side Trim Panel Replacement - Left Side
Preliminary Procedure
- Remove the rear side door sill trim plate. Refer to Rear Side Door Sill Trim Plate Replacement.
- Remove the rear seat back. Refer to Rear Seat Replacement.
- Remove the quarter window garnish molding. Refer to Quarter Window Garnish Molding Replacement.
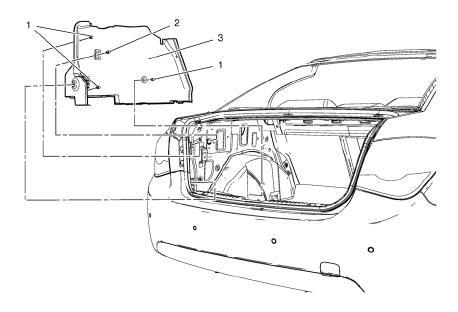
- Rear Window Panel Trim Retainer Clip
- Body Side Trim Panel Retainer (Qty: 3)
- Body Side Trim Panel Assembly
Body Side Trim Panel Replacement - Right Side
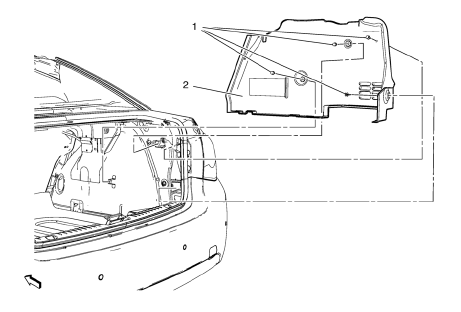
- Body Side Trim Panel Retainer (Qty: 4)
- Body Side Trim Panel Assembly
Radio Front Side Door Speaker Grille Bezel Replacement
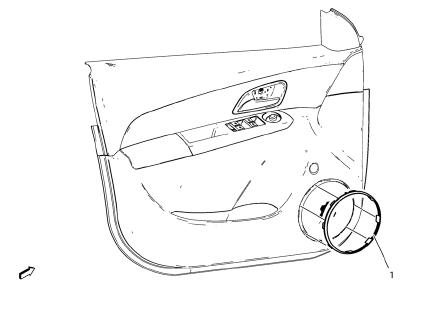
- Radio Front Side Door Speaker Grille Bezel Assembly
Radio Rear Side Door Speaker Grille Bezel Replacement
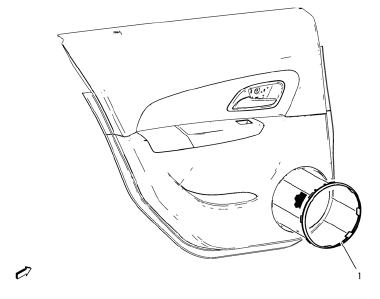
- Radio Rear Side Door Speaker Grille Bezel Assembly
Rear Window Panel Trim Replacement
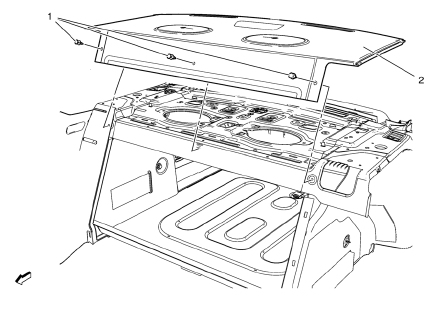
Preliminary Procedure
- Remove the rear seat back.
- Remove the high mount stop lamp. Refer to High Mount Stop Lamp Replacement.
- Rear Window Panel Trim Clip (Qty: 6)
- Rear Window Panel Trim Assembly
 Center Pillar Upper Garnish Molding Replacement
Preliminary Procedure
Remove the center pillar lower garnish molding. Refer to Center Pillar
Lower Ga rnish Molding Replacement
Remove the seat belt from the front seat. Refer ...
 Rear Side Door Trim Replacement
Rear Side Door Inside Handle Bolt Finish Cap
Procedure
Pull handle back to remove cap. Use suitable tool to unsnap.
Rear Side Door Inside Handle Screw
Caution: Refer to Fastener Caut ...
Other materials:
Tire Messages
SERVICE TIRE MONITOR SYSTEM
This message displays if there is a problem with the Tire Pressure Monitor System
(TPMS).
TIRE LEARNING ACTIVE
This message displays when the system is learning new tires.
TIRE PRESSURE LOW ADD AIR TO TIRE
On vehicles with the Tire Pressure Monitor System (TPMS), t ...
Installation Procedure
Create 6 x 20 mm (4/16 x 11/16 in) slots for MIG-brazing along the upper
edges of the service panel as noted from the original
panel.
Clean and prepare the attaching surfaces for brazing and spot welding.
Position the body lock pillar inner panel on the vehicle.
Verify the ...
Installation Procedure
Drill 8 mm (5/16 in) for plug welding along the edges of the service
panel as noted from the original panel.
Clean and prepare the attaching surfaces for welding.
Apply one-part windshield urethane adhesive as noted
from the original panel.
Position the roof ...
