Chevrolet Cruze Repair Manual: Rear Side Door Trim Replacement
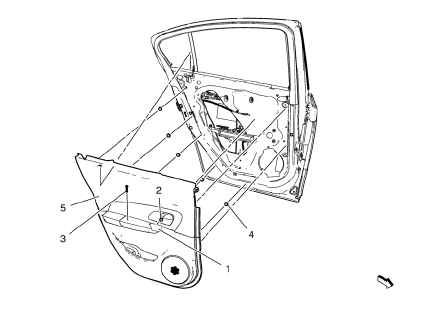
- Rear Side Door Inside Handle Bolt Finish Cap
Procedure
Pull handle back to remove cap. Use suitable tool to unsnap.
- Rear Side Door Inside Handle Screw
Caution: Refer to Fastener Caution in the Preface section.
Tighten 2.5 N·m (23 lb in)
- Rear Side Door Pull Handle Screw
Tighten 2.5 N·m (23 lb in)
- Rear Side Door Trim Clip (Qty: 5)
- Rear Side Door Trim Assembly
Procedure
- Pull upwards on the door lock retainer cable to disengage.
- Disconnect the electrical connectors.
Rear Compartment Sill Trim Plate Replacement
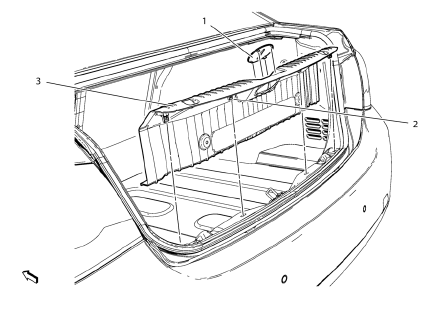
- Rear Compartment Lid Latch Striker Cover
- Rear Compartment Sill Trim Plate Clip (Qty: 4)
- Rear Compartment Sill Trim Plate Assembly
Rear Compartment Lid Inner Panel Trim Replacement
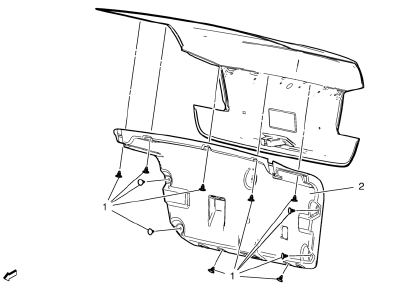
- Rear Compartment Lid Inner Panel Trim Retainer (Qty: 12)
- Rear Compartment Lid Inner Panel Trim Assembly
Rear Compartment Side Trim Replacement - Left Side
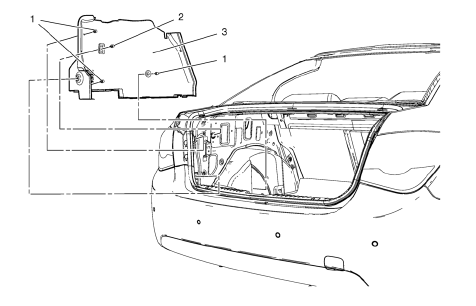
Preliminary Procedures
Remove rear compartment sill trim plate. Refer to Rear Compartment Sill Trim Plate Replacement
- Body Side Trim Panel Retainer (Qty: 3)
- Body Side Trim Panel Screw
- Body Side Trim Panel Assembly
Rear Compartment Side Trim Replacement - Right Side
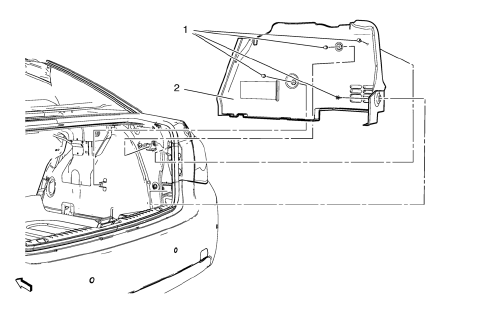
Preliminary Procedure
Remove rear compartment sill trim plate. Refer to Rear Compartment Sill Trim Plate Replacement
- Body Side Trim Panel Retainer (Qty: 4)
- Body Side Trim Panel Assembly
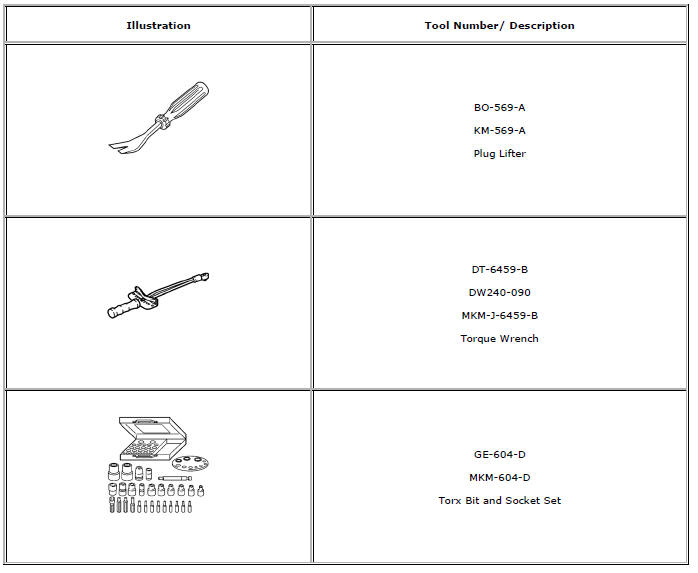
Special Tools and Equipment
 Body Side Trim Panel Replacement - Left Side
Preliminary Procedure
Remove the rear side door sill trim plate. Refer to Rear Side Door Sill
Trim Plate Replacement.
Remove the rear seat back. Refer to Rear Seat Replacement.
Re ...
 Body repair
...
Other materials:
Inflatable Restraint Steering Wheel Module Coil Centering
Caution: The new SIR coil assembly will be centered. Improper
alignment of the SIR coil assembly may damage the unit, causing an
inflatable restraint malfunction.
Verify the following conditions before centering the supplemental
inflatable restraint (SIR) steering wheel module co ...
Water Hose Test
Note: Use a water hose without the nozzle attached.
Have an assistant inside of the vehicle i 1. n order to locate the leak.
Begin testing at the base of the window or the windshield.
Slowly move the hose upward and across the top of the vehicle.
...
Destination
If route guidance is not active, press the Destination Entry screen button on
the Home Page to access the Destination Entry screen. Several options can be selected
to plan a route by entering destinations.
Some destination entry items such as Previous Destinations, Address Book, and
My Home ...
