Chevrolet Cruze Repair Manual: Removal Procedure
- Disable the SIR System. Refer to SIR Disabling and Enabling.
- Disconnect the negative battery cable. Refer to Battery Negative Cable Disconnection and Connection.
- Remove all related panels and components.
- Visually inspect the damage. Repair as much of the damage as possible.
- Remove the sealers and anti-corrosion materials from the repair area, as necessary. Refer to Anti-Corrosion Treatment and Repair.
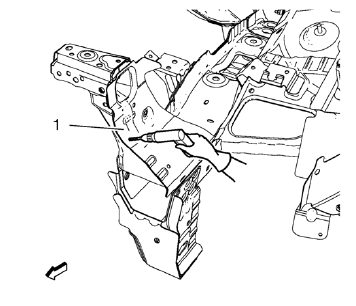
- Locate and mark all the necessary factory welds of the front end sheet metal cross panel reinforcement (1).
- Drill all factory welds. Note the number and location of welds for installation of the service assembly.
- Remove the front end sheet metal cross panel reinforcement (1).
- Drill all factory welds.
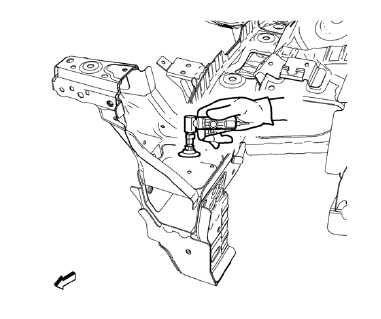
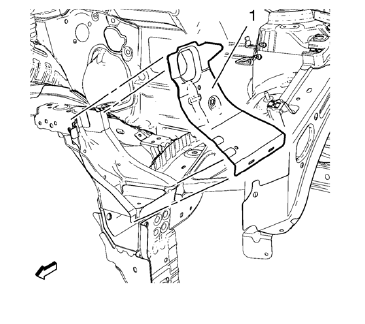
- Grind factory welds of the front end upper tie bar.
- Remove the front end upper tie bar (1).
 Front End Upper Tie Bar Replacement (MAG-Welding)
Note: According to different corrosion warranties, only the
regional mandatory joining methods are allowed. ...
 Installation Procedure
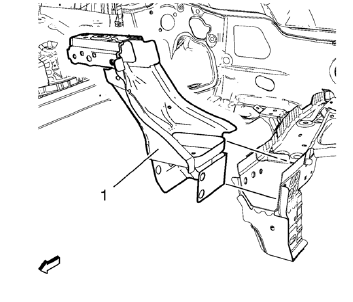
Position the front end upper tie bar (1) on the vehicle.
Verify the fit of the front end upper tie bar.
Clamp the front end upper tie bar into position.
Weld seam accordingly.
...
Other materials:
OnStar® Destination Download
The destination download lets an OnStar® subscriber ask an OnStar Advisor to
download a destination to the navigation system. OnStar will send address information
and location coordinates of the destination into the navigation system.
Using Destination Download
If the navigation radio screen i ...
Hydraulic Clutch
For vehicles with a manual transmission, it is not necessary to regularly check
brake/clutch fluid unless there is a leak suspected.
Adding fluid will not correct a leak.
A fluid loss in this system could indicate a problem. Have the system inspected
and repaired.
When to Check and What to Us ...
Removal Procedure
Warning: Refer to Approved Equipment for Collision Repair Warning in the
Preface section.
Warning: Refer to Collision Sectioning Warning in the Preface section.
Warning: Refer to Glass and Sheet Metal Handling Warning in the Preface section.
Disable the SIR System. Refer to SIR Dis ...
