Chevrolet Cruze Repair Manual: Removal Procedure
Warning: Refer to Approved Equipment for Collision Repair Warning in the Preface section.
Warning: Refer to Collision Sectioning Warning in the Preface section.
Warning: Refer to Glass and Sheet Metal Handling Warning in the Preface section.
- Disable the SIR System. Refer to SIR Disabling and Enabling.
- Disconnect the negative battery cable. Refer to Battery Negative Cable Disconnection and Connection.
- Remove all related panels and components.
- Visually inspect the damage. Repair as much of the damage as possible.
- Remove the sealers and anti-corrosion materials from the repair area, as necessary. Refer to Anti-Corrosion Treatment and Repair.
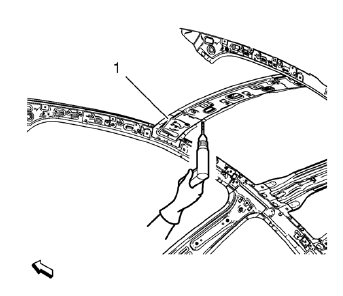
- Locate and mark all the necessary factory welds of the roof panel front bracket right (1).
- Drill all factory welds. Note the number and location of welds for installation of the service assembly.
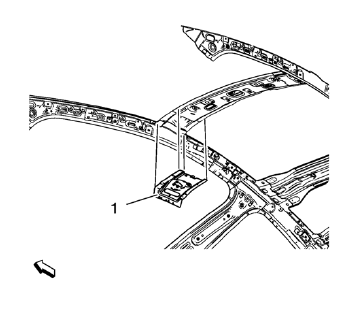
- Remove the roof panel front bracket right (1).
- Proceed the same way with the roof panel front bracket left.
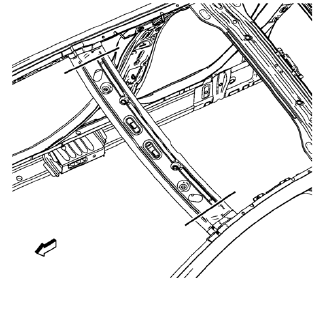
- Create cut lines on the roof front header panel.
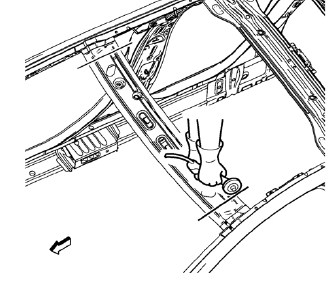
- Cut the panel where sectioning is to be performed.
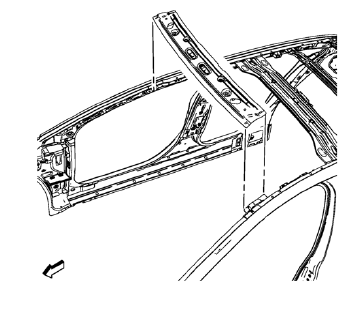
- Remove the damaged roof front header panel.
 Roof Front Header Panel Replacement (MIG-Brazing)
Note: According to different corrosion warranties, only the
regional mandatory joining methods are allowed. ...
 Installation Procedure
Cut the roof front header panel in corresponding locations to fit the
remaining original panel. The sectioning joint should be trimmed
to allow a gap of one-and-one-half-times the metal th ...
Other materials:
Driver or Passenger Seat Back Cushion Cover and Pad Replacement
Removal Procedure
Warning: Refer to SIR Warning in the Preface section.
Warning: Replace the passenger presence system as a complete assembly to prevent
possible injury to the occupant. The bladder, the
pressure sensor, the seat cushion, and the control module are assembled and
calibrated a ...
Deployment Inside Vehicle - Vehicle Scrapping Procedure
Deploy the inflator modules inside of the vehicle when destroying the vehicle
or when salvaging the vehicle for parts. This includes, but is
not limited to, the following situations:
The vehicle has completed all useful life.
Irreparable damage occurred to the vehicle in a non-deployment ty ...
Removal Procedure
Raise and support the vehicle. Refer to Lifting and Jacking the
Vehicle.
Remove the tire and wheel. Refer to Tire and Wheel Removal and
Installation.
Note: DO NOT re-use the lower control arm bolts and nuts. Discard
and use NEW only.
Remove wheel speed sensor wiring harness ...
