Chevrolet Cruze Repair Manual: Removal Procedure
Warning: Refer to Approved Equipment for Collision Repair Warning in the Preface section.
Warning: Refer to Glass and Sheet Metal Handling Warning in the Preface section.
- Disable the SIR System. Refer to SIR Disabling and Enabling.
- Disconnect the negative battery cable. Refer to Battery Negative Cable Disconnection and Connection.
- Remove all related panels and components.
- Visually inspect the damage. Repair as much of the damage as possible.
- Remove the sealers and anti-corrosion materials from the repair area, as necessary. Refer to Anti-Corrosion Treatment and Repair.
- Locate and mark all the necessary factory welds of the rear floor panel filler.
Note: Note the number and location of welds for installation of the service assembly.
- Drill all factory welds.

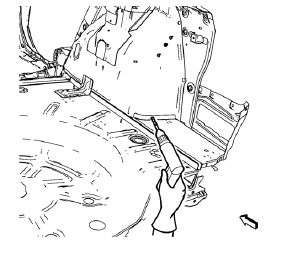
- Remove the rear floor panel filler.
 Rear Floor Panel Filler Replacement (MIG-Brazing)
Note: According to different corrosion warranties, only the
regional mandatory joining methods are allowed. ...
 Installation Procedure
Note: If the location of the original plug weld holes can not be
determined, space the braze holes every 40 mm (1½ in).
Create 5 x 18 mm (4/16 x 11/16 in) slots for MIG-brazing along ...
Other materials:
Hill and Mountain Roads
Driving on steep hills or through mountains is different than driving on flat
or rolling terrain. Tips for driving in these conditions include:
• Keep the vehicle serviced and in good shape.
• Check all fluid levels and brakes, tires, cooling system, and transmission.
• Shift to a lower g ...
Fuel
Use of the recommended fuel is an important part of the proper maintenance of
this vehicle. To help keep the engine clean and maintain optimum vehicle performance,
we recommend the use of gasoline advertised as TOP TIER Detergent Gasoline.
Look for the TOP TIER label on the fuel pump to ensure ...
Passenger Sensing System
United States
Canada
The passenger sensing system turns off the front outboard passenger frontal airbag
and knee airbag under certain conditions. No other airbag is affected by the passenger
sensing system.
The passenger airbag status indicator will be visible on the instrument panel
wh ...
