
Chevrolet Cruze Repair Manual: Stabilizer Shaft Link Replacement
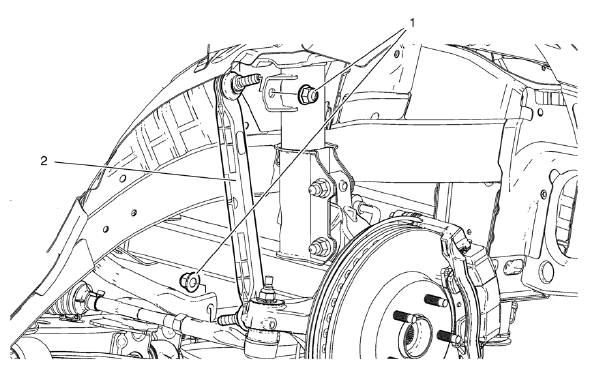
Preliminary Procedure
- Raise and support the vehicle. Refer to Lifting and Jacking the Vehicle.
- Remove the front tire and wheel assemblies. Refer to Tire and Wheel Removal and Installation.
Stabilizer Shaft Link Nut (Qty: 2)
Caution: Refer to Fastener Caution in the Preface section.
Procedure
Discard the old stabilizer shaft link nut and use NEW ONLY.
Tighten 65 N·m (48 lb ft)
Stabilizer Shaft Link
 Stabilizer Shaft Replacement
Special Tools
CH 904 Underframe
CH 49289 Centering Adapter
EN 45059 Torque Angle Sensor Kit
For equivalent regional tools, refer to Special Tools.
Removal Procedure
Turn the front whee ...
 Stabilizer Shaft Insulator Replacement
Special Tools
CH 904 Underframe
EN 45059 Torque Angle Sensor Kit
CH 49289 Centering Adapter
For equivalent regional tools, refer to Special Tools. ...
Other materials:
Removal Procedure
Raise and support the vehicle. Refer to Lifting and Jacking the Vehicle.
Remove the brake rotor. Refer to Front Brake Rotor Replacement.
Remove the wheel speed sensor screw (2).
Remove the wheel speed sensor (1) from the steering knuckle.
Remove the wheel drive shaft from the fron ...
Removal Procedure
Warning: Refer to Approved Equipment for Collision Repair Warning in the
Preface section.
Warning: Refer to Collision Sectioning Warning in the Preface section.
Warning: Refer to Glass and Sheet Metal Handling Warning in the Preface section.
Disable the SIR System. Refer to SIR Dis ...
Air Vents
Adjustable air vents are in the center and on the side of the instrument panel.
Move the slats (1) to change the direction of the airflow.
Use the thumbwheels (2) near the air vents to open or close off the airflow.
Additional air vents are located beneath the windshield, driver and passenger
...
