Chevrolet Cruze Repair Manual: Installation Procedure
- Create 8 x 14 mm (5/16 x 15/16 in) slots for MIG-Brazing along the edges of the drivetrain and front suspension frame front support as noted from the original panel.
- Clean and prepare the attaching surfaces for brazing.

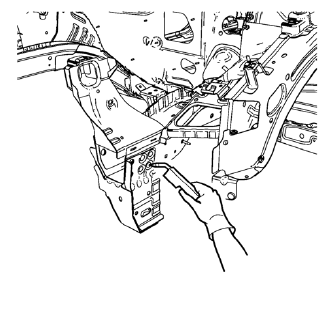
- Position the drivetrain and front suspension frame front support on the vehicle.
- Verify the fit of the drivetrain and front suspension frame front support.
- Clamp the drivetrain and front suspension frame front support into position.
- Braze accordingly.
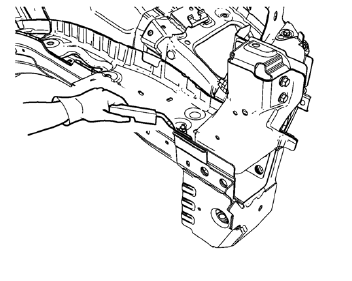
- Braze seam as noted from the original panel from the drivetrain and front suspension frame front support to the front compartment side rail.
- Apply the sealers and anti-corrosion materials to the repair area, as necessary. Refer to Anti- Corrosion Treatment and Repair.
- Paint the repaired area. Refer to Basecoat/Clearcoat Paint Systems.
- Install all related panels and components.
- Connect the negative battery cable. Refer to Battery Negative Cable Disconnection and Connection.
- Enable the SIR system. Refer to SIR Disabling and Enabling.
 Removal Procedure
Warning: Refer to Approved Equipment for Collision Repair Warning in the
Preface section.
Warning: Refer to Glass and Sheet Metal Handling Warning in the Preface section.
Disable the SIR Syst ...
 Front Wheelhouse Front Panel Replacement (MAG-Welding)
Note: According to different corrosion warranties, only the
regional mandatory joining methods are allowed. ...
Other materials:
Dome Lamps
The dome lamp controls are in the headliner.
(Dome Lamp Override): Press
to turn the lamps off, even when a door is open.
(Door): Press to turn the
lamps on automatically when a door is opened.
(On): Press to turn on the
dome lamps. ...
Stitcher Internet Radio
Stitcher SmartRadio™ is an Internet radio service that streams news, sports,
and entertainment shows through the audio system. Create personalized, on-demand
stations or discover new shows through Stitcher's preset stations. To set up an
account, download the application from the Android M ...
Installation Procedure
Cut the body lock pillar outer panel in corresponding locations to fit
the remaining original panel. The sectioning joint should be
trimmed to allow a gap of one-and-one-half-times the metal thickness at the
sectioning joint.
Create a 50 mm (2 in) backing plate from the unused porti ...
