
Chevrolet Cruze Repair Manual: Removal Procedure
Warning: Refer to Approved Equipment for Collision Repair Warning in the Preface section. Warning: Refer to Glass and Sheet Metal Handling Warning in the Preface section.
- Disable the SIR System. Refer to SIR Disabling and Enabling.
- Disconnect the negative battery cable. Refer to Battery Negative Cable Disconnection and Connection.
- Remove all related panels and components
- Visually inspect the damage. Repair as much of the damage as possible.
- Remove the sealers and anti-corrosion materials from the repair area, as necessary. Refer to Anti-Corrosion Treatment and Repair.
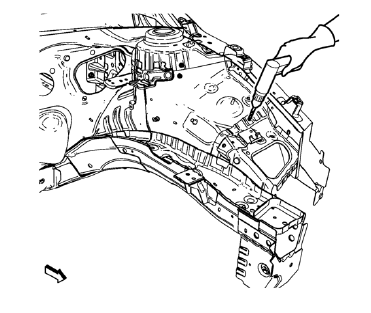
- Locate and mark all the necessary factory welds of the front wheelhouse front panel.
- Drill all factory welds. Note the number and location of welds for installation of the service assembly.
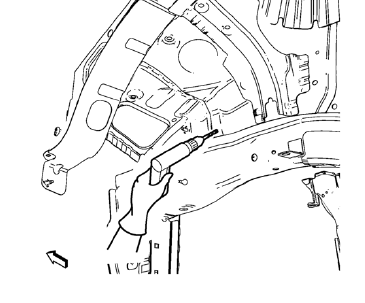
- Drill hidden factory weld where front wheelhouse front panel and front wheelhouse overlap.
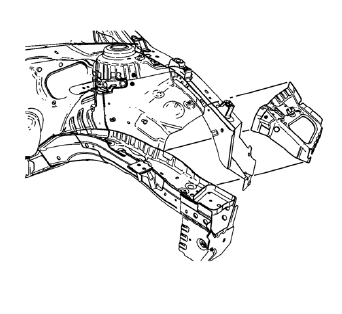
- Remove the front wheelhouse front panel.
 Front Wheelhouse Front Panel Replacement (MAG-Welding)
Note: According to different corrosion warranties, only the
regional mandatory joining methods are allowed. ...
 Installation Procedure
Drill 8 mm (5/16 in) for plug welding along the edges of the front
wheelhouse front panel as noted from the original panel.
Drill 8 mm (5/16 in) for plug welding where front ...
Other materials:
Brakes
This vehicle has front disc brakes and could have rear drum brakes or rear disc
brakes.
Disc brake pads have built-in wear indicators that make a high-pitched warning
sound when the brake pads are worn and new pads are needed.
The sound can come and go or be heard all the time the vehicle is m ...
New Vehicle Break-In
Notice: The vehicle does not need an elaborate break-in. But it will
perform better in the long run if you follow these guidelines:
• Do not drive at any one constant speed, fast or slow, for the first 805 km (500
mi).
Do not make full-throttle starts. Avoid downshifting to brake or slow the v ...
Removal Procedure
Remove the drivetrain and front suspension frame. Refer to Drivetrain
and Front Suspension Frame Replacement.
Mark Installation position of insulator (2) at frame (1).
Cut out frame insulator core (1) from frame insulator (2).
Note: On the rear insulator dril ...
