
Chevrolet Cruze Repair Manual: Removal Procedure
- Remove the drivetrain and front suspension frame. Refer to Drivetrain and Front Suspension Frame Replacement.
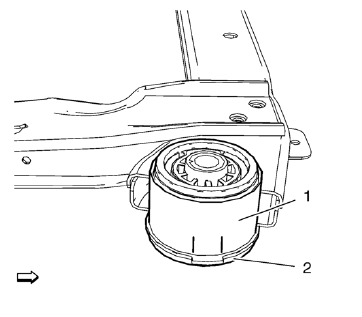
- Mark Installation position of insulator (2) at frame (1).
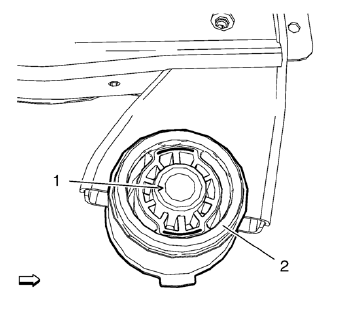
- Cut out frame insulator core (1) from frame insulator (2).
Note: On the rear insulator drill holes into the rubber in order to gain free access for jigsaw.
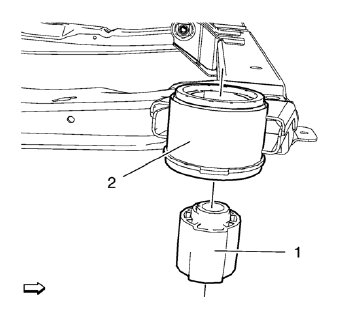
- Remove frame insulator core (1) from outer frame insulator (2).
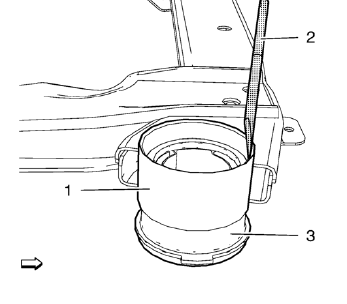
- Cast out frame insulator (3) from drivetrain and front suspension frame (1) with CH-48377-1 chisel (2).
 Drivetrain and Front Suspension Frame Insulator Replacement
Special Tools
CH 49460-1 Adapter
CH 49460-2 Adapter
CH 6616 Hydraulic Hand Pump
CH 6615-10 Hydraulic Cylinder
CH-48377-1 Chisel
For equivalent regional tools. Refer to Special Tools. ...
 Installation Procedure
Install the following components on the drivetrain and front suspension
frame:
CH 49460-1 adapter (2).
CH 49460-2 adapter (4).
CH 6615-10 hydraulic cylinder (1).
NEW frame insula ...
Other materials:
Inflatable Restraint Passenger Presence Detection System - If Equipped
Note: The passenger presence detection system includes an ECU and a
sensor mat that can be serviced separately. After repairing or
replacing any part of the passenger presence detection system, the system must
be rezeroed in order to function properly.
The passenger presence detection system i ...
Replacing Airbag System Parts after a Crash
WARNING
A crash can damage the airbag systems in the vehicle.
A damaged airbag system may not work properly and may not protect you and your
passenger(s) in a crash, resulting in serious injury or even death. To help make
sure the airbag systems are working properly after a crash, have them in ...
Installation Procedure
Note: If the location of the original plug weld holes can not be
determined, space the plug weld holes every 40 mm (1½ in).
Drill 8 mm (5/16 in) for plug welding along the edges of the body rear
end panel as noted from the original panel.
Clean and prepare the attaching s ...
