Chevrolet Cruze Owners Manual: Doors
Trunk
WARNING
Exhaust gases can enter the vehicle if it is driven with the liftgate, trunk/hatch open, or with any objects that pass through the seal between the body and the trunk/hatch or liftgate. Engine exhaust contains carbon monoxide (CO) which cannot be seen or smelled. It can cause unconsciousness and even death.
If the vehicle must be driven with the liftgate, or trunk/hatch open: • Close all of the windows.
• Fully open the air outlets on or under the instrument panel.
• Adjust the climate control system to a setting that brings in only outside air and set the fan speed to the highest setting. See “Climate Control Systems” in the Index.
• If the vehicle has a power liftgate, disable the power liftgate function.
Remote Trunk Release

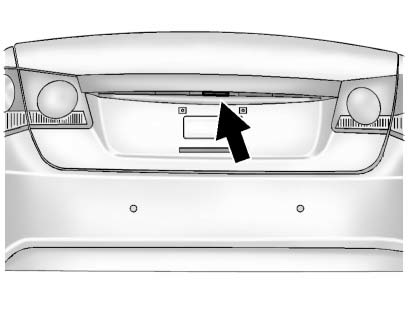
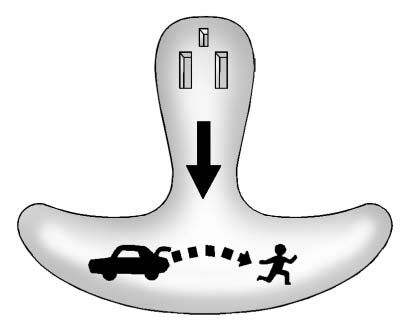
To open the trunk from outside the vehicle, press the button on the Remote Keyless Entry (RKE) transmitter, or by pressing the touch pad
above the license plate when the doors are unlocked.
If the engine is running, the doors must be unlocked. Vehicles with an automatic transmission must be in P (Park), vehicles with a manual transmission must have the park brake applied.
Emergency Trunk Release Handle
Notice: Do not use the emergency trunk release handle as a tie-down or anchor point when securing items in the trunk as it could damage the handle.
The emergency trunk release handle is only intended to aid a person trapped in a latched trunk, enabling them to open the trunk from the inside.

There is an emergency trunk release handle located inside the trunk on the trunk lid. The release handle can be accessed by folding the rear seatback. Pull the release handle to open the trunk from the inside.
 Safety Locks
The rear door safety locks prevent passengers from opening the rear doors from
inside the vehicle.
Press to activate the safety locks.
The indicator light comes on when activated.
The rear do ...
 Vehicle Security
This vehicle has theft-deterrent features; however, they do not make the vehicle
impossible to steal. ...
Other materials:
Front Side Door Trim Replacement
Front Side Door Pull Handle Bolt
Caution: Refer to Fastener Caution in the Preface section.
Tighten
2 N·m (18 lb in)
Front Side Door Inside Handle Bolt Finish Cap
Tip
Pull handle back to remove cap. Use suitable tool to unsnap.
Front Side Door Inside Handle Bolt
Tighten
...
Park Brake and P (Park) Mechanism Check
WARNING
When you are doing this check, the vehicle could begin to move.
You or others could be injured and property could be damaged.
Make sure there is room in front of the vehicle in case it begins to roll. Be
ready to apply the regular brake at once should the vehicle begin to move.
Park on ...
Securing Child Restraints (Rear Seat)
When securing a child restraint in a rear seating position, study the instructions
that came with the child restraint to make sure it is compatible with this vehicle.
If the child restraint has the LATCH system.
Do not secure a child seat in a position without a top tether anchor if a national
...
