Chevrolet Cruze Repair Manual: Rear Compartment Lid Emblem/Nameplate Replacement (Cruze - Left Side)
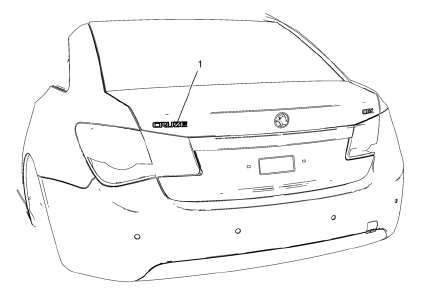
Rear Compartment Lid Emblem Assembly
Caution: Refer to Exterior Trim Emblem Removal Caution in the Preface section.
Procedure
- The part and surface should be 21°C (70°F) prior to installation. The vehicle should remain 21°C (70°F) for one hour after assembly to allow adhesive to develop sufficient bond strength.
- Use a Heat Gun or equivalent to remove the old nameplate. Clean all adhesive from the rear compartment panel and wipe the surface dry with a clean lint-free towel prior to installing the new nameplate.
- When removing protective liners from the adhesive tape, be careful not to touch tape with hands and do not allow tape to come in contact with dirt or any foreign matter prior to adhesion
- Close the rear compartment lid prior to adhesion.
- Using the palm of the hand, wet out the emblem to the rear compartment lid to ensure full adhesion of the emblem is made.
 Rear Compartment Lid Emblem/Nameplate Replacement (CDX)
Rear Compartment Lid Emblem Assembly
Caution: Refer to Exterior Trim Emblem Removal Caution in the Preface
section.
Procedure
The part and surface should be 21°C (70°F) prior to installati ...
 Rear Compartment Lid Emblem/Nameplate Replacement (Rear Emblem)
Rear Compartment Lid Emblem Assembly
Caution: Refer to Exterior Trim Emblem Removal Caution in the
Preface section.
Procedure
The part and surface should be 21°C (70°F) prior to installati ...
Other materials:
Steering Wheel Controls
Depending on the vehicle options, some audio functions can be controlled through
the steering wheel controls.
(Push to Talk): Press to interact
with Bluetooth or voice recognition.
(Mute/End Call): Press to decline
an incoming call, or to end a current call. Press to silence the vehicle ...
Steering Column in Lock Position Caution
Caution: With wheels of the vehicle facing straight ahead, secure
the steering wheel utilizing steering column anti-rotation pin, steering
column lock, or a strap to prevent rotation. Locking of the steering column will
prevent damage and a possible malfunction of the SIR
system. The steering ...
Tire Terminology and Definitions
Air Pressure: The amount of air inside the tire pressing outward on each
square inch of the tire. Air pressure is expressed in kPa (kilopascal) or psi (pounds
per square inch).
Accessory Weight: The combined weight of optional accessories. Some examples
of optional accessories are automatic t ...
