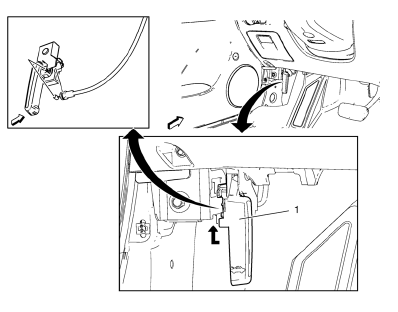
Chevrolet Cruze Repair Manual: Hood Primary Latch Release Cable Handle Replacement

Preliminary Procedure
Remove the front side door sill trim plate. Refer to Front Side Door Sill Trim Plate Replacement.
Hood Primary Latch Release Cable Handle
Procedure
- Pull down the hood primary latch release cable handle.
- To release the handle, pull down the cable and unhook from the handle.
 Rear Side Door Wiring Harness Replacement
Preliminary Procedure
Remove the rear side door inner panel trim. Refer to Rear Side Door Trim
Replacement.
Rear Side Door Wiring Harness
Warning: Unless directed otherwise, the ignition ...
 Front Side Door Upper Hinge and Lower Hinge Replacement
Preliminary Procedure
Remove the front wheelhouse liner. Refer to Front Wheelhouse Liner
Replacement.
Remove the front fender insulator. Refer to Front Fender Insulator
Replacement.
...
Other materials:
Interior Trim and Paneling
Specifications
Front Side Door Window Switch Bezel Replacement
Preliminary Procedure
Remove the front side door trim. Refer to Front Side Door Trim Replacement.
Front Side Door Window Switch Bezel Screw (Qty: 8)
Caution: Refer to Fastener Caution in the Preface section.
Tighten
...
Removal Procedure
Warning: Refer to Approved Equipment for Collision Repair Warning in the
Preface section.
Warning: Refer to Glass and Sheet Metal Handling Warning in the Preface section.
Disable the SIR System. Refer to SIR Disabling
and Enabling.
Disconnect the negative battery cable. Refer to ...
CD Player
The CD player is capable of playing:
• Most audio CDs
• CD-R
• CD-RW
• MP3, unprotected WMA, and AAC formats
When playing any compatible recordable disc, the sound quality may be reduced
due to the disc, the method of recording, the quality of the music recorded, or
how the disc has b ...
