Chevrolet Cruze Repair Manual: Hood Replacement
Warning: When a hood hold open device is being removed or installed, provide alternate support to avoid the possibility of damage to the vehicle or personal injury.
Preliminary Procedure
Remove the windshield washer nozzle hose. Refer to Windshield Washer Nozzle Hose Replacement.
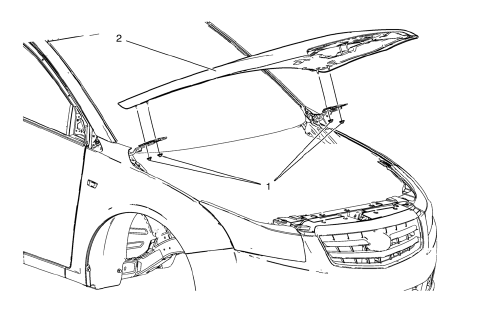
- Hood Hinge Reinforcement Nut (Qty: 4)
Caution: Refer to Fastener Caution in the Preface section.
Tighten 26 N·m (19 lb ft)
- Hood
Procedure
- Transfer components as necessary.
- Adjust hood as needed. Refer to Hood Adjustment.
Front Fender Insulator Replacement
Preliminary Procedure
Remove the front wheelhouse liner. Refer to Front Wheelhouse Liner Replacement.
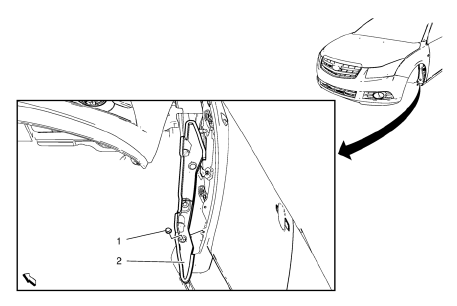
- Front Fender Insulator Retainer
- Front Fender Insulator
Hood Insulator Replacement
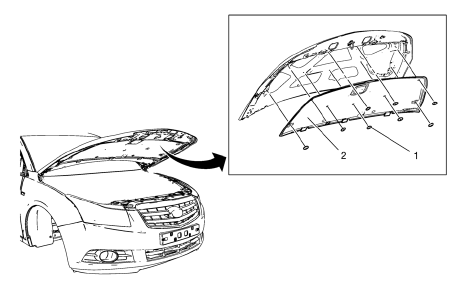
- Hood Insulator Retainer (Qty: 9)
- Hood Insulator
 Hood Adjustment
Hood
Caution: Refer to Fastener Caution in the Preface section.
Procedure
Loosen the hood hinge reinforcement nuts (Qty: 4).
Adjust the hood in order to obtain an even gap on both sides be ...
 Hood Primary and Secondary Latch Replacement
Preliminary Procedure
Remove the front bumper fascia. Refer to Front Bumper Fascia
Replacement.
Remove the radiator grille support reinforcement. Refer to Radiator
Grille Reinfor ...
Other materials:
Roof Side Rail Inflatable Restraint Module Replacement
Warning: In order to prevent SIR deployment, personal injury, or
unnecessary SIR system repairs, do not strike the door or the
door pillar in the area of the side impact sensor (SIS). Turn OFF the ignition
and remove the key when performing service in the
area of the SIS.
Warning: When pe ...
Steering Linkage Inner Tie Rod Replacement (Electronic Power Steering)
Special Tools
CH-6247 Removal and Installation Tool for the Steering Linkage Inner Tie Rod
For equivalent regional tools, refer to Special Tools.
Removal Procedure
Raise and support the vehicle. Refer to Lifting and Jacking the
Vehicle.
Remove the tire and wheel assembly. Refer to ...
AM-FM Radio
Playing the Radio
(Power/Volume):
• Press to turn the radio on or off.
• Turn to increase or decrease the volume of the active source.
The steering wheel controls can also be used to adjust the volume.
Radio Operation
The radio will work when the key is in ON/RUN or ACC/ ACCESSORY. When ...
