Chevrolet Cruze Repair Manual: Installation Procedure
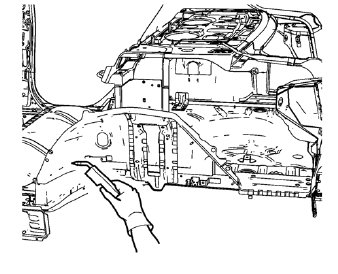
- Drill 8 mm (5/16 in) for plug welding along the edges of the rear inner wheelhouse as noted from the original panel.
Note: If the location of the original plug weld holes can not be determined, space the plug weld holes every 40 mm (1½ in).
- Clean and prepare the attaching surfaces for welding.
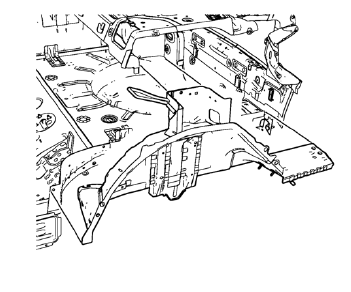
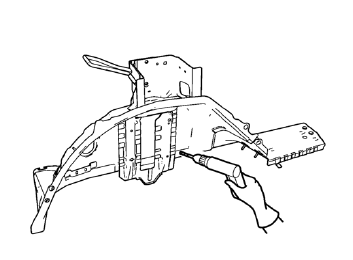
- Position the rear inner wheelhouse on the vehicle.
- Verify the fit of the rear inner wheelhouse.
- Clamp the rear inner wheelhouse into position.
- Plug weld accordingly.
- Apply the sealers and anti-corrosion materials to the repair area, as necessary. Refer to Anti-Corrosion Treatment and Repair.
- Paint the repaired area. Refer to Basecoat/Clearcoat Paint Systems.
- Install all related panels and components.
- Connect the negative battery cable. Refer to Battery Negative Cable Disconnection and Connection.
- Enable the SIR system. Refer to SIR Disabling and Enabling.
 Removal Procedure
Warning: Refer to Approved Equipment for Collision Repair Warning in the
Preface section.
Warning: Refer to Glass and Sheet Metal Handling Warning in the Preface section.
Disable the SIR System. ...
 Rear Wheelhouse Panel Replacement (MIG-Brazing)
Note: According to different corrosion warranties, only the
regional mandatory joining methods are allowed. ...
Other materials:
If a Tire Goes Flat
It is unusual for a tire to blowout while driving, especially if the tires are
maintained properly. If air goes out of a tire, it is much more likely to leak out
slowly. But if there ever is a blowout, here are a few tips about what to expect
and what to do: If a front tire fails, the flat tir ...
Radio Data System (RDS)
RDS features are available for use only on FM stations that broadcast RDS information.
With RDS, the radio can:
• Seek to stations broadcasting the selected type of programming.
• Receive announcements concerning local and national emergencies.
• Display messages from radio stations.
Thi ...
Steering Column Replacement (Right Hand Drive)
Caution: With wheels of the vehicle facing straight ahead, secure
the steering wheel utilizing steering column anti-rotation pin, steering
column lock, or a strap to prevent rotation. Locking of the steering column will
prevent damage and a possible malfunction of the SIR
system. The steering ...
