
Chevrolet Cruze Repair Manual: Removal Procedure
Warning: Refer to Approved Equipment for Collision Repair Warning in the Preface section.
Warning: Refer to Glass and Sheet Metal Handling Warning in the Preface section.
Disable the SIR System. Refer to SIR Disabling and Enabling.
- Disconnect the negative battery cable. Refer to Battery Negative Cable Disconnection and Connection.
- Remove all related panels and components.
- Visually inspect the damage. Repair as much of the damage as possible.
- Remove the sealers and anti-corrosion materials from the repair area, as necessary. Refer to Anti-Corrosion Treatment and Repair.
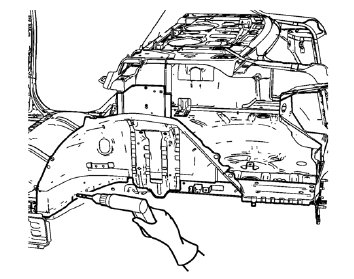
- Locate and mark all the necessary factory welds of the rear inner wheelhouse.
Note: Note the number and location of welds for installation of the service assembly.
- Drill all factory welds.
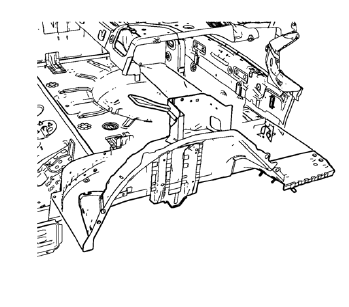
- Remove the rear inner wheelhouse.
 Rear Wheelhouse Panel Replacement (MAG-Welding)
Note: According to different corrosion warranties, only the
regional mandatory joining methods are allowed. ...
 Installation Procedure
Drill 8 mm (5/16 in) for plug welding along the edges of the rear inner
wheelhouse as noted from the original panel.
Note: If the location of the original plug weld holes can not be
det ...
Other materials:
Automatic Dimming Rearview Mirror
To adjust the inside rearview mirror, hold the rearview mirror in the center
and move it to view the area behind the vehicle.
For vehicles with an automatic dimming rearview mirror, the mirror will automatically
reduce the glare from the headlamps from behind.
The dimming feature and the indic ...
How comfortable is the Mercedes-Benz C Class
The interior of the C-Class Coupe matches the allure of its striking exterior design. Across all versions, you'll find premium materials that exude quality, complemented by metallic and piano black or wood accents. The sleek and minimalist layout adds to the sophistication, with standard sports s ...
Rear Axle Replacement
Special Tools
EN 45059 Torque Angle Sensor Kit
For equivalent regional tools, refer to Special Tools.
Removal Procedure
Raise and suitably support the vehicle. Refer to Lifting and
Jacking the Vehicle.
Remove the tire and wheel assembly. Refer to Tire and Wheel Removal and
...
