Chevrolet Cruze Repair Manual: Installation Procedure
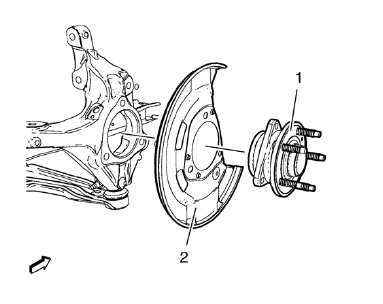
- Position the front brake shield (2) and front wheel bearing/hub (1) assembly in the steering knuckle.
Caution: Refer to Fastener Caution in the Preface section.
- Install the NEW front wheel bearing/hub bolts (1).
- Tighten the bearing/hub bolts (1) in 3 passes. Use the EN-45059 kit .
- First pass to 90 N·m (67 lb ft)
- Second pass to 60°
- Third pass to 15°
- Install the wheel drive shaft at the front wheel bearing/hub. Refer to Front Wheel Drive Shaft Replacement - Left Side or Front Wheel Drive Shaft Replacement - Right Side.
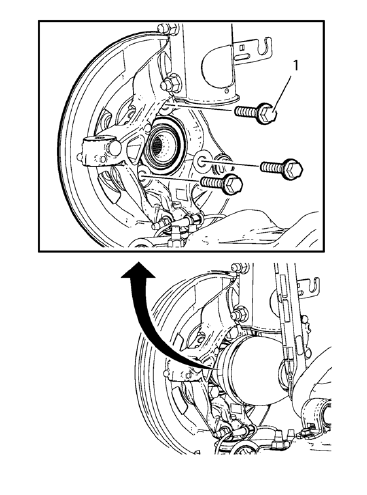
- Install the wheel speed sensor (1) to the steering knuckle.
- Install the wheel speed sensor screw (2) and tighten to 6 N·m (54 lb in).
- Install the brake rotor. Refer to Front Brake Rotor Replacement.
- Remove the support and lower the vehicle.
 Removal Procedure
Raise and support the vehicle. Refer to Lifting and Jacking the Vehicle.
Remove the brake rotor. Refer to Front Brake Rotor Replacement.
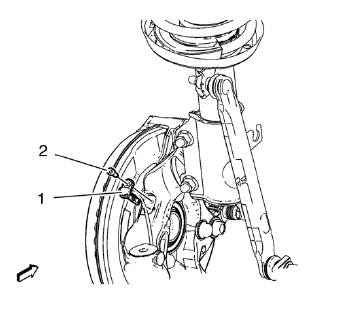
Remove the wheel speed sensor screw (2).
Remov ...
 Steering Knuckle Replacement
Preliminary Procedure
Raise and support the vehicle. Refer to Lifting and Jacking the
Vehicle
Remove the wheel bearing and hub assembly. Refer to Front Wheel Bearing
and Hub Repl ...
Other materials:
Installation Procedure
Clean and prepare the attaching surfaces for welding.
Apply structural adhesive to the attaching surfaces.
Position the body rear end panel on the vehicle.
Verify the fit of the body rear end panel.
Clamp the body rear end panel into position.
Spot weld accordingly as no ...
Removal Procedure
Disable the SIR System. Refer to SIR Disabling and Enabling.
Disconnect the negative battery cable. Refer to Battery Negative Cable
Disconnection and Connection.
Remove all related panels and components.
Visually inspect the damage. Repair as much of the damage as possible.
Remove the ...
Replacing Safety Belt System Parts after a Crash
WARNING
A crash can damage the safety belt system in the vehicle.
A damaged safety belt system may not properly protect the person using it, resulting
in serious injury or even death in a crash. To help make sure the safety belt systems
are working properly after a crash, have them inspected a ...
