
Chevrolet Cruze Repair Manual: Rear Side Door Window Regulator Motor Replacement
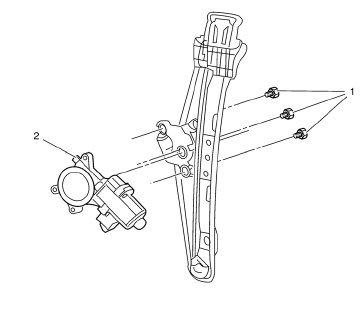
Preliminary Procedure
Remove the rear side door window regulator. Refer to Rear Side Door Window Regulator Replacement.
- Rear Side Door Window Regulator Motor Screw (Qty: 3)
Caution: Refer to Fastener Caution in the Preface section.
Tighten 9 N·m (80 lb in)
- Rear Side Door Window Regulator Motor Assembly
Rear Side Door Window Regulator Handle Replacement
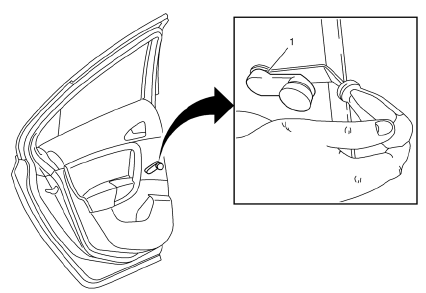
- Rear Side Door Crank Clamp
Procedure
Use a BO-317-B remover aid in the removal of the rear side door crank.
Special Tools
BO-317-B Remover
For equivalent regional tools, refer to Special Tools.
Front Side Door Window Outer Sealing Strip Replacement
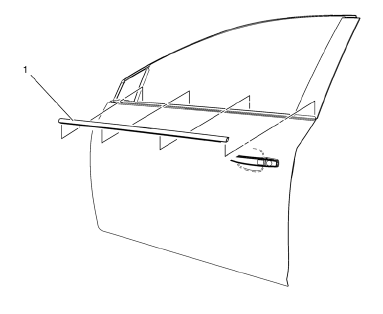
- Front Side Door Window Outer Sealing Strip Assembly
 Front Side Door Window Regulator Motor Replacement
Preliminary Procedure
Remove the front side door window regulator. Refer to Front Side Door Window
Regulator Replacement.
Front Side Door Window Regulator Motor Screw (Qty: 3)
Caution: R ...
 Rear Side Door Window Outer Sealing Strip Replacement
Rear Side Door Window Outer Sealing Strip Assembly
...
Other materials:
Instrument Panel Compartment Replacement
Preliminary Procedure
Remove the instrument panel outer trim cover - right side. Refer to
Instrument Panel Outer Trim Cover Replacement - Right Side.
Instrument Panel Compartment Screw (Qty: 5)
Caution: Refer to Fastener Caution in the Preface section.
Tighten
2.5 N·m (22 lb in)
...
Stabilizer Shaft Replacement
Special Tools
CH 904 Underframe
CH 49289 Centering Adapter
EN 45059 Torque Angle Sensor Kit
For equivalent regional tools, refer to Special Tools.
Removal Procedure
Turn the front wheels to the straight forward position and secure the
steering wheel from moving.
...
Exterior Care
Washing the Vehicle
To preserve the vehicle's finish, wash it often and out of direct sunlight.
Notice: Do not use petroleum-based, acidic, or abrasive cleaning agents
as they can damage the vehicle's paint, metal, or plastic parts.
If damage occurs, it would not be covered by the vehic ...
